21.5.18

Pretty tissue Peonies


Peonies are a real head-turner at this time of year, with their showy blooms in all kinds of colours. I saw the most beautiful tree peony the other day with enormous pink flowers, which sort of got me thinking about this project. And of course peonies were centre stage at the royal wedding.

The great thing is, because of their naturally ruffled, billowy shape, they're really easy to make.

You will need:
Sheet of yellow tissue paper
3 sheets of coloured tissue paper for the flower
Scissors
Craft glue
Elastic band
Pipe cleaner (optional)

1. For the petals, we used a white sheet of tissue paper and two pink sheets.
Fold one sheet a few times, so you have a few layers and cut a square, about 16cm by 16cm (or bigger if you want).
The shape of our sheet meant it was easy to fold into a square shape that was roughly the size we wanted, so all we had to do was just cut along the creases.
Repeat with the other two coloured sheets, so you end up with lots of tissue squares.


2. Take one square and fold it in half, then fold it again, into a smaller square. With the pointy end (that's the middle of the square) nearest you, fold into a triangle and cut the other wider end into a curved shape, so it looks a bit like an ice-cream!
I've drawn it on so you can see more clearly. This might be a good thing to do for younger makers too. It doesn't matter if the shape you cut varies from piece to piece - having different petal shapes will add to the overall effect.


3. Then, the fun bit - opening it up to see the petals. Repeat until you have two of each colour -  6 altogether per flower.


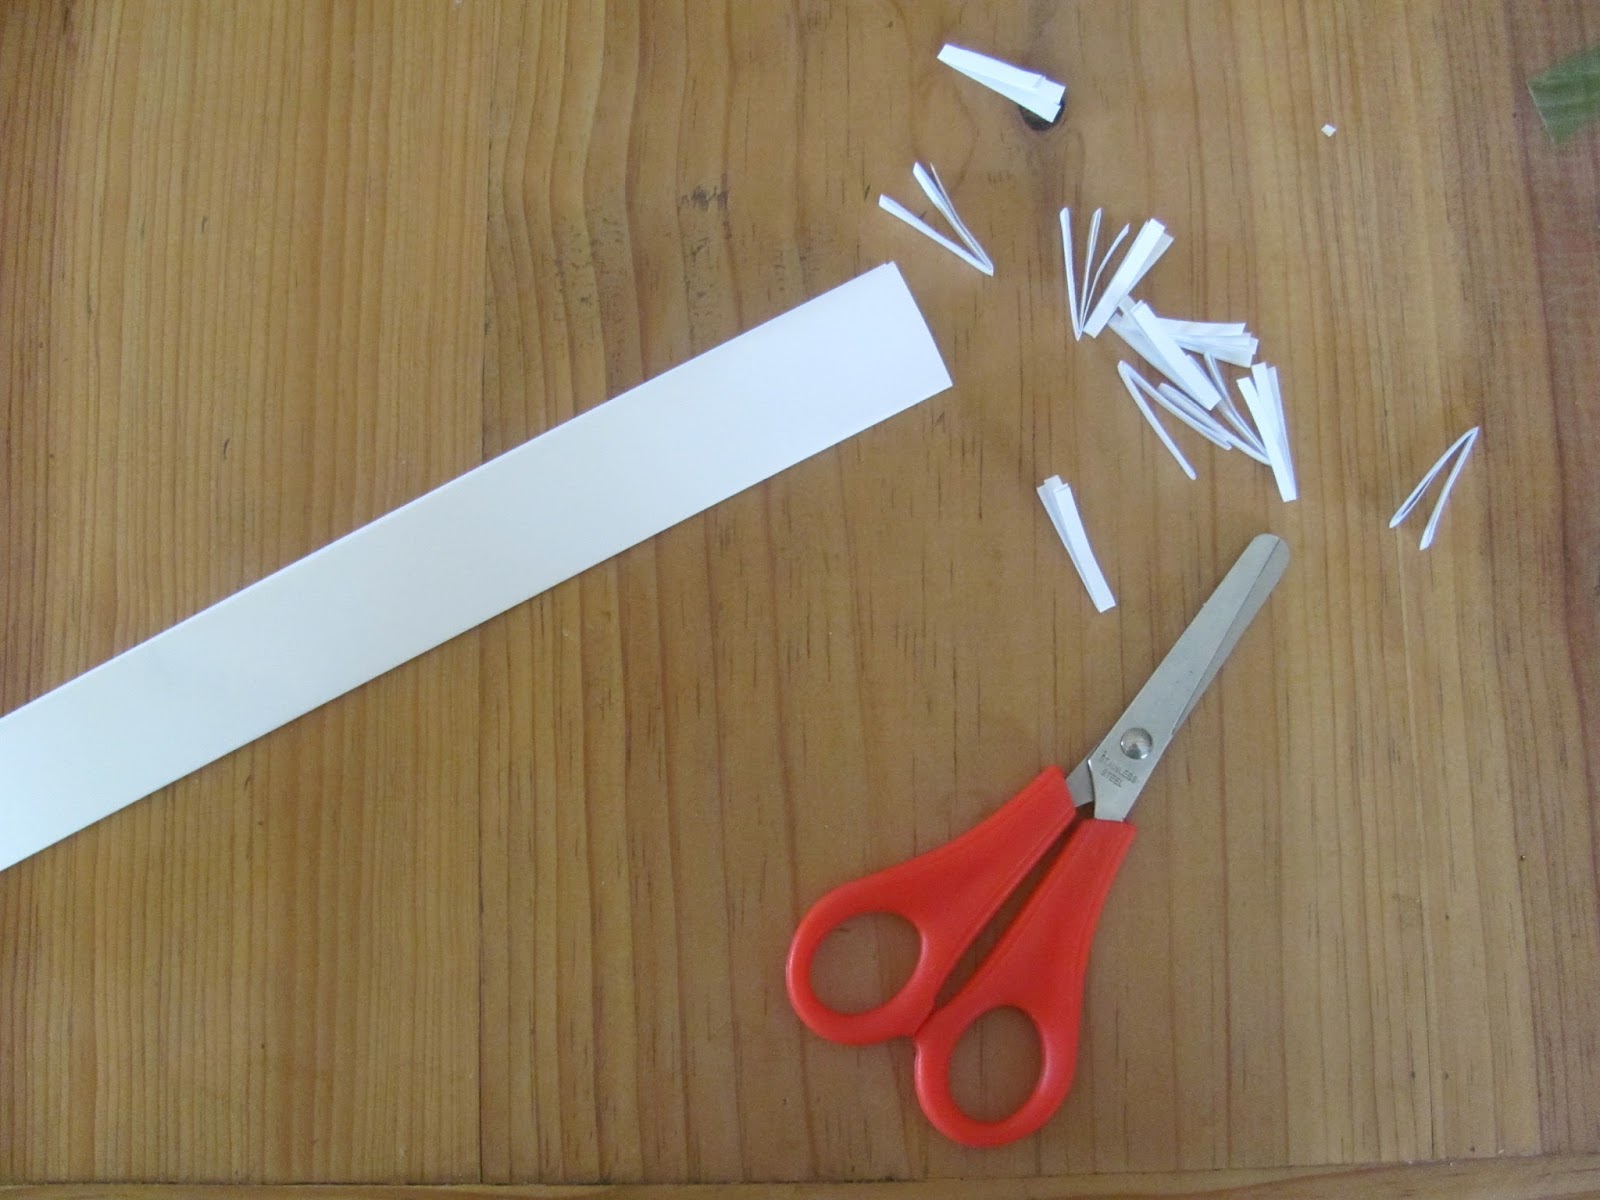
4. For the centre of the flower, fold the yellow tissue paper sheet over a few times and cut about a 6cm strip.


5. Hold the folded tissue firmly, and cut a fringe along an open side - cut about halfway down.


6. Roll the strip tightly at the bottom, and put a small blob of glue at the end. Finish rolling, and squeeze where the glue is, so it sticks the tissue paper layers together.


7. Brush some more glue all around the bottom part of your yellow centre, then put the gluey end in the middle of one of the petal pieces and simply gather up, and press around the yellow centre. Give it a good squeeze at the bottom.


You can either keep brushing glue around the bottom before each petal piece (can get quite sticky), or just keep gathering the petals around the centre without glue, keep a firm grip on the bottom, and then, with adult help, wrap a small elastic band around a few times, to hold the petals in place.

Give your finished flower a bit of a scrunch, before fluffing it out a bit with your fingers.


You could also wrap the end of a pipe cleaner around the bottom of the flower a few times, to secure it, so it's easier to display in a vase, or attach as a decoration.


15.5.18

DIY Dandelions and Daisies


Everything in the garden looks good in May I think, even the weeds have a kind of charm, and I have a soft spot for these bursts of yellow and white that pepper the grass.

Know it's not everyone's favourite, but I love a sunny yellow flower.

These paper daisies and dandelions are easy to make and can be used in lots of different ways - to stick on cards or pictures, or as decorations.

You will need:

Plain white paper
Yellow paper (optional)
Scissors
Glue stick
Craft glue
Yellow tissue paper

1. For the little daisies, fold an A4 sheet of plain paper in half, lengthways, then fold it again lengthways two more times.


2. Cut thin strips by cutting across the folded paper, then unfurl your strips and snip into pieces by cutting on the creases.


3. Rub glue stick in the middle of a petal piece and stick another one at right-angles to it, to make a cross. Rub more glue in the middle and attach another two petal strands, to fill the gaps.


We found the best way was to assemble a daisy on a finger tip! The first rub of glue seemed to fix the petal strip steady on the tip, making it easier to add the other pieces, but use whatever method you find best.

4. Use a hole punch to punch out small yellow circles - if you don't have yellow paper, colour in some plain paper.


5. Rub glue in the centre again, wet your finger to help pick up the little yellow circle, and glue it down.

6. For the dandelions, fold a sheet of tissue paper a few times so it's easier to cut across. Cut a few 4/5cm strips.


7. Cut a fringe along an open end of one of the pieces (keep the cuts close together). Make the cuts about 2cm long (no more than halfway down your strip)


8. Open up the strip and dab some glue along it at intervals, just under the fringe, then fold the strip in half.

Best not to use a glue stick like we did... because the tissue paper is easy to rip - better to use a small amount of glue on a brush.


9. Dab more glue along the length of this shorter strip, again just under the fringe, and tightly roll your strip. It can be fiddly to start off, but once you get going you can hopefully roll it between your finger and thumb, and remember to press tightly just under the fringe where the glue is. Brush some glue on the end of the strip and tightly roll the last bit.


10. Puff out the dandelion with your fingers, trim the centre if you want, to make it flatter. We cut the stalk bit off so we could stick them on a picture.


17.4.18

Paper plate hen


paper plate hen

This hen was inspired by a paper plate challenge on Instagram and it's really simple to do. You could paint yours any colour you want, but we went for speckled, which is so quick!

28.3.18

Brian the Lion


What can I say about Brian? He was the first cardboard tube animal I made with my daughter, and I've always had a soft spot for him.  He really kicked off the whole Zoo and Farm craft journey, so I couldn't be happier he now has his very own picture book.

'Brian the Lion goes into Space' is a colourful, wacky space adventure, with some fun twists and turns along the way.. There are lots of little beardy blue gnomes, rainbow food, oh, and a friendly dragon called Norris.. 


Brian the Lion goes into Space
The gnomes want to read Brian's new book!

The book combines storytelling and craft, as Brian's world is made out of cardboard (of course).. 
All the picture scenes in the book are created from ordinary packaging like egg cartons, tubes and cereal boxes. Plenty of familiar things for kids to spot, and hopefully it'll inspire some making too! The book is available on Amazon.

I have shared a Brian project before, quite a long time ago now.. so, in honour of his first book, I've updated it here.

You will need:
Toilet paper tube (or kitchen paper roll)
Cereal box card
A cup/beaker and egg cup/spice jar or similar, to draw around
Craft glue
Scissors
Ruler
Pencil
Yellow and Brown paint (mix a little red with yellow and a dab of blue)
Black felt-tip or gel pen
Paper clips

1. Paint the tube and some cereal box card yellow (enough for the face, tail and paws) and paint another piece of card brown (enough for the mane). 

Painting first can speed up the making (if your mini maker doesn't mind a short wait at the start..), but in MYOZ we got stuck in straight away, cutting and gluing the body first, and then painting, which is fine too!


2. When the paint is dry, cut the tube so it's about 8cm high. An easy way to do this is to use a ruler to  mark 8cm on the side, then squeeze the tube flat, near the mark, and cut across, cutting through the mark (younger ones might need some help cutting through the double card).


3. Squeeze the top part of your tube together again, and give Brian some shoulders by snipping little triangles off the sides. Don't take too much off.


4. Brush some glue all along the inside edges of the end you've just cut. Don't overload with glue or it will ooze out everywhere when you squeeze the glued sides together.


Use two paper clips to keep the sides together while the glue dries.


5. Time to make Brian's head. On the brown card, use a pencil to draw around a big circle, like the top of a cup or beaker - and draw around a small circle, like an egg cup or spice jar on the yellow card. Carefully cut these out. (slowly turn the card circle towards you as you cut, rather than moving or turning the scissors.)


6. Place the smaller yellow circle in the middle of the brown one, and when you're happy, lightly draw around it and put aside.


(*see tip below for younger makers) 

7. For his mane, the best and easiest way to keep it even, is to cut up to the pencil line and then make a cut opposite the one you've just made.
Halfway between them, make another cut on both sides. 


Keep cutting halfway between all your cuts until you feel his mane is full enough. (Don't worry if you cut over the pencil line, this will be covered up by the face in a moment)


8. Draw on Brian's face with a black pen. Brush a thin layer of glue on the back of the face and place it in the pencil circle on the mane. Make sure you don't use too much glue or it will squidge out the sides!


9. From the spare yellow card, cut a thin strip for a tail and cut out two paws. (You could make a paw template first, then draw around it to keep your paws the same size). 

We cut out a little brown piece to glue onto the end of the tail too, but leave it plain if you want, or colour in the end with a pen. Add some claws to the paws.

10. Glue the paws on, again, just use a little glue, and make sure they don't hang over the edge of the tube. Dab some glue on the plain end of the tail strip (painted side) and stick it at the back, inside the tube (you can bend it into place when the glue has dried).

Finally, remove the paper clips and glue on the head.


Leave Brian lying on his back while the glue dries. 


 When Brian's ready, bend the tail back, into place, and fluff up his mighty mane!


* TIP: For younger makers, leave out the mane cutting and draw on paws instead of cutting them out.

There's also a tutorial to make the little blue gnomes Brian meets on his adventure in space. Using corks and cotton wool! Full step-by-step instructions here.


21.3.18

Bunny and Chick Easter egg holders


These make great table decorations for a Easter day spread. You could even write the children's (and adults..) names on them, before filling with treats like mini eggs.

You will need:
Toilet paper tube (or two)
Scissors
Pencil
Ruler
Paint
Glue
Glue stick
Black pen (gel or felt-tip)
Green paper (optional)
Coloured tissue paper
Feathers (optional)

1. Flatten the cardboard tube with your hand - press down along the sides, so you can see the creases.


2. Squeeze the tube back into shape, then line up the two creases you've just made, in the middle, and flatten again, pressing down on the sides.


3. While the tube is flat, use a ruler and pencil to draw a line across the tube, about 2cm from the bottom.


4. Use the scissors to cut down the (longer) two side creases to the pencil line.


5. Squeeze the tube back into shape, then line up the cuts you've just made in the middle, and press the tube flat again.


6. With a pencil, draw half an 'n' shape on the fold, so it goes about halfway up the tube. Leave a space between the pencil shape and the side cuts.


7. Cut around the shape to the pencil line (*mini makers might need help cutting through the double card). Snip through the crease at the top, above the shape (see pic below), so you can bend each side piece down, and fold on the line. Now they're easier to snip off.


When you squeeze the tube back into shape you will have the body for your chick or bunny.

8. For the head, draw around something like a coin or a bottle top on spare card and cut out (if there isn't enough card left, cut open another toilet paper tube and use that.)


9. (Bunny only) Fold some spare card and draw a rabbit ear on top. Cut through the double card * to get two identical ears. For an easier option, use paper instead.


10. Now you have all your pieces, it's painting time. Paint behind the body first - use a nice, bright colour. Then paint the body and the other pieces. Paint a small piece of spare card (or paper) orange, for the chick's beak.


You could paint the foreground, below your chick or bunny green, or make paper grass (in step 12) 

We also cut long zig-zags into the back of the tube, to make it look like the rabbit's hiding in some grass.

11. Use a black pen to draw on the faces. For the chick, cut out a small triangle from the piece of painted orange card (or use paper), and use a small amount of glue to stick it under the eyes. Glue the bunny ears behind the head.


12. If you would like to make some grass for the front of your egg holder, cut out a strip of green paper (or colour in some plain paper). It needs to wrap round half your tube and be about a cm or so higher that the pencil line at the front.

14. Cut zig-zags along the strip - keep them short and make them uneven.


15. Glue the grass below your chick or bunny, lining it up with the bottom of the tube - a glue stick is good for this, just rub a layer of glue on the back of the grass.

16. For the flowers, scrunch up small squares of coloured tissue paper, dot some glue on the grass, where you want them to go, and stick in place.


17. Glue the chick's head on and if you have two feathers, glue them either side. If you don't have feathers, you could cut some wings out of paper and colour in.

For the bunny, glue the head onto the body.


You could use a paper clip to keep things in place while the glue dries, or prop them on their sides.

And why not customise your egg holder with some blingy sequins before adding Easter treats.

(They're a perfect size for a creme egg.. )


Linking up with #bloggerclubuk