17.1.17

Cork bunny with a heart - Valentine's crafts for kids


Another cork craft idea inspired by my sizeable Christmas cork collection... from something fizzy this time! The shape at the top is perfect for a head, so we thought rabbit - and it would make a sweet present for Valentine's day, especially with a little message written on the heart.

You'll need:
A Champagne/cava cork
White paint (acrylic is best)
Pencil
Red, pink and plain paper
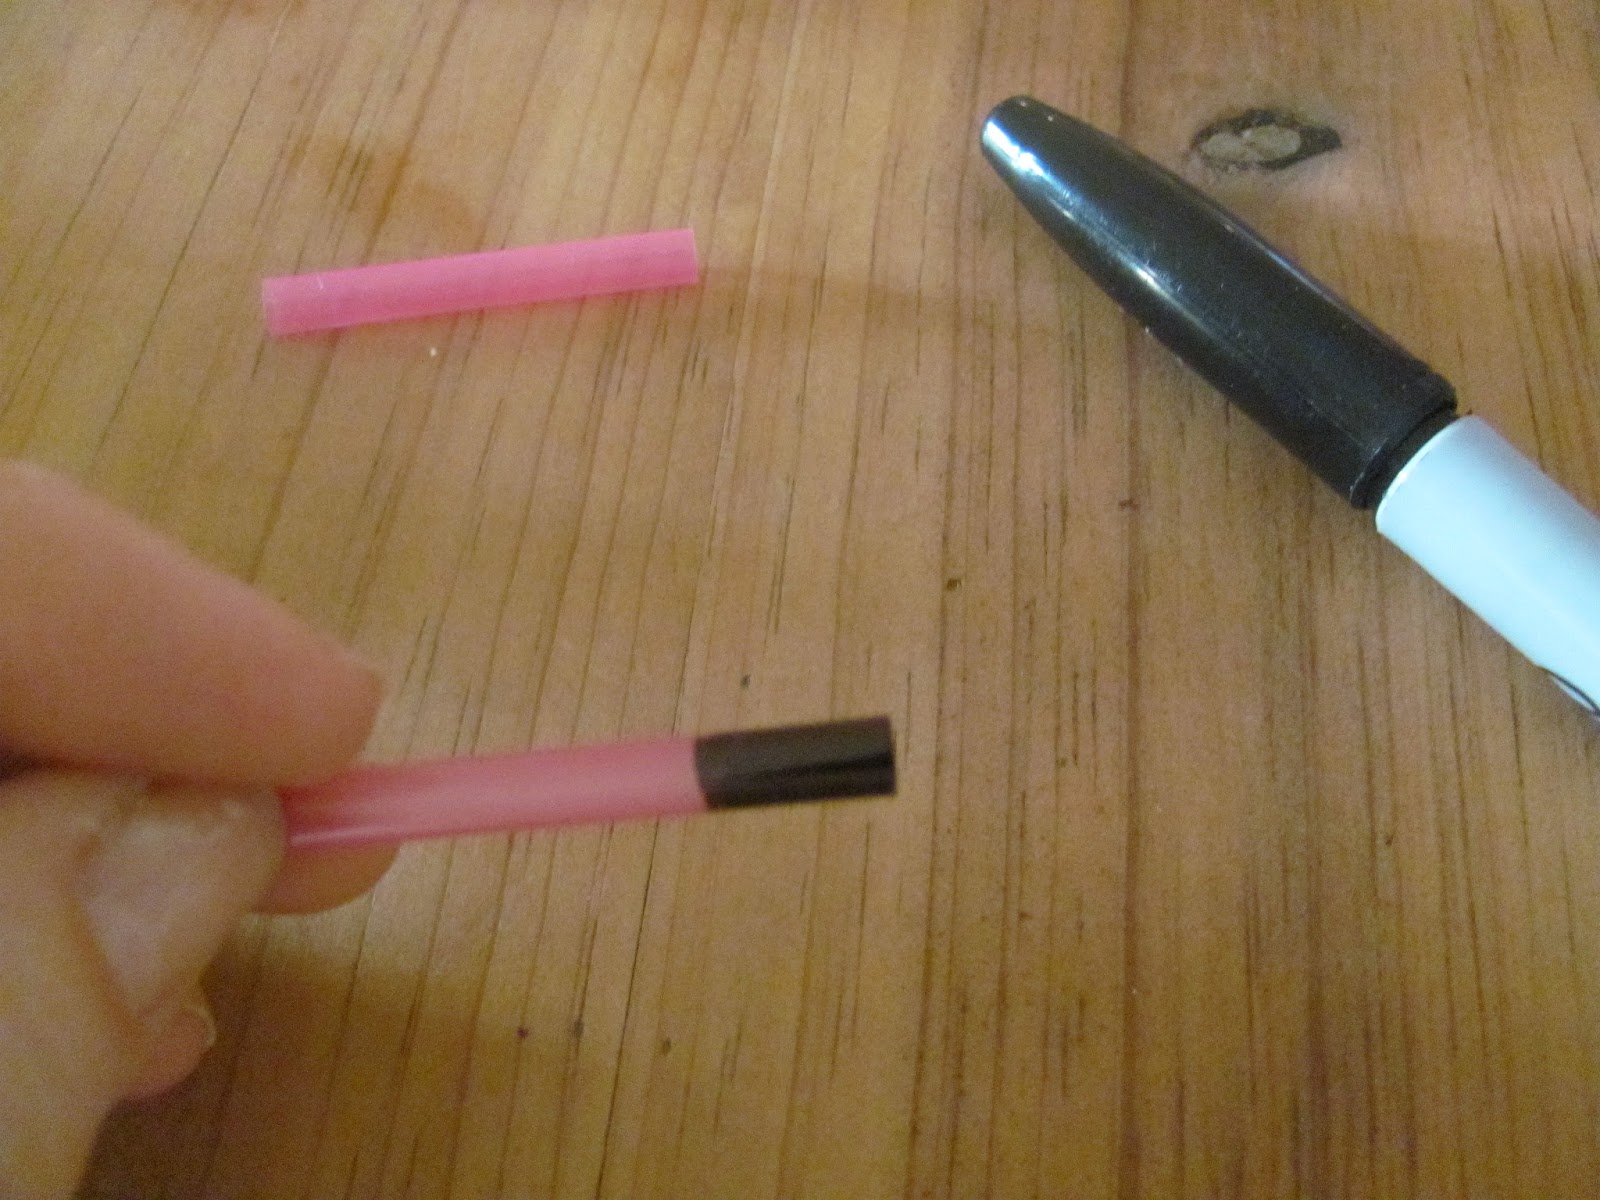
Black felt-tip or gel pen
Pink felt tip pen (optional)
PVA/craft glue or a glue stick
Old Christmas/Birthday card (optional)

1. Paint the cork white, you may need a few coats - acrylic paint is best when you're using white. While it's drying, fold a small piece of plain paper in half and draw half a long rabbit's ear on the fold. Make it about 6cm (21/2in long) and cut it out.


2. Before opening your ear up, place it on another folded piece of paper, lining up the folds and draw around it carefully. Cut out the second ear and open them both up - this is the quick way, and should keep the ears roughly the same size.

If you prefer, after cutting out one ear, open up and stick to some spare cereal box card, and when dry, cut out the ear to make an easy template to draw around. Keep the template for extra bunnies!
Use whatever method you prefer.


3. For the pink ear middle the quick, easy option is to use a pink felt-tip pen. Draw an outline inside the white ear first, and then colour it in.
We decided to use some pink paper. Fold it as in step 1, and draw a shorter (about 5cm/2in) and narrower ear shape that will fit inside the white one. Copy this, by following step 2, then rub glue stick or brush a thin layer of craft glue on the back of the pink pieces and glue them in the middle of the white ears.


4. Brush some glue on the bottom cm or so of the ears and fold them in half lengthways, pinching the glued bottom part so the sides stick together - then glue this bottom bit to the sides of your bunny's head. If they're slipping or popping off - lie on its side with a book leaning on the top ear.


5. While that's drying. cut out a strip for the arms - make it about 1cm wide (1/2in) and 8cm long (2in), though it might need to be longer if you have a big cork.


6. Cut a strip for the arms - make it about 1cm wide (1/2in) and 8cm long (3in), though it might need to be longer if you have a big cork. Round off the ends for the paws. You could fold the strip in half and round off the unfolded end so when you open it out, the paws look the same.

7. Brush or rub some glue either side of a middle fold, leaving the arm ends glue-free. Stick the middle gluey part of the strip to the back of your bunny, in the groove just below the head.


8. Use a fine black felt-tip or gel pen to draw on a face - then, while pressing the ears where the attach to the head, use your free hand to press open the top part of the ear, so you can see the pink middles clearly and the ears look fuller.


9. Lightly fold another small piece of coloured paper in half and draw half a heart on the fold - make it roughly the same height as the bottom section of the cork, below the head. Try not to press too hard on the fold so there isn't a heavy crease line on the heart. Cut out and open up your heart shape. This is the time to add a Valentine's message if you want.


10. Dab some glue or rub glue stick on the paw ends on the inside, and attach one paw to one side of the heart (make sure the pointy part of the heart is roughly level with the base of the cork). Fold the paw around the edge of the heart, pinching together. Repeat on the other side, keeping as even as you can.


TIP: You could stick the paper heart to some spare cereal box card and when dry cut out to make a heart template. Use this to draw around on some old Christmas or Birthday cards to make a more patterned, colourful heart for your bunny to hold. 

11.1.17

Cork lovebirds - Valentine's crafts for kids


I'm not the biggest fan of Valentine's day, but I am partial to a good hearty craft, and unlike most Valentine's stuff, this one won't cost you! 
These little lovebirds are made from corks (saved up over Christmas.. I have many.. ) They are quick and easy to do and can be turned into a useful gift, like a keyring or a fridge magnet. Love a useful craft! You could also write a little Valentine's message on the heart if you want to.

You'll need:
A cork
Coloured paper
Paint
Hole punch
Glue stick
Craft glue
Fine black felt tip or gel pen
Feather (optional)
Mini eye pin (optional)
Keyring (optional)
Small magnet (optional)
Strong all-purpose glue (optional) 

1. Paint the cork any colour you want. 


2. Fold a small piece of coloured paper in half and draw half a heart on the fold. You want it to be roughly half to two thirds the length of the cork - and make it narrow. If it looks too big, fold the heart again and trim until you're happy with the size.


 3. Carefully cut around the shape and open it up.


4. Rub some glue stick on the back of the heart and glue it to the cork with the point almost touching the bottom edge. Cut a strip of different coloured paper for the wings - make the shorter side about the same height as the heart. If you're making a penguin, leave out the wing strip.


5. Line the edge of the strip up with one side of the heart and the base of your bird, and wrap the rest around the cork - cut away any extra paper where it touches the other side of the heart.


6. Rub glue stick on the top half of the strip only and glue in place, so the bottom of the wings stick out slightly.


7. For the eyes, use a hole-punch to punch out some circles - rub a little glue stick where you want the eyes to go on the cork, wet your finger to help pick up the little circles and stick them in place.


 8. Use a fine black pen to add the centres.


9. For the beak, cut out a small triangle from yellow or orange paper (or colour in some plain paper), rub glue stick just below the eyes, wet your finger to help pick up the triangle, and glue in place.


10. Paint feet on the bottom edge with yellow paint and leave to dry.


11. To add a feathery head plume, make a hole on top by screwing in a small screw, nearer to the front of your bird. Take the screw out.


12. Choose a feather, dab a little glue on the pointy tip and push it into the hole.


13. To make your lovebird into a keyring, screw a mini eye pin (seen in step 11) into the top of your cork and attach a keyring. Or, for a fridge magnet, glue a small magnet to the back of your bird. Use strong all-purpose glue like UHU.


I got these little magnets on Ebay - they're a great size, weren't expensive and are seriously strong. Nothing worse than a fridge magnet that doesn't hold stuff!


Linking up with Trash2Treasure 

5.1.17

Easy Darth Vader figure - Star Wars craft

Darth Vader kids craft
Come over to the dark side....

Darth Vader is back...
And if you have any young Star Wars fans in your life, then you might want to have a go at making this easy little mini figure.

You'll need:
Egg carton
Craft scissors
Pencil
Ruler
Black paint
Silver metallic pen (fine/medium nib)
PVA/craft glue
Red/pink straw
Black permanent marker (like a sharpie)
Nail scissors (optional) Adult supervision needed

1. Roughly cut out two middle cones from an egg carton so they're easier to work with.


2. On one of them, draw a line all the way around the cone, just above the bumpy card joins at the bottom. Cut along the line and check the cone sits flat and even. This will be the body.


3. For the head, take the second cone, and use a ruler and pencil to measure and mark about 2cm (3/4in.)  from the top on each side. Join the marks with a rough line. Cut out the head - a good way to do this is to cut up two adjacent corners to the line, bend back the card flap and cut it off. It's now easier to cut along the rest of the line.


4. Glue the head onto the body. Cut a strip of card from the egg carton lid for the arms - make it roughly 0.5cm wide(1/4in.) and about 5cm long (2in.)


5. Paint the body and the arm piece black.

TIP: Put the body on a spare egg carton cone while you paint it - much easier and less messy!


6. While that's drying, cut about 4cm (11/2in.) off the end of a straw and use the black marker pen to colour in the handle of the lightsaber.


7. Use the silver marker to add detail to Darth Vader's head and body, using the picture here as a guide.


8. Bend the card strip in half and cut along the crease, then either stick the arms on each side of the body with glue, just below the head - or, make slots either side, just below the head, using the nail scissors (keep them closed, press down and twist - once you've made a hole, cut slots to fit the arms)


9. Make small slits up the handle end of the lighsaber, so you can slot it onto the bottom of Darth Vader's arm, and he's ready for action!


10.12.16

Christmas tree decorations - Christmas crafts


Christmas tree decorations this time, and they're not that different from the sparkly birds.

You'll need:
egg box/carton
pencil
paint
plastic bottle top
sheet of newspaper
fine paintbrush
craft glue
strong all-purpose glue
glitter (optional!)
Sequins and other shiny bits
needle and thread
Nail scissors (to make holes - adult supervision needed)

1. Roughly cut a whole cone from the egg carton


2. Draw a rough pencil line all the way around the cone, just above the bumpy card join at the bottom, and cut along the line. Neaten up the edges so the sides are even and the cone sits flat.


3. Paint the cone green (if it's green already you could leave it). When the paint's dry, use the nail scissors to pierce a hole through the top (if there isn't one there already) - keep the scissors closed, press down and twist from side to side.


4. Thread a needle with a good length of thread - we used gold thread, but use whatever you have - and push the needle up through the cone and through the hole, then back down through the hole, leaving a loop for hanging your tree. Use sticky tape to stick down the two strands of thread inside the tube. Trim the ends of the thread.

5. Brush glue inside the cone and push in a scrunched up piece of newspaper. Don't fill it completely - leave a small space at the top.


6 Put a layer of strong all-purpose glue (like UHU or Bostik) on the newspaper and put some on the rim of your bottle top too. Stick the bottle top onto the newspaper and leave to dry upright.


7. When the glue's dry, brush some craft glue in a spiral, around your tree for the tinsel, then sprinkle over some glitter. Shake off the excess. A good way to save glitter is to do the sprinkling over a paper plate, then bend the plate in the middle to catch the glitter in the fold, and funnel most of it back into a container.


8. Have fun gluing on sequins or any shiny bits you have. You could also scrunch up small balls of coloured tissue paper to make baubles.


9. For the star on top, we used two identical stars from a pack of Christmas confetti, brushed glue on the back of one and stuck it onto the thread, just above the top of the tree. Then we stuck the other star to it, sandwiching the thread between them. Fiddly to get the stars to line up, but looks good when they do.

Next time Christmas fairies!