 |
| Come over to the dark side.... |
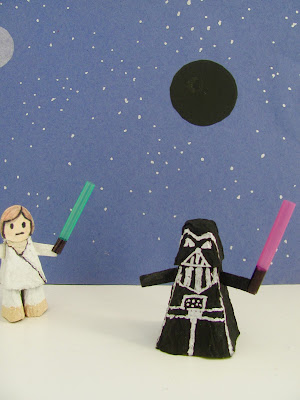
Darth Vader is back...
And if you have any young Star Wars fans in your life, then you might want to have a go at making this easy little mini figure.
You'll need:
Egg carton
Craft scissors
Pencil
Ruler
Black paint
Silver metallic pen (fine/medium nib)
PVA/craft glue
Red/pink straw
Black permanent marker (like a sharpie)
Nail scissors (optional) Adult supervision needed
1. Roughly cut out two middle cones from an egg carton so they're easier to work with.
2. On one of them, draw a line all the way around the cone, just above the bumpy card joins at the bottom. Cut along the line and check the cone sits flat and even. This will be the body.
3. For the head, take the second cone, and use a ruler and pencil to measure and mark about 2cm (3/4in.) from the top on each side. Join the marks with a rough line. Cut out the head - a good way to do this is to cut up two adjacent corners to the line, bend back the card flap and cut it off. It's now easier to cut along the rest of the line.
4. Glue the head onto the body. Cut a strip of card from the egg carton lid for the arms - make it roughly 0.5cm wide(1/4in.) and about 5cm long (2in.)
5. Paint the body and the arm piece black.
TIP: Put the body on a spare egg carton cone while you paint it - much easier and less messy!
6. While that's drying, cut about 4cm (11/2in.) off the end of a straw and use the black marker pen to colour in the handle of the lightsaber.
7. Use the silver marker to add detail to Darth Vader's head and body, using the picture here as a guide.
8. Bend the card strip in half and cut along the crease, then either stick the arms on each side of the body with glue, just below the head - or, make slots either side, just below the head, using the nail scissors (keep them closed, press down and twist - once you've made a hole, cut slots to fit the arms)
9. Make small slits up the handle end of the lighsaber, so you can slot it onto the bottom of Darth Vader's arm, and he's ready for action!


