Showing posts with label kids crafts. Show all posts

26.3.20

Egg carton turtle and babies - #stayathomecrafts


 Another craft that uses the whole egg carton, and makes a perfect home for the little turtle babies!

You will need:
2 egg cartons
Cereal box card
Craft glue
Paint
Black pen
Nail scissors (optional, to be used by an adult)

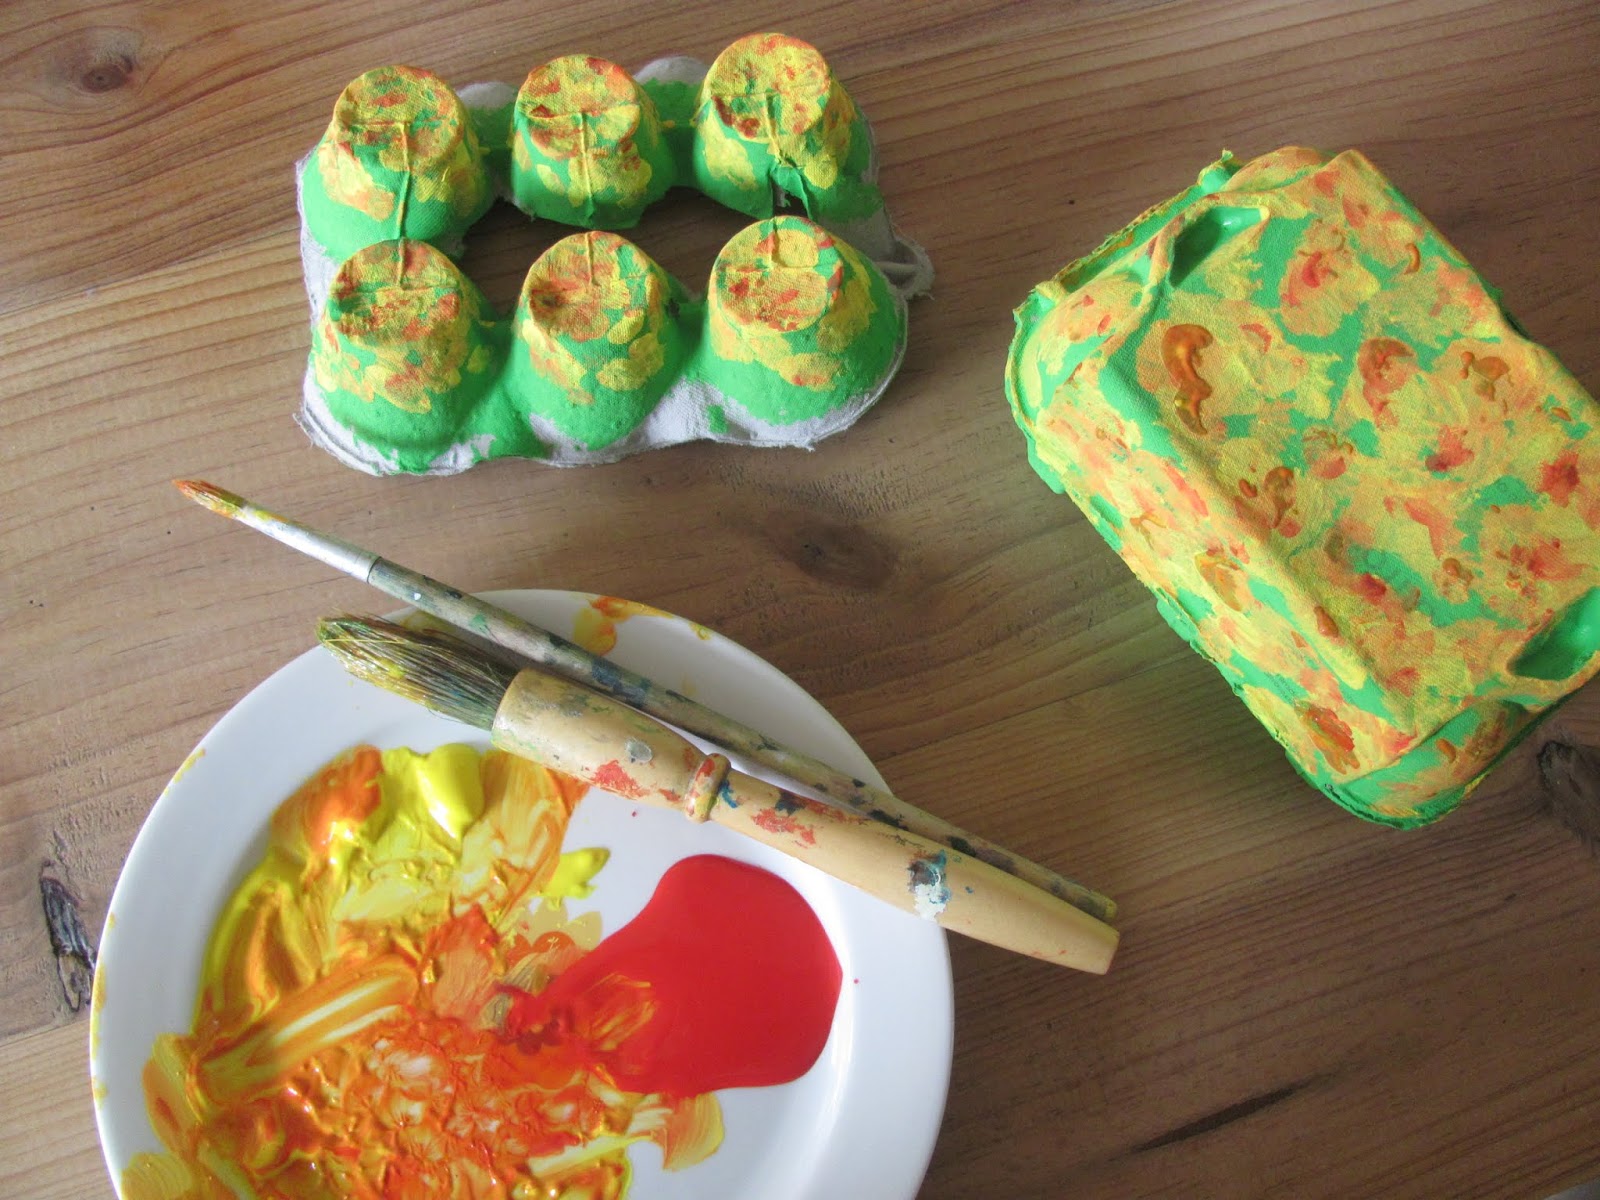
1. With green paint and a big brush, paint the outside of an egg carton, the cereal box card and the bottom of the egg cups from the second carton.


2. Squirt some red and some yellow paint on a plate or palette, and mix them in the middle to make orange, then have fun splodging on yellow and orange on your turtle and baby turtle's shells, and dab on a little red with finger tips. Messy and fun!
We got a bit carried away, so added a few more blobs of green on top, to break up the bright colours.


3. For the big turtle's head, cut a strip from the green card, about 4cm wide. Cut it so it's about 6cm long and round off one end.

4. For the back legs, cut a strip about 3cm wide, cut two pieces from either end of the strip, about 5cm long. and round off one end of each.

5. For the front flippers, use a decent sized cup or glass and draw around the rim. Cut out the circle and and cut the circle in half.


6. Cut away the middle part of the semi circle - use a pencil to draw this first, if it helps.


7.  Then round off one end of each flipper, but make sure you round OPPOSITE ends, so the flippers can go either side of the turtle's head.


8.  Glue the legs inside the carton at one end, on or near the corners.


9.  Use a black pen to draw the face on the head part, and either glue this in the middle of the other end and glue the flippers on top of it, or flippers first and head on top. Whatever's easier.

If the flipper doesn't go far enough down the side that's attached to the lid, cut the connecting card a little and slot the flipper in.


10. The baby turtles or turtlettes, are made in a very similar way. Cut out as many egg carton cups as you want. For a quick finish, cut a strip for the head, snip into 2cm lengths and round one end. Draw on a face. Either glue the end of the head piece inside the 'shell'. When dry fold into place, OR, make a hole in the side of the carton cup, about half way up (to be done by a adult - keep nail scissors closed, press down and twist from side to side. It helps if you put a piece of modelling clay behind where you're making the hole, so there's something to press into)

Once you've pierced through, make a slot for the head and push it into place.

These babies will look sweet as they are, but if you would like to add legs, cut a thin strip for the back legs, cut off small pieces, about 2cm long and round ends.

For the flippers, draw around something small, like a  thread spool or small spice jar - cut out the circle, and cut the circle in half. Cut away the middle of each semi circle and round one end of each, making sure they're opposite ends, and glue the ends under the turtle's shell. When dry, fold out.


When the babies get tired of swimming, they can always have a little rest under Mum's shell..


20.6.19

Paper plate mermaid


Magical mermaids! Always thought the bumpy rim on a paper plate would make a good scaly tail, so that's how this project started..
We used small pieces of sponge to paint her too, which was super quick, great fun and added a bit more texture.

You will need:
Two paper plates (ours were 15cm)
Scissors
Pencil
Craft glue or a glue stick
Paint
Old sponge
Black felt tip or gel pen

1. Draw a pencil line in one of the grooves on the plate rim and roughly mark the middle point of the plate. Count about 10 bumps along and draw another line in the groove. Join the top of these two lines to the dot in the middle of the plate, but curve the lines out a bit, so they're not completely straight (this top part is going to be your mermaid's body)


2. Cut this piece out and then cut the rim away from the centre of the plate. 

Cut five pieces from the rim that are about the same size as the rim on the body piece (10 bumps). 

Glue FOUR of these pieces to the body (leave one for the end of the tail). Glue them underneath, with the bumps showing. Just concentrate on lining up the top edge, and making a nice curve here for the tail. 
Don't worry about the sticky out bits at the bottom! We'll sort those out when the glue dries.


3. While the glue dries, make the head by drawing around the bottom of something like a small spice jar on a spare piece of paper plate centre. Cut it out, and if you want, trim two sides to make a more oval shape (optional).


4. For the mermaid's hair, cut out the middle of the second paper plate - we trimmed it all round, cutting more away on two sides, to make it oval shaped (again, this is optional) Ours ended up about 12cm long and 10cm wide.


5. Cut about a third off the head and place it on the hair, so she looks like she's got a fringe (bangs). When you're happy with the position, draw a pencil line right along the top of the head.

Then, roughly halfway along this line, fold the hair piece longways. and either cut straight along the folded line for a straight fringe, OR, as we did, start cutting just above the line, aiming for the end of the line, to make a centre parting!
Make sure the head piece fits in the slot, but don't stick it down yet.


6. To make the arms, draw around the top part of the mermaid's body on some spare paper plate middle. Make sure it's just the top of the body, so only go as far as the first ridge (see picture below). Then join the two ends with a gently curved line.


7. Draw a pencil line inside, mirroring the shape, so it's about 1cm wide (it doesn't have to be perfect!)
Cut the piece out and then snip through the pointy end of the shape, and follow the inside line.


8. Time to finish off the tail! cut away the sticky out bits at the bottom (I've drawn a pencil line, so you can see more clearly what I mean). Then draw a pencil line from the bottom of the second piece of plate rim to the end of the tail, tapering and making it thinner as you do, to make a nice curve. Keep it about a 1cm wide at the end.


9. To make an even looking tail end, draw a pencil line roughly in the middle of the remaining piece of plate rim. Cut away the sides at an angle, so it's the right size to fit on the end of the tail. Then cut out the curvy tail end, using the middle line as a guide. Glue in place.


10.  Painting time and we cut small pieces from an old sponge, about 2 to 3cm square. Press them in the paint and get sponging! Use one piece for each different colour.

First we painted the body, head and arms. We mixed lots of white with a little red, dab of yellow and tiny spot of blue.

The hair is a mix of yellow and orange splodges, but do the body and hair whatever colour you prefer.

The tail is green and blue splodges. 

Leave your mermaid pieces to dry.


11. Once dry, assemble your mermaid. Slide the arm piece over the body and angle it to one side. Trim the nearest arm, so it doesn't look too long. Make sure the arm piece is 1cm or so below the pointy top and glue in place. Glue the head to the top of the body, and then the body to the hair, sliding the head into the fringe slot. 


12. Cut small triangles for the bikini from some leftover rim, and glue them on. Use a black pen to draw on her face.


Obviously add glitter if you want to!
And hang on to the leftover rim pieces. I have some other ideas for them...


17.2.19

Oink! the Pig - TP roll crafts for kids


Oink is very similar to Scamp the dog. I love the way they look like they're on the move! 
Made from a single toilet paper roll that's quickly transformed with a few careful cuts and folds, plus a little bit of glue.

You will need:
Toilet paper roll (about 10cm long)
Scissors
Pencil
Ruler
Paint (white and red)
Craft glue
Paper clip or similar
Black felt tip or gel pen

1. Paint a toilet paper roll pink (plenty of white an a little red). Paint the inside too, at both ends, as well as a small piece of spare card (for a snout). 
When the paint is dry, lightly press the cardboard tube flat, but no need to press firmly along the creases. The creases are  mainly for guidance.


2. Line up the two creases you've just made in the middle, and press the tube flat again, but not too hard, so you end up with four evenly spaced, light creases.


3. While the tube's still flat, use a ruler and pencil to mark 2cms in from each end along the middle crease. Then use this mark as a guide to mark the two creases either side. And finally the one on the back.


4. Cut up to the marks, so you'll have four cuts at each end.


5.  For the legs, fold two opposite end flaps down, and cut a thin, long triangle from the middle of the flaps, to define the legs.


6. For the tail end, cut a top flap into three strips. Leave the middle one (for the tail) and bend the other two down.


7.  Fold the side flaps inwards, and glue them together. Use a paper clip or something similar to hold the card in place while the glue dries. Trim the card flaps if you need to, to neaten things up.


8. Roll the card tail between your fingers, from the end, right down to the pig's back, to make it curl.


9.  For the ears, fold the top flap at the other end, so it points up and cut out a triangle, from each corner to the middle of the flap.


10. For the face, fold the two remaining side flaps right back. 


11. Then fold each of these flaps in half and firmly press the creases.

Bend the flaps back towards each other.


12.  Glue the flaps on top of each other and use a paper clip to hold them in place while the glue dries. 


13. When the glue has set, you could draw on a snout and eyes straight away. Or, cut out a round snout from the spare piece of painted pink card, add nostrils and glue in place. Draw eyes either side with the black pen. Shorten the legs and bend the ears forward.


14. And Oink is ready to scamper off!