We called him Scamp because he sort of looks like he’s scampering.. think he’d be one of those dogs that never sat still! Scamp is made from cutting and folding a single toilet paper roll. Just one dab of glue at the end to stick the sides of his head together.
A narrower toilet paper tube is best - the one we used was quite narrow and about 10cm long.
It's probably easier to paint the tube first, though fine to do it after the making too. Make sure you paint inside each end of the tube before leaving to dry.
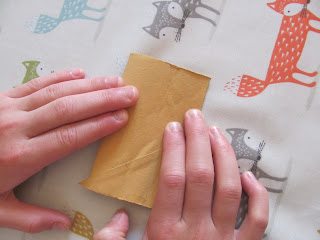
1. Press the tube flat, but concentrate only on one of the creases, pressing along it firmly with your fingers. Leave the other as a light crease.
2. Line up the two creases you've just made and press the tube flat again, and again, concentrate on pressing firmly along one of the creases, leaving the other. You should end up with tube with a flat bottom, like this.
3. On the flat side, measure and mark about 2cm in from each end. Then from each mark, roughly draw around the tube until you get back to the mark. Don’t worry if the line is a bit wobbly, it’s only a guide for cutting.
4. At one end on the flat side, cut along the creases to the pencil line - these will be Scamp’s back legs. Halfway between these cuts, snip out a long, thin triangle, up to the line.
Repeat at the other end for the front legs, but this time snip a little bit over the pencil line, so the front legs are slightly longer.
5. At this front end, on the top of the tube, cut along the light creases to the pencil line. Fold the middle flap back and cut a ‘V’ from each corner to the middle of the line, for Scamp’s ears.
6. At the other end of the top part of the tube, inbetween the light creases, make two cuts up to the pencil line, quite close together, for the tail. (You could use the position of the ears to help position the tail). Cut away two long thin triangles either side of the tail (see below).
7. Press the two flaps either side of the tail into the body.
8. At the head end, glue the end of the two flaps together and use a paper clip or clothes peg to hold it in place.
9. Once dry, trim if you need to, then use a black pen to draw his nose on the top corner and draw on eyes. Keep them high up, near the ears.
Walkies!!


