Showing posts with label egg carton crafts. Show all posts

8.12.17

On the eighth day of Christmas...

my true love gave to me, eight maids a milking,

8 maids a milking

seven swans a swimming,

7 swans a swimming

six geese a laying,

6 geese a laying

FIVE GO-OLD RINGS...


four calling birds,


three French hens,


two turtle doves,


and a partridge in a pear tree


The maids are based on the Princess Leia Star Wars project... Who'd have thought?


4.5.17

Princess Leia - Star Wars craft

Princess Leia - Star Wars craft

Princess Leia joins the crew to celebrate Star Wars day!  She's made like the other figures, but the most important thing to get right was her rather distinctive hair style. Think we cracked it...

You'll need:
Egg carton
Pencil
Ruler
Craft scissors
Nail scissors or similar (optional) Adult supervision required
Paint
Craft glue
Plain paper
Black felt-tip or gel pen
Silver metallic pen
For a lightsaber:
Coloured straw
Black marker pen (like a Sharpie)

1. As with the other figures, roughly cut out two middle cones from the egg box so they're easier to work with. On one, draw a pencil line around the bottom of the cone, just above the bumpy cardboard joins. Cut along the line. This will be the body.

2. The second cone is for the head, and you only need the very top part. Either estimate this, or use a pencil and ruler to mark about 1.5cm (1/2in.) from the top on all sides, join the marks and cut out. A handy way to do this is to cut up two adjacent corners to the pencil line, bend the card back and cut off the flap - it should be easier now to cut along the rest of the line.

(If your cone has a hole in the top, see the tip at the bottom.)

3. For the arms, fold a piece of the egg carton lid in half and draw an arm (roughly about 3cm/or 1in. long) on the fold. Make it a little wider at the unfolded end. Cut out and open up.


4. Either cut the arm strip in half after the painting step (Step 7), and glue the pieces either side of the body, or, with adult supervision, use the nail scissors to make a hole roughly in the middle of one of the arm sides (keep the scissors closed, press down and twist from side to side.)
Once you've made the hole, snip up to the top of the cone and down the other side until the slot looks level. Cut an extra sliver out to widen the gap for the arms. Make sure the slot goes far enough down the body, so when you push the arm strip in, it sits below the top part of the cone (the head will be glued here later). Don't glue any of the pieces together just yet.


5. For her side buns, cut out a strip of plain paper, about 5cm by 8cm (2in.x3in.) and roll it as tightly as you can.


6. Then cut across your roll. Cut a few and make them as thin as you can. Choose two you're happy with, and gently squeeze them back into a rounder shape, letting them unfurl a little. Dab glue on the sides of Princess Leia's head and stick them in place. This might be easier to do with the head sitting on the body. 


7. Painting time. Take the head off and paint the body and arms white.

TIP: As with Darth Vader, place the body on a spare egg carton cone to make painting easier (and less messy!)

Make a skin colour by mixing white with a little red, a touch of yellow and the tiniest dab of blue. Paint one side of the head. When that's touch dry paint on brown hair, painting the buns too. It helps if you draw the outline of the hair on the face first with a brown or black pen before painting. 

Again, put the head on a spare egg carton cone while you're decorating it. 


9. When the paint is dry, use the fine black pen to draw on a face and if you have a silver pen add a belt (see pic above). Glue the head on and if you have cut the arm strip in half, glue them either side.

If you'd like to make a lightsaber or another type of weapon for Princess Leia, have a look at the steps for Luke Skywalker


Tip: If your egg cones have holes in the top, brush glue inside the cones and push a small piece of newspaper up to fill the hole.


5.1.17

Easy Darth Vader figure - Star Wars craft

Darth Vader kids craft
Come over to the dark side....

Darth Vader is back...
And if you have any young Star Wars fans in your life, then you might want to have a go at making this easy little mini figure.

You'll need:
Egg carton
Craft scissors
Pencil
Ruler
Black paint
Silver metallic pen (fine/medium nib)
PVA/craft glue
Red/pink straw
Black permanent marker (like a sharpie)
Nail scissors (optional) Adult supervision needed

1. Roughly cut out two middle cones from an egg carton so they're easier to work with.


2. On one of them, draw a line all the way around the cone, just above the bumpy card joins at the bottom. Cut along the line and check the cone sits flat and even. This will be the body.


3. For the head, take the second cone, and use a ruler and pencil to measure and mark about 2cm (3/4in.)  from the top on each side. Join the marks with a rough line. Cut out the head - a good way to do this is to cut up two adjacent corners to the line, bend back the card flap and cut it off. It's now easier to cut along the rest of the line.


4. Glue the head onto the body. Cut a strip of card from the egg carton lid for the arms - make it roughly 0.5cm wide(1/4in.) and about 5cm long (2in.)


5. Paint the body and the arm piece black.

TIP: Put the body on a spare egg carton cone while you paint it - much easier and less messy!


6. While that's drying, cut about 4cm (11/2in.) off the end of a straw and use the black marker pen to colour in the handle of the lightsaber.


7. Use the silver marker to add detail to Darth Vader's head and body, using the picture here as a guide.


8. Bend the card strip in half and cut along the crease, then either stick the arms on each side of the body with glue, just below the head - or, make slots either side, just below the head, using the nail scissors (keep them closed, press down and twist - once you've made a hole, cut slots to fit the arms)


9. Make small slits up the handle end of the lighsaber, so you can slot it onto the bottom of Darth Vader's arm, and he's ready for action!


10.12.16

Christmas tree decorations - Christmas crafts


Christmas tree decorations this time, and they're not that different from the sparkly birds.

You'll need:
egg box/carton
pencil
paint
plastic bottle top
sheet of newspaper
fine paintbrush
craft glue
strong all-purpose glue
glitter (optional!)
Sequins and other shiny bits
needle and thread
Nail scissors (to make holes - adult supervision needed)

1. Roughly cut a whole cone from the egg carton


2. Draw a rough pencil line all the way around the cone, just above the bumpy card join at the bottom, and cut along the line. Neaten up the edges so the sides are even and the cone sits flat.


3. Paint the cone green (if it's green already you could leave it). When the paint's dry, use the nail scissors to pierce a hole through the top (if there isn't one there already) - keep the scissors closed, press down and twist from side to side.


4. Thread a needle with a good length of thread - we used gold thread, but use whatever you have - and push the needle up through the cone and through the hole, then back down through the hole, leaving a loop for hanging your tree. Use sticky tape to stick down the two strands of thread inside the tube. Trim the ends of the thread.

5. Brush glue inside the cone and push in a scrunched up piece of newspaper. Don't fill it completely - leave a small space at the top.


6 Put a layer of strong all-purpose glue (like UHU or Bostik) on the newspaper and put some on the rim of your bottle top too. Stick the bottle top onto the newspaper and leave to dry upright.


7. When the glue's dry, brush some craft glue in a spiral, around your tree for the tinsel, then sprinkle over some glitter. Shake off the excess. A good way to save glitter is to do the sprinkling over a paper plate, then bend the plate in the middle to catch the glitter in the fold, and funnel most of it back into a container.


8. Have fun gluing on sequins or any shiny bits you have. You could also scrunch up small balls of coloured tissue paper to make baubles.


9. For the star on top, we used two identical stars from a pack of Christmas confetti, brushed glue on the back of one and stuck it onto the thread, just above the top of the tree. Then we stuck the other star to it, sandwiching the thread between them. Fiddly to get the stars to line up, but looks good when they do.

Next time Christmas fairies!


29.1.16

Easter egg carton birds in a tree


This cardboard Easter Tree is simple to make, looks sweet, holds sweets, and can be played with too, so, hopefully the kids will like it!

24.10.13

Egg carton Panda

My husband's favourite so far. Peter Panda is made from painted egg carton bits, and that's about it - apart from his little bamboo!

egg carton panda

You will need:

2 Egg cartons (with the cone shaped pieces down the middle - some don't have them. It's the same part used for the penguins and the monkeys.)
Scissors
Black and white paint
Tacky glue (Make your own by putting a small amount of PVA craft glue in a clean, uncovered jar or yogurt pot for at least a day. The longer you leave it the thicker and tackier it gets.)
Or use a glue gun
Nail scissors or similar to make slots (*to be done by an adult or with grown-up supervision)
Black felt-tip or gel pen
2 tooth picks
Green tissue paper

1. To make the body, roughly cut out two whole egg cup pieces from the egg carton, then measure and mark points around each cup, about 2cm up from the cardboard bottom. (More or less than 2cm is fine, as long as it's the same on both cups). 
Join the points with a pencil, to help with the cutting, and cut carefully along the line.

Spending a bit of time measuring and cutting can be a bit fiddly, but it does make it easier to fit the two pieces together.


2. Use plenty of tacky glue around the edges to stick the pieces on top of each other and to fill any gaps. (Or use a glue gun)

3. While the body is drying, cut out another egg cup, but leave one side a little higher, so it curves upwards making a kind of lip or tab. (See photo below)


4. Once the body is ready, draw a slightly curved pencil line (slot for the head), on top, and with nail scissors* pierce a hole in the line (keep them closed, press down and twist from side to side), then cut along the line and open up the slot a little.


Push the head tab in here to check it fits. If the head sticks out too much, make your slot bigger or the head tab smaller. Take the head out again.


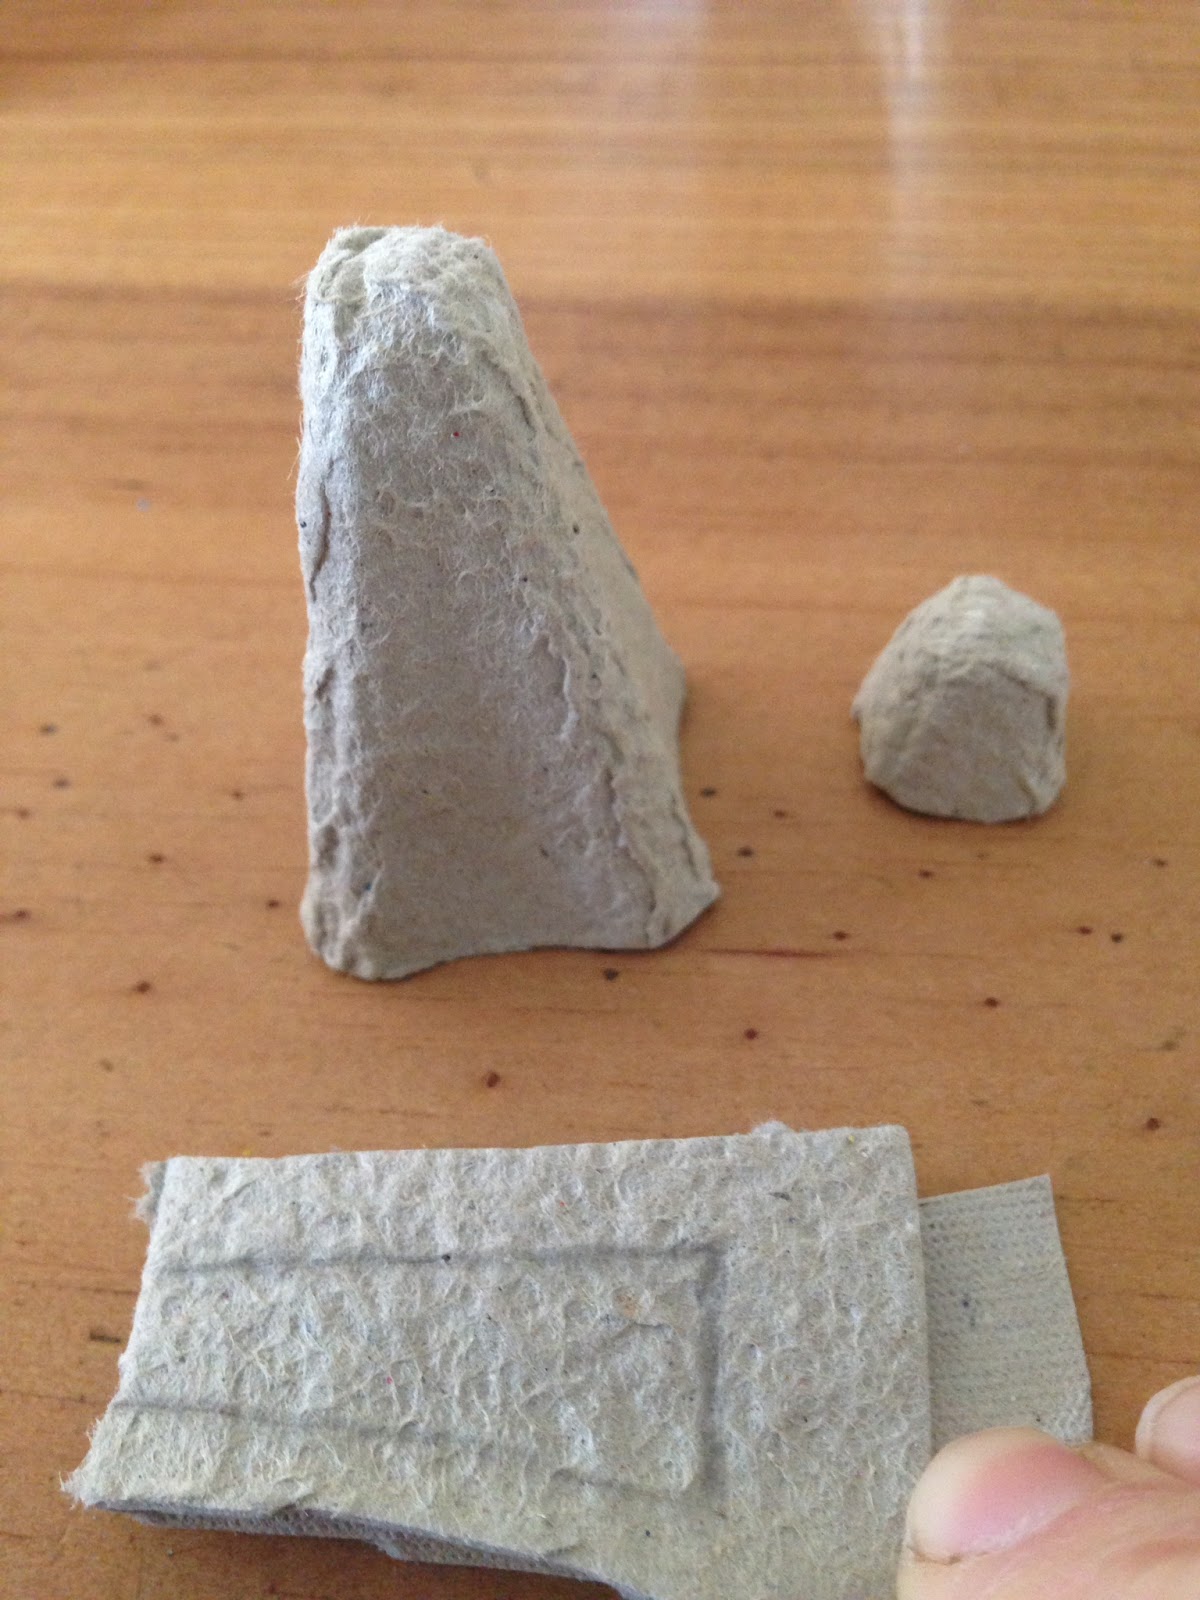
5. Use two middle cones for the legs. Cut them out roughly first, then neaten up, so they're both about 4cm high. Again it doesn't matter if they're more or less than 4cm, as long as they're the same height. 
Halfway up one side, draw a line straight across, and then draw down the next side at a diagonal, to the bottom corner (do this on both sides). Cut out your leg pieces.


...you want them to fit fairly snuggly to the egg cup body. Keep snipping away until you're happy, but don't glue them yet. The left leg in the picture below still needs a little work! (apologies for colour change)


6. Next, paint the body and head white, and the legs and some spare card black. This is for the arms and ears. Paint both sides black (we used the egg carton lid).


7. When dry, glue the legs to the body using plenty of tacky glue (or a glue gun).

8. While that's drying, cut a piece for the arms from the black card. You want it long enough to wrap around the back of the egg cup body (roughly about 12cm). You can cut a straight strip (about 2cm wide), that's absolutely fine, but it looks good if you make the strip slightly curved, wider in the middle (about 2cm), and narrower at the ends. (like a wide smile!) Round off the ends for the paws.


9. Cut out ears too, and remember to make them long at the bottom, so there is a card tab to slot into holes on top of the panda's head.

10. Back to the arms, and make a small hole in each paw (put the card on top of a piece of plasticine/modelling clay and push the tip of the *nail scissors or a skewer through)  Glue the arm piece on - it should sit a little higher at the back - and push a cocktail stick through the holes to hold everything in place while the glue dries.


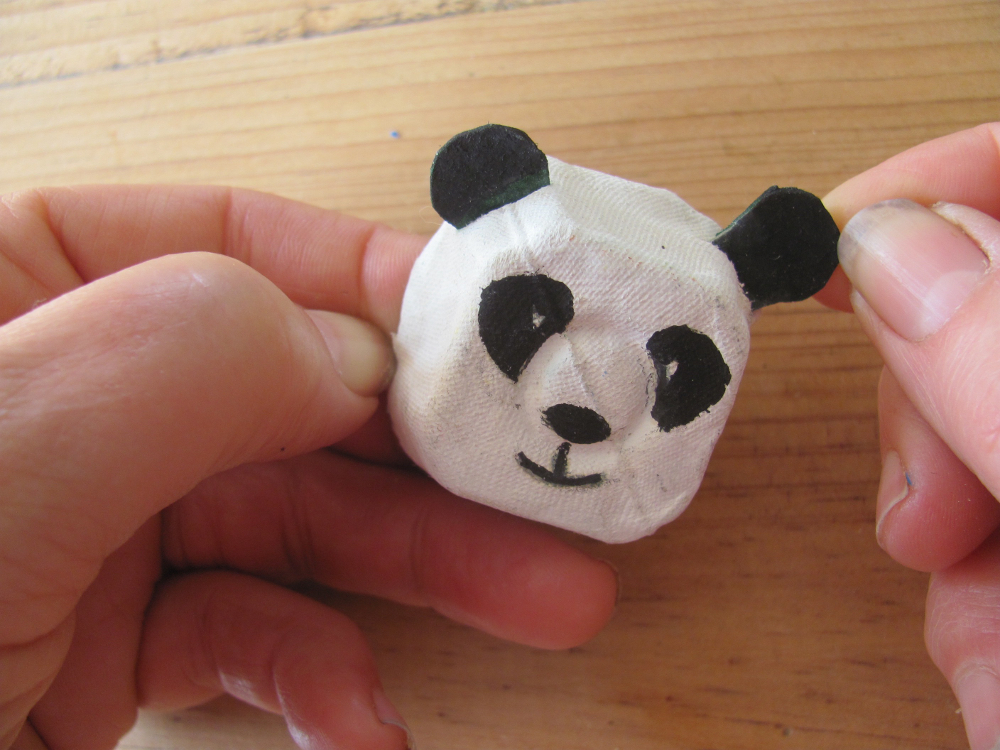
11. While that's drying, use a black felt-tip or gel pen to draw a face on your panda. For the eyes, start by drawing a small round ring, then colour in around it, leaving the centre white.


12. Mark slots where you want the ears to go on top of the panda's head (more to the sides looks best), making sure the slots are long enough.
Use *nail scissors to pierce through the card on the line (keep them closed, press down and twist from side to side). It is a good idea to place a big lump of modelling clay behind the ear slots, so you have something to push into. (the blue stuff in the photo below)

TIP: Instead of making slots for the ears, you could simply fold the ear tabs back, and glue them to the head. 


Once you've made a hole, carefully cut along the slot lines, and wiggle the scissors in and out a bit, so it's easier to push the ears into place.


Then glue the head into the body slot.

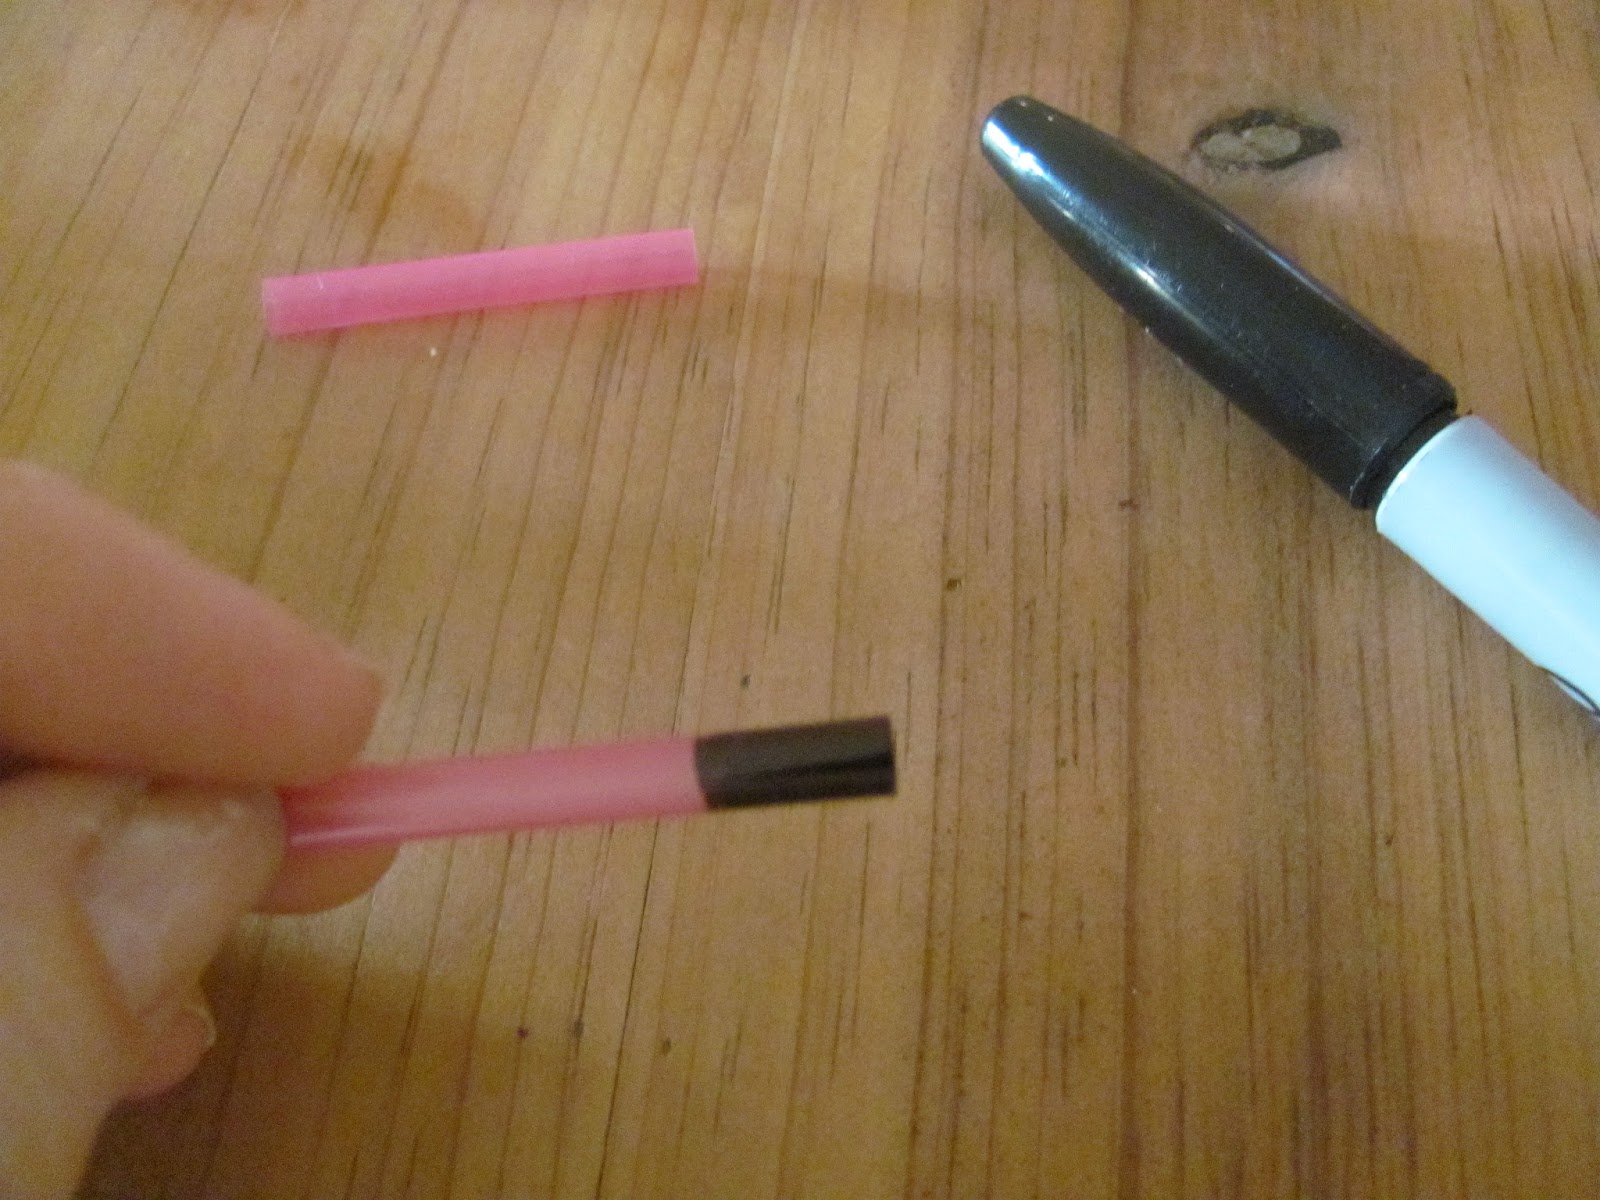
We gave our panda a bamboo to chew on. Cut the pointy bits off another cocktail stick and wrap and glue a few small rectangles of green tissue paper around one end. Snip when dry.

Replace the cocktail stick holding the arms in place with the bamboo shoot.


Panda

Peter spends a lot of time hanging out with the monkeys...


panda - make your own zoo

egg carton panda

You can also make a bear in exactly the same way - just change the paint colour - and try a lighter shade for the muzzle and tummy (and paws if you like). 
Use the cocktail stick to hold the arms to the body while the glue dries, and then remove it, or use a glue gun if you have one.

egg carton bear

Many more projects like this in my craft books, 'Make Your Own Zoo' and 'Make Your Own Farm Animals'