

We made a shoebox kitchen a while ago, and fully intended to add more rooms, but then got sidetracked, as you do.. And when I looked at it again recently I felt the kitchen units could be improved and simplified. So the old ones
were chucked out and new ones installed!They are easy to make. The key is to use a cereal box that has a side that fits inside your shoebox lengthways, because the whole of one of the long sides of the cereal box is going to become your set of kitchen units.
So, you'll need:
Cereal box
Ruler
Pencil
Scissors
Paint
Craft glue/glue stick
Plain Paper
Coloured felt-tips
Small matchbox (optional)
Silver spray (optional)
Silver pen (optional)
Nail scissors (optional, and to be used by an adult)
1. The height and depth of your units will depend on the size of your kitchen box. We've gone for a height of 7cm/3in. and depth of 5cm/2in. - but obviously make it bigger or smaller depending on what works best.
The first thing you need to do is carefully open both ends of your cereal box so you can flatten it. BUT make sure you preserve the card flaps at both ends, and try not to rip them (too much!), because you are going to need them when you eventually stick your unit back together again.
Using the long side crease as the edge of your units, measure and mark out the size you want. I've squeezed our box back together with the measurements on, so you can see the shape of the kitchen units and where they come from.

2. In the first picture below you can see the flattened box and our lines for the top and bottom. I've put the measurements we used on it, so it's clear which is the worktop and which is the base.
Cut out the unit, and remember to include the card flaps or tabs too, this is important.
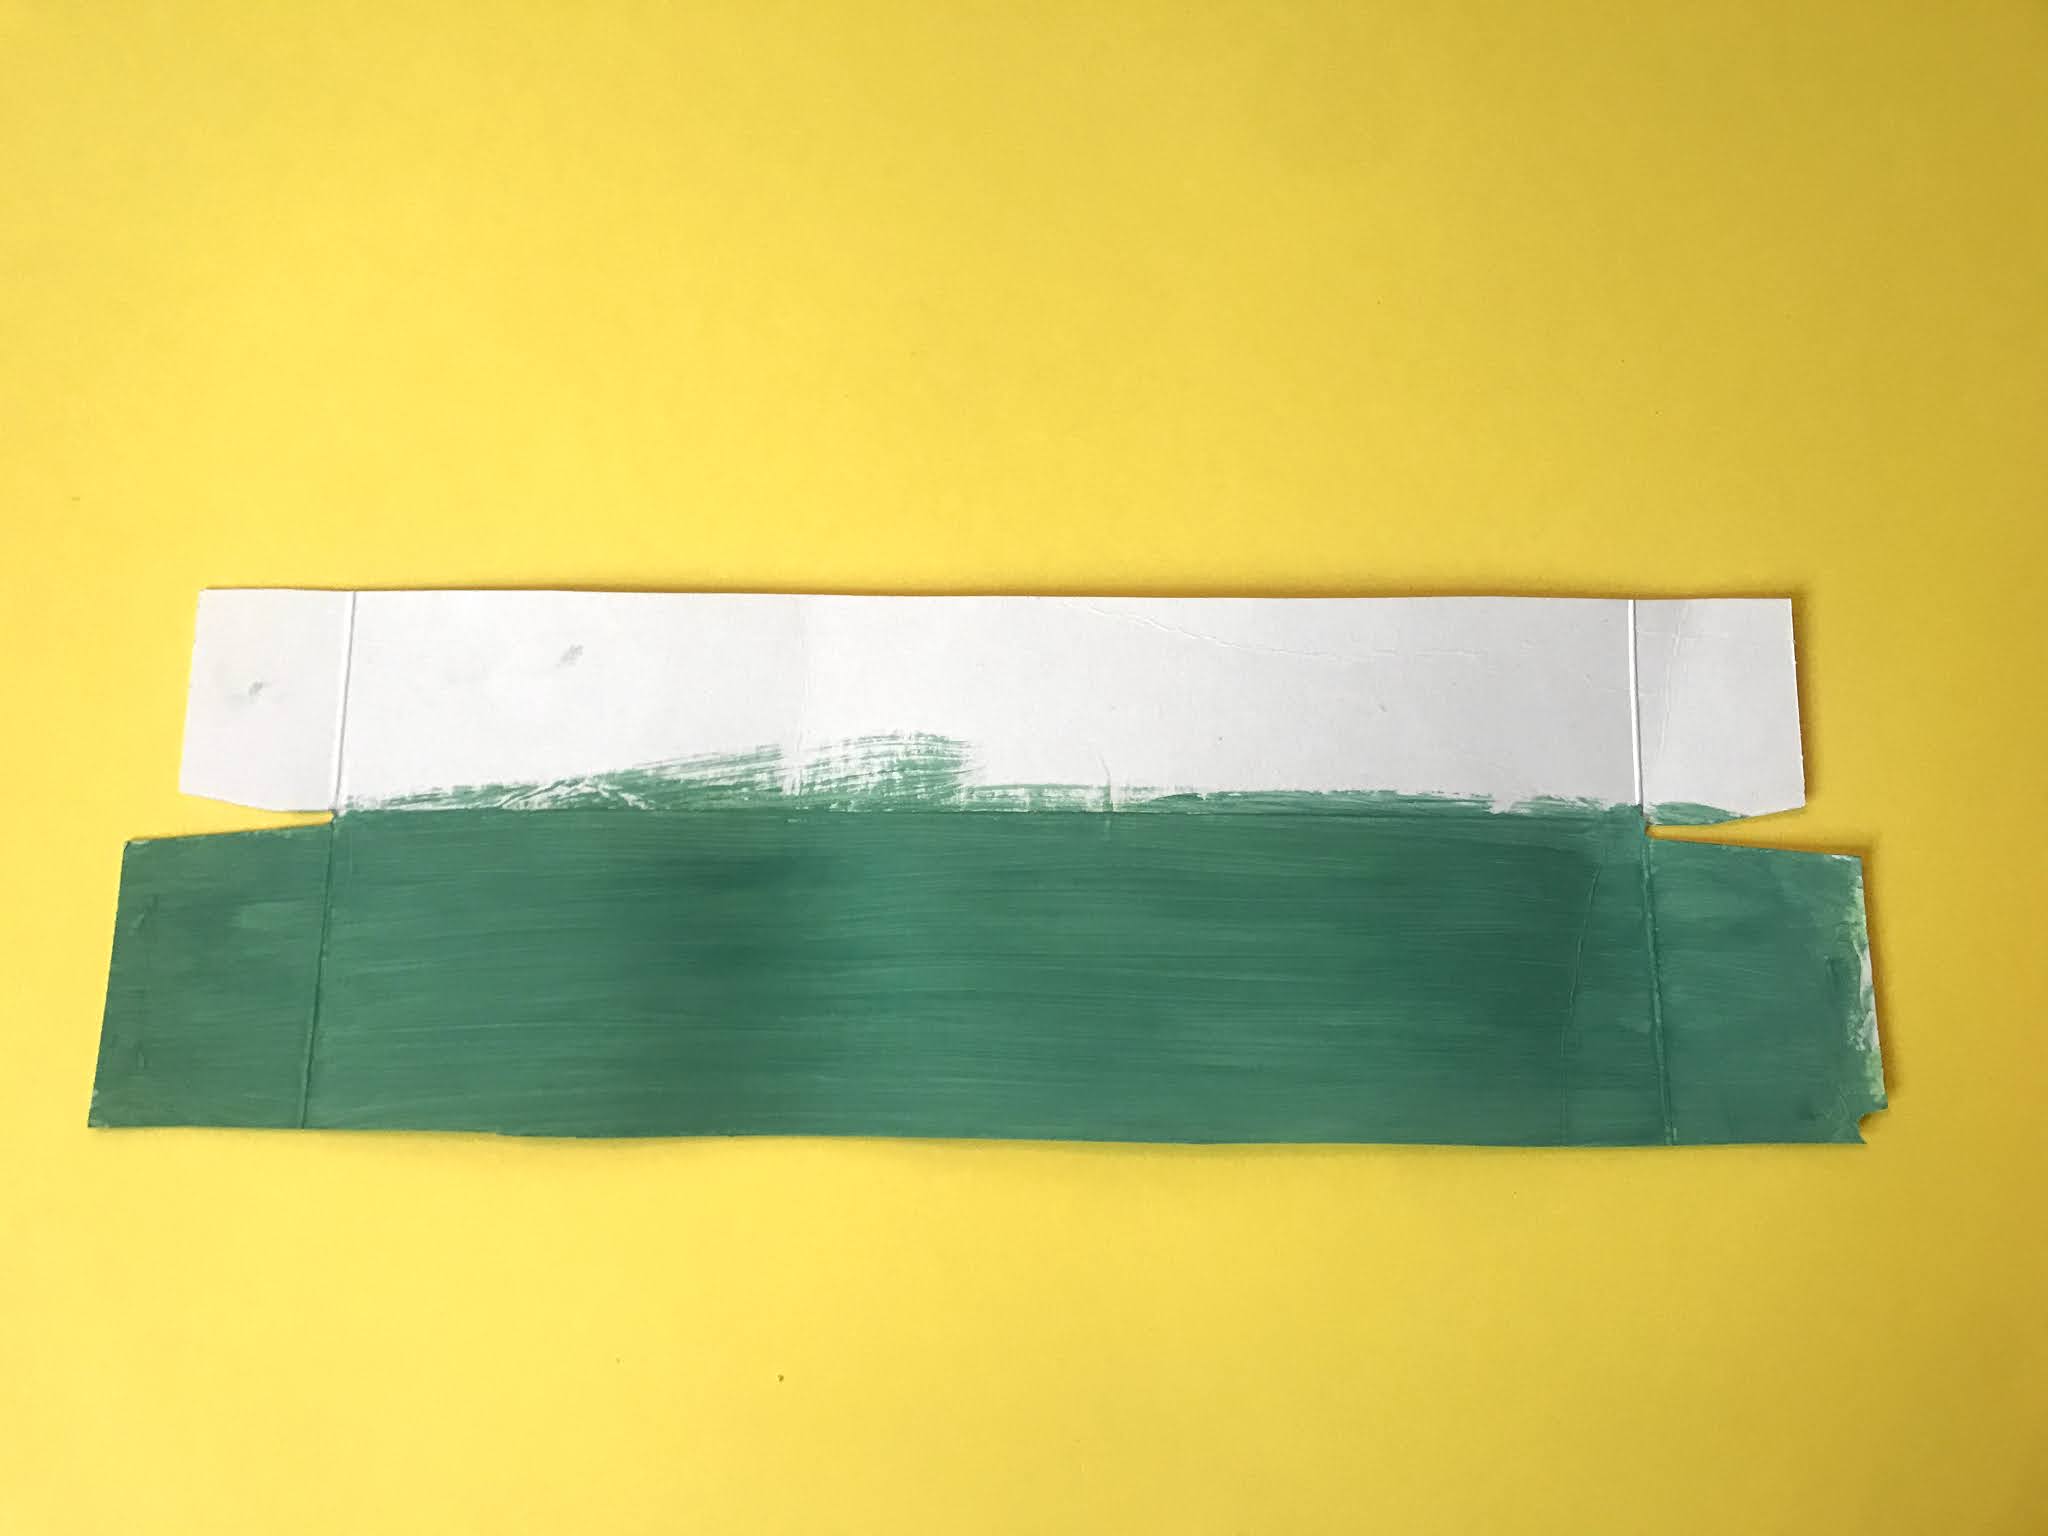
Flip it, bend and fold all the creases the opposite way, then flatten it again, so you can work on the plain side.

When dry, fold along the long crease line, so the bit you want to paint next (the worktop) is on top, and the painted part is folded underneath. This is a quick and easy way to get a nice clean edge for your worktop, no matter what age the decorator!
4. Time to decide what units you want now, and how big you want them to be. It looks best if all the units are roughly the same width. Use your ruler to measure the length between the card flaps and work out the best size, then draw pencil lines.
We decided to have an oven on the far righthand side, so have drawn lines on the worktop bit too, for the top of the oven.

5. When you're happy, go over the pencil lines with a thin or medium black marker pen. Add a bit more detail, like drawers, cupboard doors, knobs and handles. I did this freehand as prefer it not too straight, but do use a ruler if you want to.
We have put a double cupboard in the middle, because that's where the sink is going to go.

6. Paint on an oven or fridge (or washing machine) if you want, or you could do what we did - use a ruler to draw a rectangle, the size of your appliance, then draw and colour in with felt-tips. Cut out and glue in place.


7. Paint or colour in the top part of the oven with a black marker pen. You could use the pen to draw along the tricky worktop edge, and then fill in with paint. It doesn't matter if you go over the front edge, as this is going to be covered soon. Add oven rings - we used a silver pen for this, and added some silver detail to the oven drawing too.

8. Glue the paper appliances in place.

9. You could simply draw on a sink, but if you would like to make one, cut a thin strip of card from leftover cereal box card, snip off two small pieces the same size for taps and a long piece for the spout. Glue to the outside of one of the longer sides of the matchbox drawer. Bend the spout strip, so it arches down to the sink.
We sprayed our sink silver, but you could leave it, or paint light grey.
10. Place it where you want it to go on the worktop, and lightly draw around the base. (I've gone a bit heavier here, so it's easier to see)
11. Pierce a hole in the middle - this bit should be done by an adult - put some old modelling clay behind the card so you have something to push into, and use nail scissors (or similar). Keep them closed, press down firmly, and twist from side to side. Then could out the rectangle, BUT you need to cut a little INSIDE the pencil line, so the sink hole isn't too big.
Underneath, brush glue along the front and side edges of the hole, and then push the sink up, so the taps and spout show above the worktop and the sides and front are pressed into the glue. Add some sticky tape underneath for extra strength (or if the hole is a little on the big side). The last picture here shows the sink from underneath.

12. Now all you need to do is glue the end tabs back together, to get your boxy shape. Before you do, press along all the creases again. Brush glue on the tabs and use paper clips or laundry pegs to hold the ends together while the glue dries. Make sure you're happy with the shape, and how the units sit, before attaching the paperclips.

Time to fit it into your kitchen!

You'll find tutorials for the chairs and table and all the other bits and pieces on the Kids Craft Ideas page, or use the search bar. We added a little card calendar and a clock made from a bottle top.

