

It's foxglove time of year again, and I love the way they self-seed and pop up randomly in the garden - in the weirdest places sometimes. They're biennials, so they don't flower their first year, but make up for it (with bells on!) the second year.
Egg carton cones are perfect for the shape of the bell-like flowers - add some paint, a few green pipe cleaners and paper leaves, and you have foxgloves to enjoy all year round!
You will need:
10 egg carton cones (2 x dozen cartons or 5 x half-a-dozen cartons)
Scissors
Paint
4 long Pipe cleaners (ours were about 30cm) + 1 for attaching the leaves
Sheet green paper (or plain painted)
1. Roughly cut the middle cones from the cartons.

2. You need to vary the size of the cones - so two big, two a little smaller, the next two smaller again and so on. So you have five sets of two. But honestly, each set of two doesn't have to be exactly the same! As long as all of them range from big to small that's fine.
(Easiest I think to cut them all out the same first - so cut around each cone, just above the bumpy cardboard join and then put two cones aside, and mark the others with a pencil in sets of two, getting a little closer to the cone top each time)

3. Next, you need to angle your foxglove bells, so you can see inside.
Draw a straight pencil line across one side of a cone, roughly a cm or so above the bottom edge, and then join the ends of this pencil line to the two back corners with a diagonal line.


Cut out. Do the same for all ten.


4. Painting time next, and we used a mix of purple, pink and white, to paint each cone, and then brushed white paint around the edge and dots of white inside. It helped to have a real foxglove bell to look at, but you could also use an online photo.


6. You will need four pipe-cleaners for this bit - ours were about 30cm long. Keep one aside and cut the other three into three roughly equal pieces (of about 10cm)
Wind one end of the uncut pipe-cleaner around itself to make a kind of knot (so it doesn't slip through the hole), and thread through one of the smallest cones.
(Our cones already had holes on top, you may have to make holes, nails scissors are good for this, or place the cone on a piece of old modelling clay, with the pointy end on the clay, and push a sharp pencil/pen or knitting needle through the inside of the cone, so it pierces through the top. Take care though, as the card can be thin here, and don't make the holes too big)

7. Do the same with all the other smaller pieces of pipe-cleaner.


First, hold the other smallest cone about 2cm or so below the top flower, and out to one side. When you're happy with the position, wind the short pipe-cleaner tightly around the stem. Then hold one of the next size cones JUST below the one you've done, facing to the other way, and wind the short pipe-cleaner tightly around the long stem again.


9. A few cms below, add the next two (in order of size) in the same way, and repeat, until you have three cones remaining.
You want to get these three to be close to each other.
So, do as you've done before, add the next size a few cms below the two above, and bend it so it's facing the opposite way from the last one you attached.
Then add the next one JUST below it, but make this one face forward. Add the last cone JUST below this one, facing the other other direction, winding the pipe-cleaners as you go.


Here you can see what it looks like underneath the bottom three.


And here, how it looks from behind - see the gaps between each set of cones.

10. You will need to move the cones around now - twist any that have moved, so you can see inside, and angle them downwards. Bend one of the bells just above the bottom row more into the middle, so it's more in line with the middle cone on the bottom row. This makes the foxglove look fuller.
11. It would help if you fold the bottom of the pipe-clear up to meet the ends of the pipe-cleaners attached to the bottom flowers. We didn't do this, but it should help make the stem sturdier.
If you don't want to add leaves, wrap a pipe-cleaner tightly around the stem from near the bottom of the flowers to the end, folding in and winding around the pointy tip. Cut off any pipe-cleaner left over.
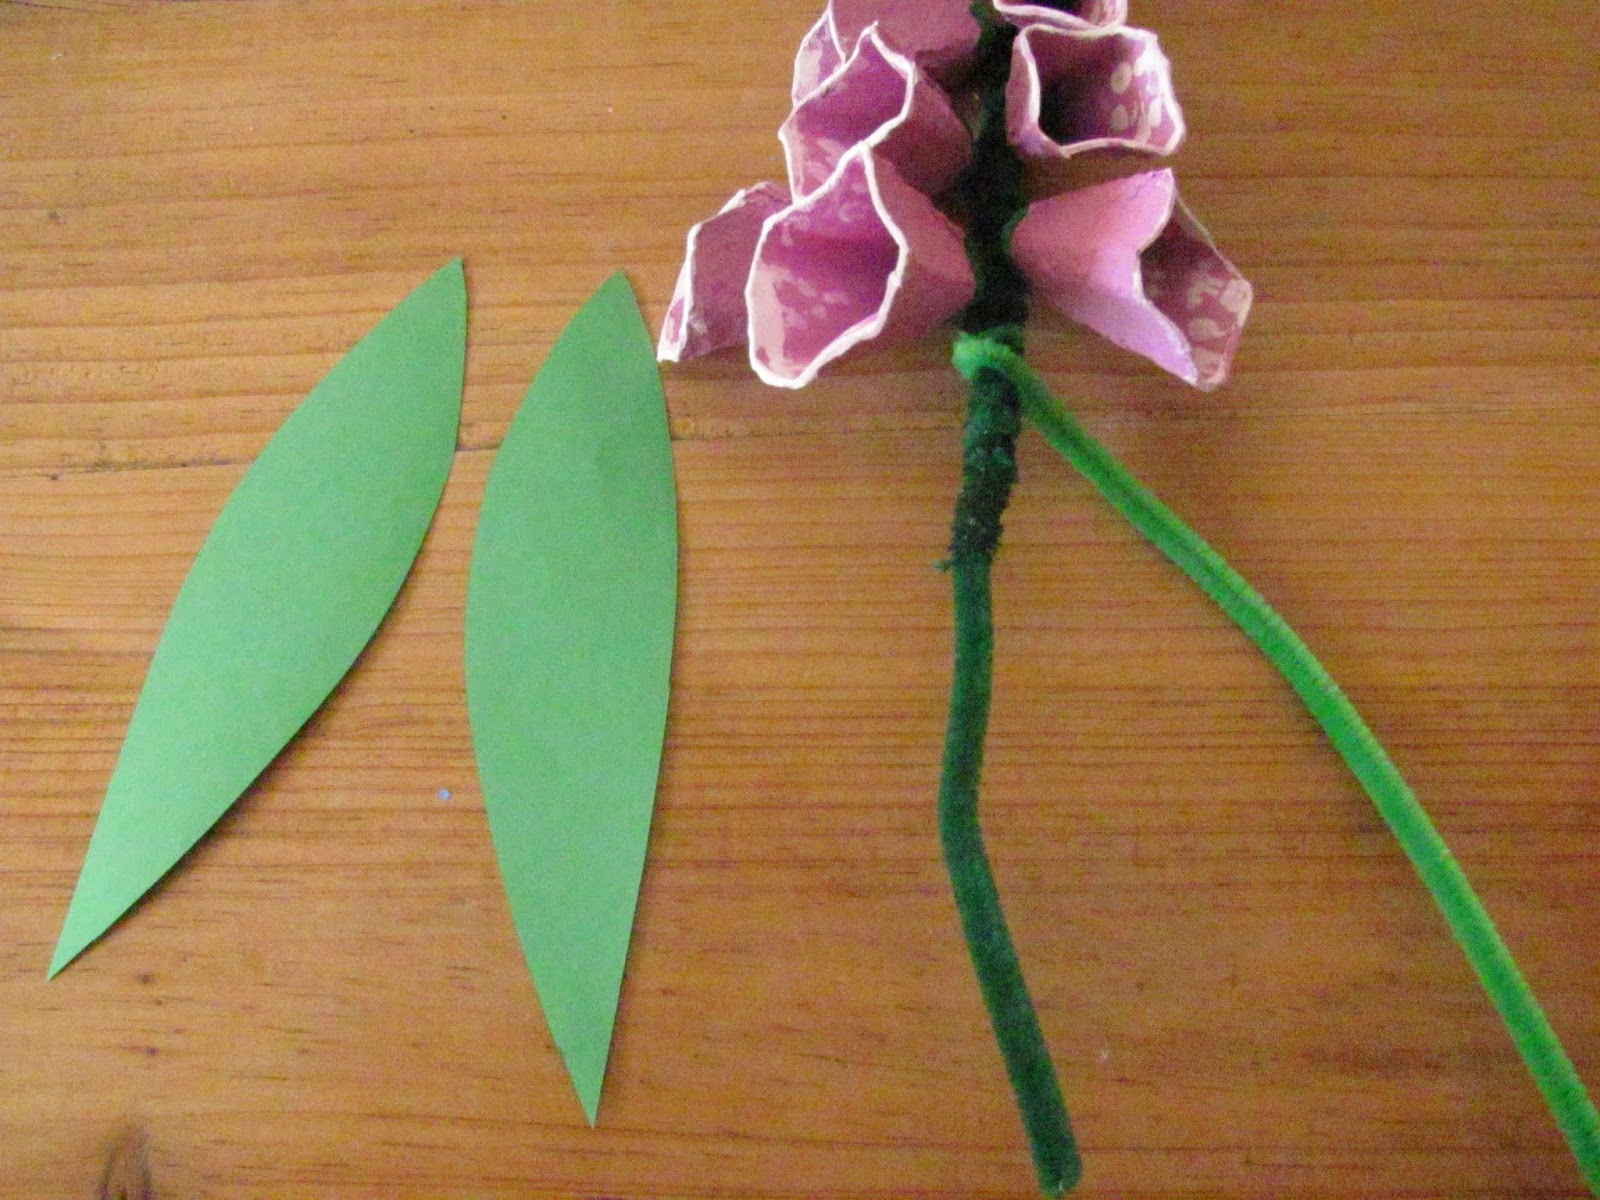
12. If you do want leaves, don't add the last pipe-cleaner yet. Fold a piece of green paper in half. (Or a plain paper and paint green after)
Draw a long thin shaped leaf and cut out so you end up with two the same.
Wrap the last pipe-cleaner tightly around the stem, to cover the ends of the pipe-cleaners attached to the bottom flowers. (We didn't have another dark green one, but the different colour helps show up the winding!)


13. Once you're clear of the bottom of the flowers, wrap the very end of one leaf around the stem and then wrap the pipe-cleaner tightly around it, to hold it in place. Just below, do the same with the other leaf.


14. Keep winding until you get to the bottom of the stem.


