Showing posts with label toilet paper tube craft. Show all posts

8.6.17

Make a city scene - crafts for kids


I've been going through A LOT of cardboard tubes recently, and the city tubescapes we did a few weeks back got me thinking about making a bigger city scene that could be added to and played with. The first thing was to make the tubes less, well, tubey.....!

You'll need:
Cardboard tubes (toilet paper and kitchen paper tubes)
Scissors
Paint
Black felt tip or gel pen
For the trees:
Cereal box card
Brown felt tip
Glue stick
Grey paper (or painted paper) for the street

1. Take your toilet paper tube or kitchen paper tube and flatten it on the table with you hand. Press firmly along the two creases.


2. Squeeze the tube open, line up the two creases you've just made, and flatten with your hand - making two more creases. Press firmly along them both again.


3. If you want to make your buildings different heights, this is a good time to cut across your flattened tube. Now, when you squeeze it back into shape, instead of being round, you should have more of a square shape.


4. Paint your buildings any colours you like, or leave some plain, like we did.


If you want to make trees, this would be a good time to paint some cereal box card green. Try two different colours of green. Add more blue to make a darker shade.

5. When the paint's dry, press along the creases again, to get them back into shape, then use the black pen to add windows. Draw small rectangles, colour some in and leave others open. Add any extra details you want - Daisy made a hospital, shop and a bakery. It's absolutely up to you!


6. For the tree base, cut a strip of plain cereal box card. The trees can be any size you want, but if you want them to be a similar size to ours, keep the width of the strip to about 2cm/3/4in or less.  Cut the strip into similar sized pieces, no more than about 3cm/1in. long (these measurements are just a guide, the card pieces don't need to be identical or precise).

7. Now, fold in both ends of a piece of card, so you leave a small section in the middle between the folds. This is going to be the trunk of your tree and shouldn't be too wide. It might take a minute or two to get the hang of the folding, but again it doesn't need to be precise, as long as the card piece sits steady.


8. Make a small snip down both creases (snip a little extra out to make it easier to slot in the treetop later) - then cut a 'V' between the slots for the tree's branches.


9. Keeping in mind the size of your tree base, draw a treetop shape on the painted green card and cut it out. Keep the shape simple if you prefer.


10. Draw the trunk on the tree base with a brown felt tip pen.


11. Rub some glue on the back of the branches only, and slot the treetop in place. Leave it flat to dry (you could weigh it down with a book).
Fold the flaps back and your tree is ready!


19.4.17

Curly wurly snakes!


Wrap them wherever you like!


These spirally snakes are sssssssimple to make and they're really good for scissor practice too.

You'll need:
2 toilet paper tubes (or a kitchen paper tube cut in half)
Paint
Paper
Craft glue
Glue stick
Plain paper
Yellow felt-tip or highlighter

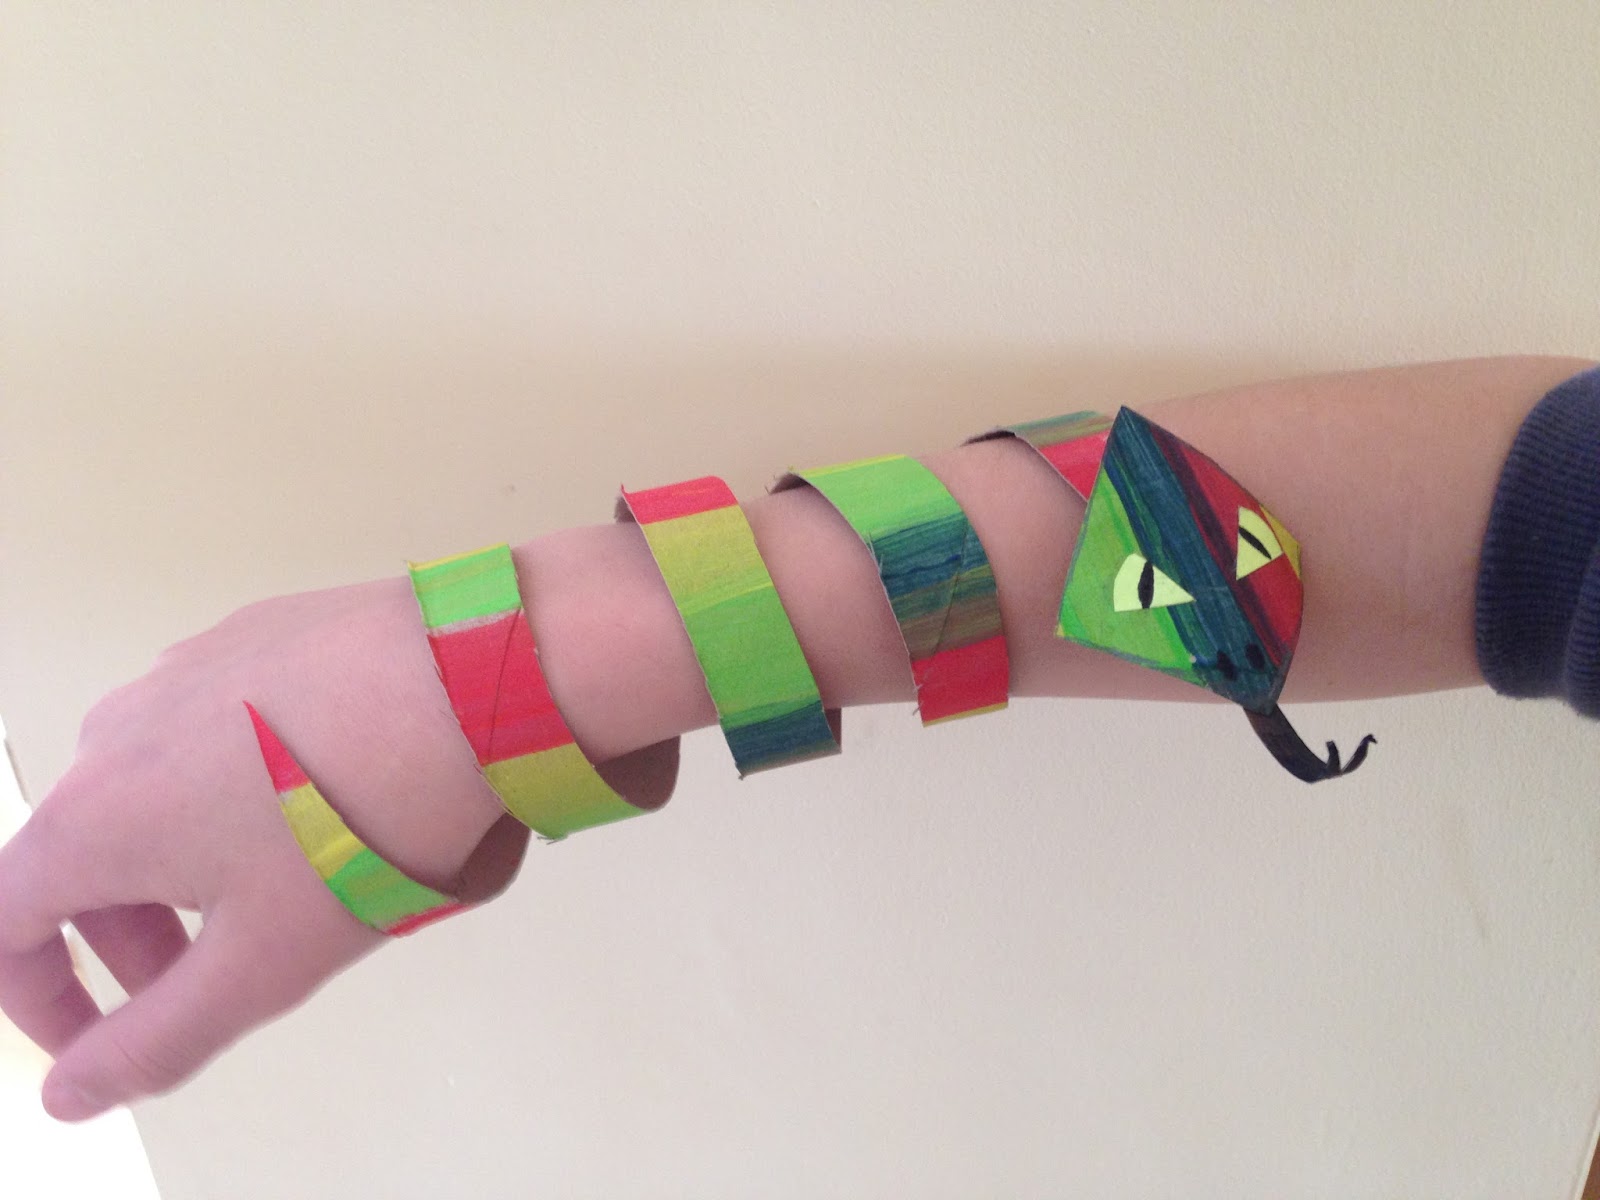
1.  Paint stripes up one tube using any colours you like. It looks good if you keep to a set pattern, so if you paint yellow, green then blue do the same around the rest of the tube. Try to keep the stripes a similar size.
On the second tube, paint the same colour pattern around the tube, leaving a space near one end. Make the stripes a little thinner this time. Paint the bit you've left black, or whatever colour you'd like for your snakes tongue! Paint the inside of this end black too.


2. When the paint's dry, carefully cut the tube to make a spiral. Take your time and make small snips with the tips of the scissors. Don't make the angle too steep at the beginning - just a gentle rise. When you've been round once, the important thing is to keep the width of the spiral (your snake's body) the same all the way up. Keep checking to see if it looks right. This can be tricky and needs concentration but it's great scissor practice. If it helps, you could try drawing a spiral on first with a pencil, or, for younger makers, start it off for them, as this is really the trickiest part. Let them have a go at cutting the rest of the spiral. It doesn't matter if it's a bit wiggly!


3. Snip the end off so you have a nice straight bit to stick the head to.


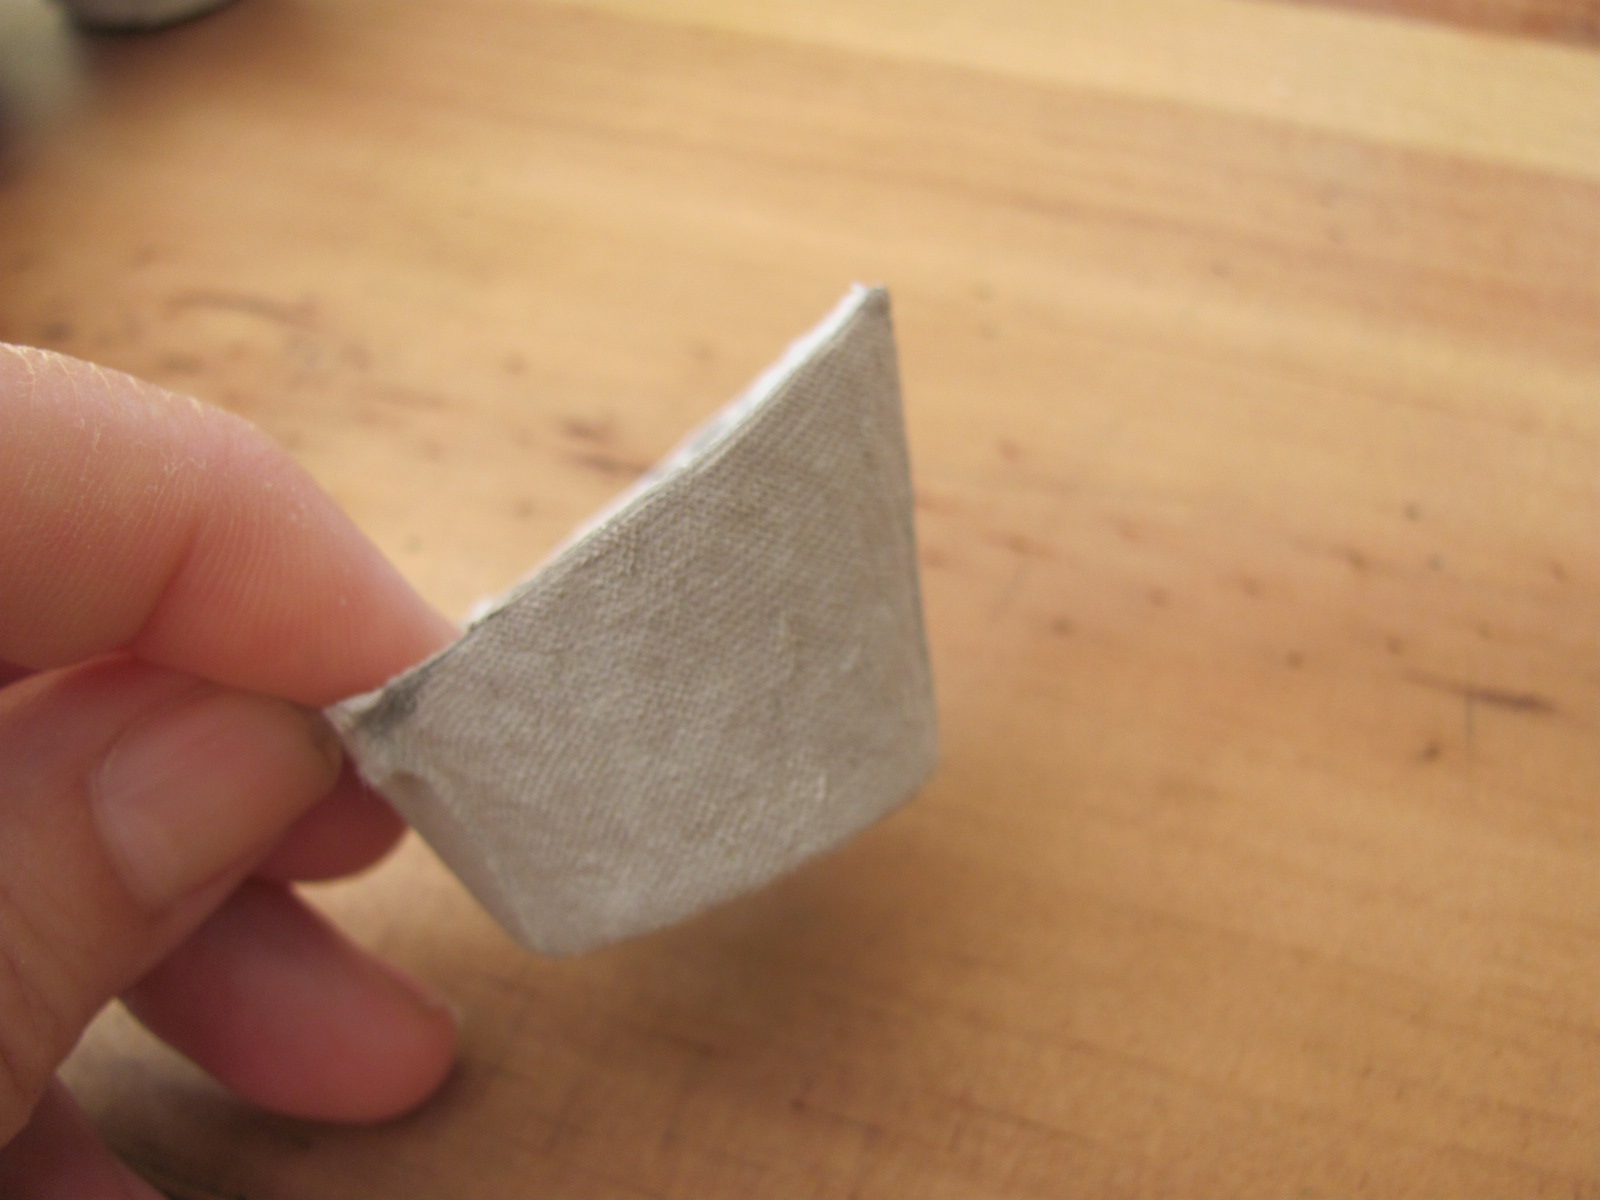
4. Use a pencil to draw a diamond shaped head on your other tube ( make sure it's not too small)


5. Use sticky tape to attach it to the twisty body.


6. Cut out an eye shape from the spare tube. We tried two different shapes. Draw around it twice on some plain paper and colour in with a yellow felt-tip pen or a highlighter. Add a black pen line down the middle. Cut them out and use a glue stick to glue them to the head.


7. Cut a thin strip from the black end of the tube for your snake's tongue. Straighten off both ends and cut a 'V' in one of them.


8. Use sticky tape or glue to stick the tongue to the back of the head. Add two black nostrils and any other detail you like. Now your snake is ready to explore!


8.7.13

Egg carton penguins

penguin craft


Apparently there are a few homemade Zoos on the go now, which is just brilliant! Though it does mean the pressure's on to come up with some new ideas.  Luckily I've been saving the penguins - and do you know, they're probably my favourites so far. SO quick and easy.


You will need:
Egg carton
Scissors
Small piece of cereal box card
PVA/craft glue
Paint (black, white, yellow)
Fine black felt-tip or gel pen
Nail scissors (straight-edged or similar *to be used by an adult)
For their iceberg home:
Egg cartons
Ice-cream carton lid or similar

The penguins are made from the long pointy cone bits in the box that protect the eggs. Some cartons don't have them but plenty do. How easy is that?

*If your cones have holes in the top, dab some glue inside the top of the cone and then push a small piece of newspaper up, to block the hole.*

First, roughly cut out as much of the middle cones as you can - this makes them easier to work with. Then, with a pencil, mark points on the 4 corners, just above the bumpy cardboard joins. Then join the points with a pencil line, all the way around the cone (just a guide so don't worry if it's a bit wobbly). Carefully cut up to the pencil line (at an angle is easiest) and then along the line. Take time doing this so the edge is nice and even and your penguin body sits steady on a flat surface.


Paint one side white - and cut out and paint a few of the egg cups and the box lid too (for the icebergs)

REMEMBER to also paint a small piece of cereal box card yellow for beaks and feet (about 10cmx10cm).


Once the paint's dry it's time for the black. I found a quick outline with a black pen or pencil on the penguin's front helped. She's pretty neat, my 6 year old, but there mightn't have been a lot of white left if we'd gone completely freestyle!


TIP: Put your penguin on a spare egg carton cone to make it easier to paint (and less messy!)


Use a black marker or gel pen to dot on eyes, close to the top of the head.

For the beak, either: 

Paint or draw one on, 

Or, cut out a small triangle and glue on,

Or, cut a thin strip from the yellow painted cereal box card. Snip the end into a 'V' and cut off the top cm or so (see picture below).

Draw a short line right under the eyes. Use the nail scissors to pierce a hole on the line (keep them closed, press down and twist carefully from side to side). Snip the slot and wiggle the scissors a little, to make it easier to slot the beak through. Dab some glue behind the slot.

Cut two long, thin triangles for feet. Stick the pointy end underneath the front, and leave your penguin lying on its back until the glue is dry. Then bend them into place.


For their frosty, iceberg scene, paint a piece of paper or cereal box card blue, and cut to fit the ice-cream lid. (Paper is easiest - press into the shape of the lid, to make creases around the edges, so you can see where to cut)


Then, have fun arranging your icebergs.
We used part of the egg box lid for a base, then cut the egg cups so they were all different sizes.


Stick the cups on top/in front/in the water - wherever you like really, before sploshing on another thick coat of white to fill any gaps.

One of our penguins has lost his head and gone for a dip...


I've had a request for monkeys and a whale... need to think about the whale, (though there is a whale HERE now!), but I've a sort of plan for monkeys, so they'll be next!

Anything else you'd like to see in the Zoo? Within reason, obviously!

Penguin craft for kids


Many more projects like this in my craft books, 'Make Your Own Zoo' and 'Make Your Own Farm Animals'