Showing posts with label kids craft. Show all posts

4.5.20

Cork Yoda fridge magnet - Star Wars craft


May the Fourth with you be! 

This little Yoda combines two of my favourite things to craft with - corks and egg cartons!

You will need:
Champagne/Sparkling wine cork
Egg carton
Paint
Black gel or marker pen
Craft glue
Strong glue, like UHU, or a glue gun
Brown paper or plain paper painted
Magnet (optional)

1. For his distinctive sticky out ears, cut out two long pointy triangle shapes from the egg carton lid. Glue them either side of the wider, top part of the cork, pointing forward. 

They will stick with PVA craft glue eventually, but easier and quicker to use a stronger clear glue or a glue gun if you have one. I don't have a glue gun and used UHU glue for bits like this.


2. When the glue has dried, bend the ears back into place.


3. Paint your Yoda's body green, plus some spare egg carton card for the hands and feet.

When dry, draw two hand shapes (see below) To cut out, cut around them roughly first, then snip out the zigzag bits, before cutting around the rest of the hand.


4. For the feet cut two short strips from the green card (place them under the cork body to make sure they're the right size and not too wide). Then, snip out a few zigzag triangles.

Glue the feet under the cork body.


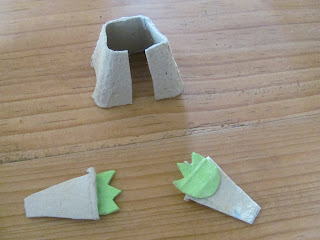
5. His cloak is made from the middle part of an egg carton cone.  Once you've cut the cone out, cut the top off, just squeeze the cone flat and cut across the card. Press back into shape - the top will look uneven, so trim until you have a nice straight edge.


6. For the billowy sleeves,  use the edge of the carton as it often has a rather nice little turn up! It's also easy for cutting. Cut two of the shape below. 


7. See the little turn up? No worries though if your carton doesn't have this lip around the edge. For the cloak opening, cut a strip out of one side of the cone.

Check the cloak is the right size for your Yoda - shorten the top part if it's too big.


8. Glue the hands behind the ends of the sleeves, so you can see them. If you have a little turn up, make sure you glue on the other side. Craft glue will work for this, or you could use the stronger glue.


Glue the sleeves either side of the cloak.

Then, glue the bottom of the sleeves to the front part of the cloak, by the opening. You might need paper clips (or laundry pegs) to hold the arms in place while the glue dries.


9. While the glue is drying, cut out a short strip of brown paper (or paint some plain paper) that covers the thinner part of the cork, below the head and above the feet. It doesn't need to go around the back of the cork as this will be covered by the cloak.

Glue in place with a thin layer of craft glue or a glue stick.

10. Use a black pen to add some Yoda-ish features.


11. Glue the cloak onto the back and sides of the body.


12. If you want to make your Yoda into a fridge magnet, use the strong glue to stick a magnet on the back.


2.5.20

Paper roll birdhouse for little egg carton birds


toilet paper roll craft


There have been so many of these sweet little egg carton birds popping up here over the years, and I thought it was about time they had a home! The birdhouse is made from one toilet paper roll (or part of a kitchen roll) and really doesn't take long to do.

You will need:
Toilet paper roll
Scissors
Craft glue
Paper clips or similar (laundry pegs work too!)
Paint or pens to decorate
Egg carton (for the bird)
Black pen

1. If you want to paint your birdhouse, do that first, and when the paint's dry, flatten the tube with your hand, pressing firmly along the two creases.

If you're keen to decorate your bird house with felt-tips or marker pens, it's best to do that now, when the tube is flat. That's how we did the flowery and the striped one above. (I used a thick marker pen for the stripes)


2. Draw a pencil line across the tube that's below the halfway mark. Our tube was roughly 10cm high, so we drew the line across about 4cm from the bottom edge.


3. Line up the two creases in the middle, and press down on the tube again on a flat surface. Press firmly along the sides, to make another two creases.

You've now made four evenly spaced corners and turned the circular tube into a square shape, but keep it flat for now.


4. Continue the pencil line across the tube.


5. Squeeze into shape, and cut down all four corner creases to the pencil line on the longer part of the tube. (see pic below)


6. Bend one of the flaps forward, folding it firmly on the pencil line.


7. You then need to fold it back on itself, leaving a little shelf or ledge jutting out. Press firmly along this crease too.

8. Pull the flap back, brush a little glue in the crease and press into place again. Use something like paper clips or a laundry peg to hold it while the glue dries.


9. Now fold the flaps either side. You need to fold them out, so they're just below the little shelf you've just made. (see pic below). And even. Press firmly along the creases.


10. To make the roof of the birdhouse, bend these two side pieces inwards now, pressing the ceases the other way. So you're bringing the two flaps towards each other.

Brush some glue along the very top edge of one side (don't use too much glue or brush it too far down the card).

Use paper clips or something similar to hold the top of the roof together while it dries.


11. When it's dry, take the clip off and press the top of the roof down with your finger, to get it back into shape.


13. Cut the card away at the back, roughly following the contours of the roof.


14. I've already written a few tutorials for the little birds, but here's a quick reminder.

Roughly cut out an egg carton cone from the carton, and cut around the cone, just above the bumpy cardboard joins.

To make this easier you could draw a rough line around the cone, just above the cardboard join. Cut up to the line at an angle, then cut along the line.


15. Once your cone is cut out, draw a pencil line around the cone, about halfway up. Don't worry if the line is a bit wobbly, it's just a guide.


16. Cut up the four corners to the pencil line, and bend three of the flaps out, folding on the line. Cut these three flaps off.


17. The remaining one is the tail feathers. Shorten this if you want.


18. You can either cut out wings (teardrop shape) from the little bits of left over card, or simply draw on wings with a black pen after you've painted your bird.


19. Set your bird on top of a spare cone, this makes the painting a lot easier.


20. Dot on eyes with a black pen near the very top of your bird's head. Paint or draw on a beak just below the eyes. Or cut out a little orange/yellow triangle and glue it on with a glue stick.

20.2.20

The Big Blue Egg Carton Whale - #stayathomecrafts


This is a great craft because it's more than just a whale! It's somewhere to keep tiny treasures,  or pieces for simple games you can play with your little ones.

You will need:
An egg carton
Cereal box card
Craft glue
Scissors
Paint
Black marker pen
Plain paper
Nail scissors (*to be used by an adult)

1. The first thing you need to do is paint your egg carton. We used ordinary ready-mixed poster paints. Add some white paint to the blue as this helps cover up any print and pictures on the box.

Paint some spare cereal box card blue too, for the tail and fins. We painted the bottom half of the egg carton a lighter blue, but it doesn't look very different in the pictures!


2. You could cut the tail out freehand, but we decided to make a template - fold a piece of thin card or paper and draw half a tail on the fold, then open up. Make it long enough so there's plenty of card to glue inside the egg carton. We cut a triangle shape template for the fins.

3. For the mouth, carefully run a brush with some black paint along the bottom edge at the head end (see photo below) Take it around both corners of the carton so you get a nice wide smile. When the paint is dry use a black pen to finish off, lifting the corners of the mouth, so there's a happy grin. Add eyes too or use googly eyes if you prefer.


4. Glue one fin just under the front edge of the lid, near the eye, and at the back, snip along the cardboard hinge join, just enough so you can slot in the second fin.


5. For the water spray, take a piece of plain paper, about 8cm wide and 16cm long, and roll it into a tube. Don't make it too tight - you want to be able to get the arm of your scissors inside the tube. Dab a little glue on the end corner  or edge of the paper, to hold the tube together. Then cut about halfway down the tube, at roughly even spaced intervals, and all the way around.


6. Find a strand of paper right in the middle of the tube and give it a gentle tug, to pull it up a little. Don't pull too hard though, as you don't want the inside to pop out completely. (This part reminds me of making palm trees from newspaper tubes, do you ever remember doing that?) Splay out the paper strands a little by pressing down lightly with your hand. This makes it look a bit more splashy!


7. Use something like nail scissors* to make a hole for the spray on top of your whale. (Keep the scissors closed, press down and twist from side to side) Then cut a cross that's a little bigger than the width of your paper tube, and push through the card with your finger. Brush a little glue in the hole and push the spray into it.


8. If you'd like to make some waves, squirt some blue, green and white paint onto a plate or palette and use a big brush to mix and swirl the colours together - this is great fun and looks really effective.


Cut some wavy lines and fold each piece roughly in half to prop them up.


There are all kinds of things you could put inside your whale. We made some little pine cone fish and painted them lots of bright colours. You could use them to help your little ones learn colours, or help with counting.