

Who'd have thought cardboard tubes would be so handy for mini-furniture?
We've already used them to make chairs, sofas, a washing machine and an oven... and now a little French style bedside table, inspired by one I bought at a flea market a few weeks ago.Once again you'll need to squash your tube to make a square shape.
Cardboard tubes come in lots of different sizes. The one we used here was quite narrow, so our little table is too, but any size will do.
You will need:
Cardboard tube (TP roll or kitchen tube)
Pencil and ruler
Scissors
Black pen
Paint (optional)
Glue
1. Start by squashing your tube flat with your hand and then press firmly alone the two creases.

2. Line these two creases up, in the middle..

... and then squash your tube flat again, making two more creases. Press firmly along these ones too.

You'll now have a square shape with four evenly spaced corner edges. This is the base for most of our furniture ideas.

3. With the tube flat, draw a line across the card - this will be the height of your table, so base it on how tall you need it to be. Ours is 6cm/2¼in. We have used a black pen for the lines, so you can see them clearly, but use a pencil, so you can rub the lines out later if you want to.

Continue this line around the rest of the flattened tube.

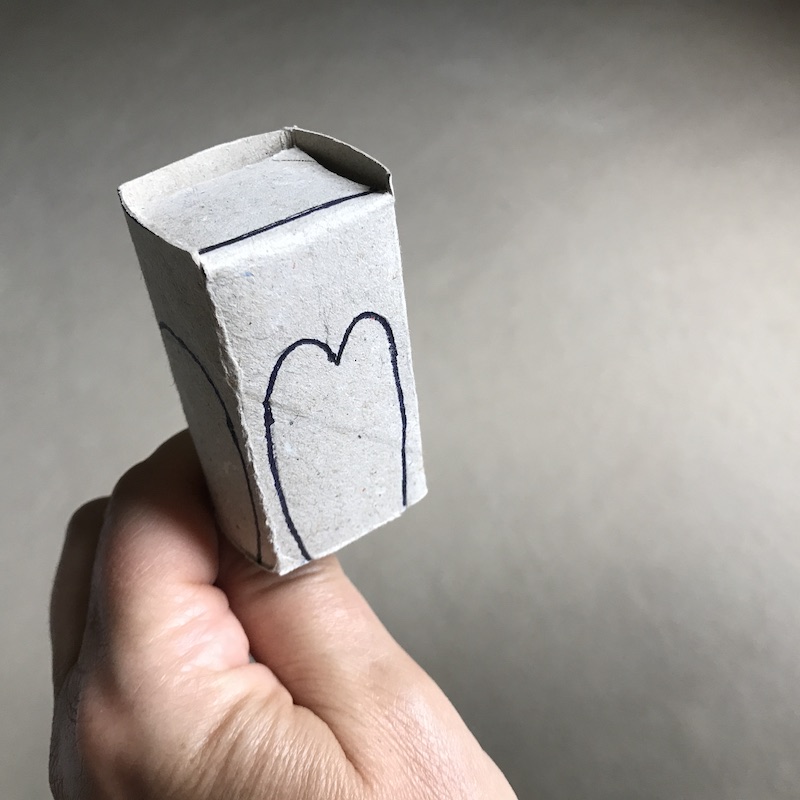
4. Select which side you want to be the table front, and draw the shape of the legs, leaving some space for the drawers on top. Our shape is basically a curvy 'M'! Change the design if you want to - we've made the legs flair out a bit at the bottom. Draw in the other table sides too (ours look like arches), using the first drawing as a guide for the height.
(See TIP below for some other ideas)


Push back into shape, after pressing firmly along the four crease lines again.

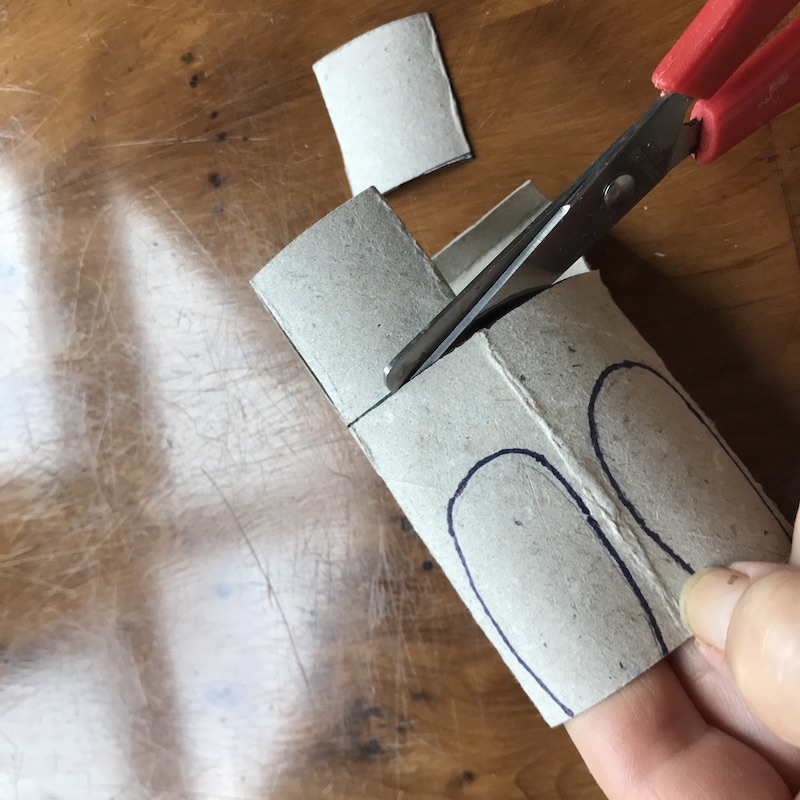
5. Cut down the two front corner edges to JUST PAST the line for the top of your table (see pic below - this will give you a little raised edge around the other sides of the table top).
Then bend and fold the flap forward and press firmly along the crease.

6. Now bend it the other way, towards the back of the table and pinch along the crease again.
Where the flap touches the card at the back, fold it, to make a tab you can tuck in at the back (this can involve a bit of trial and error - you're basically looking for the top of the table to be nice and flat)


Press along the tab fold and then slot into place at the back (you're basically making a little box)

7. Cut down the other two corners, just to the line this time, and then remove the three flaps by cutting along the line.
This makes the little raised edge around the top of the table.
8. Take the tab out again to add any detail like the drawers or to colour it in with felt tip pens.

9. Cut out the space between the legs - this can be fiddly, so best to keep the shapes simple. (See TIP below)

10. Brush some glue on the tab and use a clothes peg or paper clip to hold the card in place at the back of the table.
For an extra neat finish you could also brush some glue down the sides of the table top, before slotting the gluey tab into place. We then put our little table on its side and balanced something with a little weight on top (my phone..) until the glue had set. A glue gun would probably be a lot simpler, but I don't have one!

Once the glue is dry you could paint it - just don't overload the table with paint or it will get very soggy, and be careful with the legs. When it's dry, add any detail with the back pen.

TIP: If you're crafting with little ones and cutting around the legs is a bit too fiddly, then leave out that step - you could colour in the legs and table top with felt tips which would look great. Or, design a different style of bedside table instead, with no legs, and stick with the original box shape. Maybe draw on a cupboard door and a drawer, or something along those lines. There are all kinds of possibilities!