

This project was inspired by an Eric Carle Instagram craft challenge - they're so great for coming up with new ideas! It's a very simple project - younger makers will need some help with the folding and cutting. I've laid out a simplified pattern for Eric Carle's butterfly, but feel free to design your own butterfly!
You will need:
A4 sheet of plain paper
Paints
Two pipe cleaners
Small plastic bottle and cut up pieces of newspaper for the Cocoon
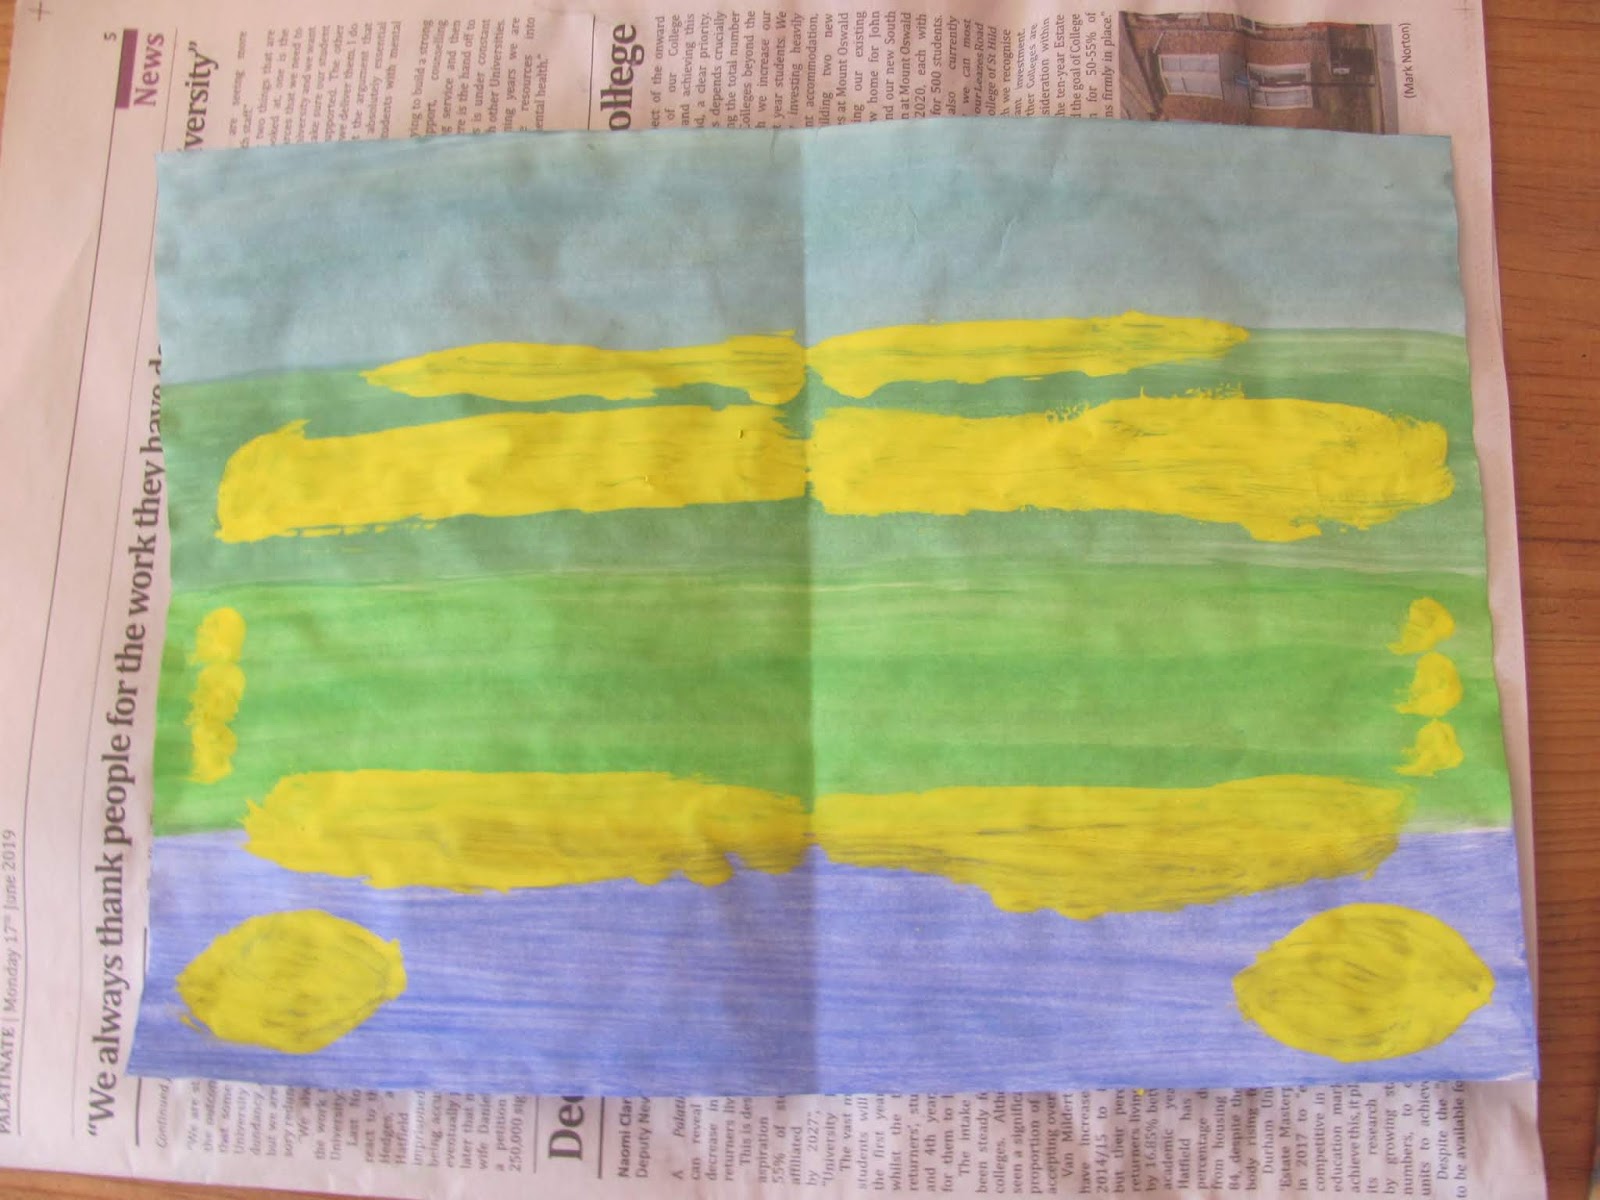
1. First, fold your piece of paper in half lengthways, then fold each half into the middle, open up and you should have four evenly spaced creases.

2. For our Eric Carle inspired butterfly, we used the creases as a guide to paint a purple, then green, then greeny-blue, followed by a blue stripe. We used poster paints and watered them down so they were more of a wash, and went on quickly with a big brush. (I often use a pastry brush, great for painting bigger areas quickly)
We painted the back the same way too, but this really is optional.


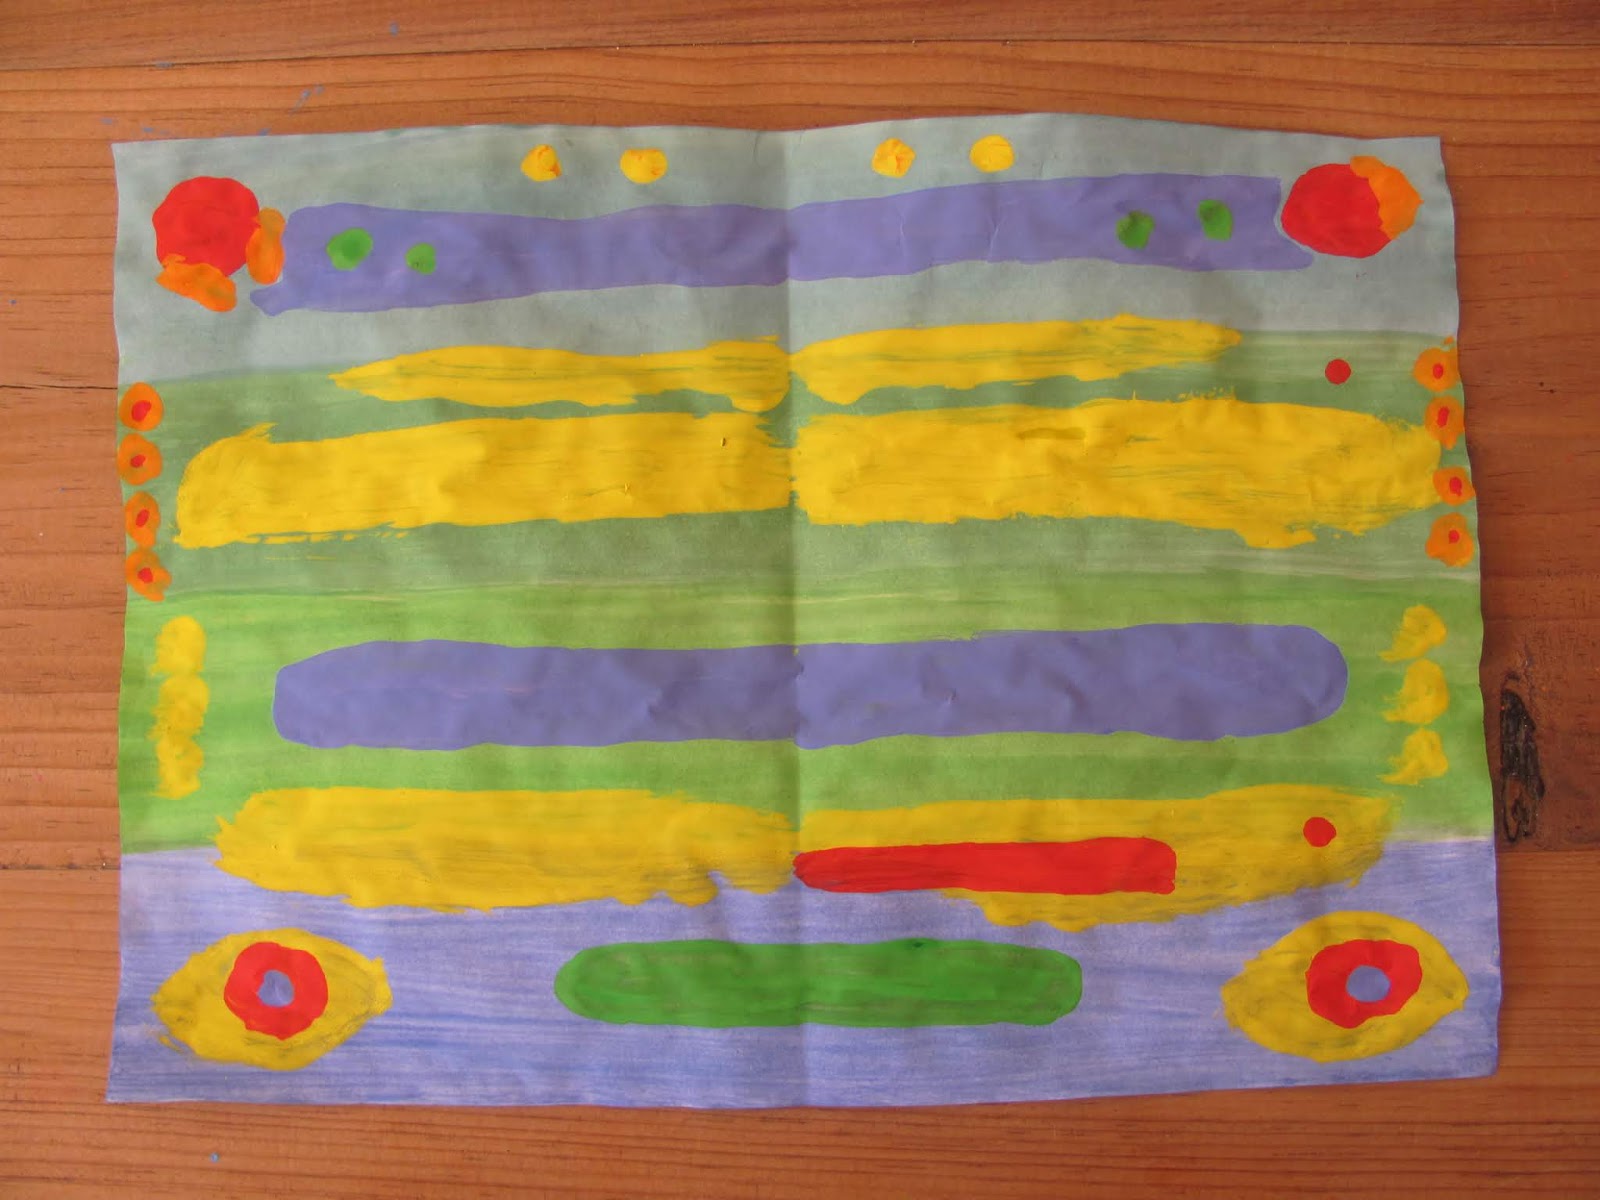
3. Once dry, fold the piece of paper in half the other way, so you can clearly see the middle of your butterfly.
We then used thick yellow poster paint to splodge on two round shapes at either end of the purple stripe, and yellow lines between the purple and green, the blue and greeny-blue stripe, and a thick one across the middle of the greeny-blue stripe. Then three dots on either edge of the green stripe.
4. We added a few dots at the top of the blue stripe, then mixed a little red into the yellow for some orange dots on either edge of the greeny-blue stripe.


6. Then thick purple lines in the middle of the green and the blue stripes, plus purple dots in the bottom circles. Last but not least a short green line in the middle of the purple stripe and some green dots at either end of the top purple line.
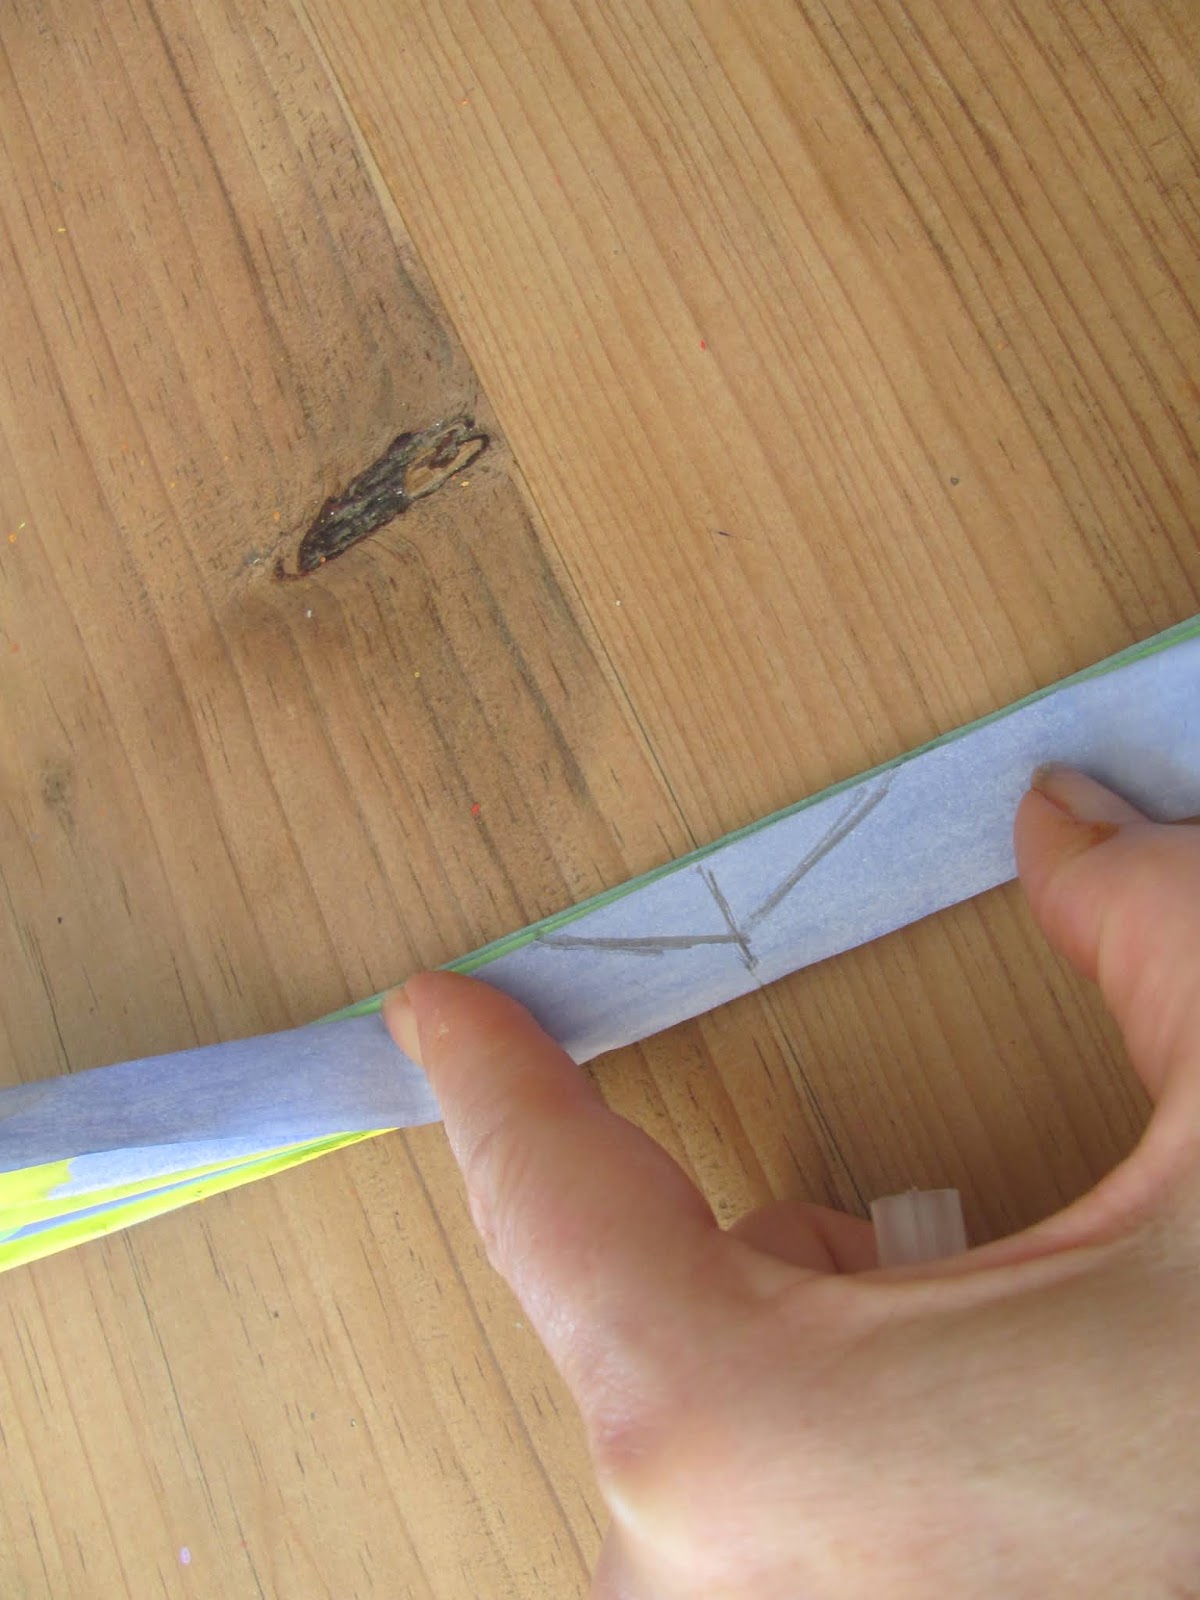
7. When dry, start folding or pleating your piece of painted paper longways, as if you're making a fan. If you're crafting with little ones, maybe make the pleats bigger, so they can be more involved with the folding.


8. In order for the pipe cleaner to be wrapped around the centre of your butterfly more easily, you need to cut a triangle from the middle of your fan - making sure you don't cut all the way through! Aim for a small triangle that's at least half the width of your folds. Make sure you cut it on the non-decorated side too.
Cutting through the paper fan can be hard, so best done by an adult.


9. Pipe cleaner time! We made some antennae with a piece of black pipe cleaner and then used a whole yellow one and made a hook shape at one end (the length we wanted our butterfly's body to be).

10. Hook it over the antennae, then hook the whole thing over the centre of your butterfly wings.


11. Start wrapping the rest of the pipe cleaner tightly around the body, and then over and around the wings to secure them. Wrap the remaining part of the pipe cleaner around the head part, so the antennae are secure too.


12. We wrapped a small piece of red pipe cleaner around the top part to keep our butterfly looking as EC as possible, but this is totally up to you. Dot on eyes with a black marker pen.


Cut up some newspaper, water down some PVA (craft) glue, soak the paper pieces in the watery glue and cover the bottle in papier mache. Messy but fun! It really doesn't need to be neat.
14. Once dry, paint it brown, orange and yellow stripes. Have the colours on one plate and let them mix together a bit, so you get a mix of colours in the stripes, and they meld into each other.


