I love a tree decoration, we are coming down with them! Every year I'm surprised by the sheer number of baubles and ornaments that come out of the Christmas box, but there's always room for more don't you think??
Lovely Trixi from @sewasoftie has organised a festive Sew a Softie this Christmas and I'm so happy to be joining in. She's on a mission to get kids and parents sewing, and Instagram has been festooned with fabulous easy projects, to try to tempt those who haven't tried before to give it a go.
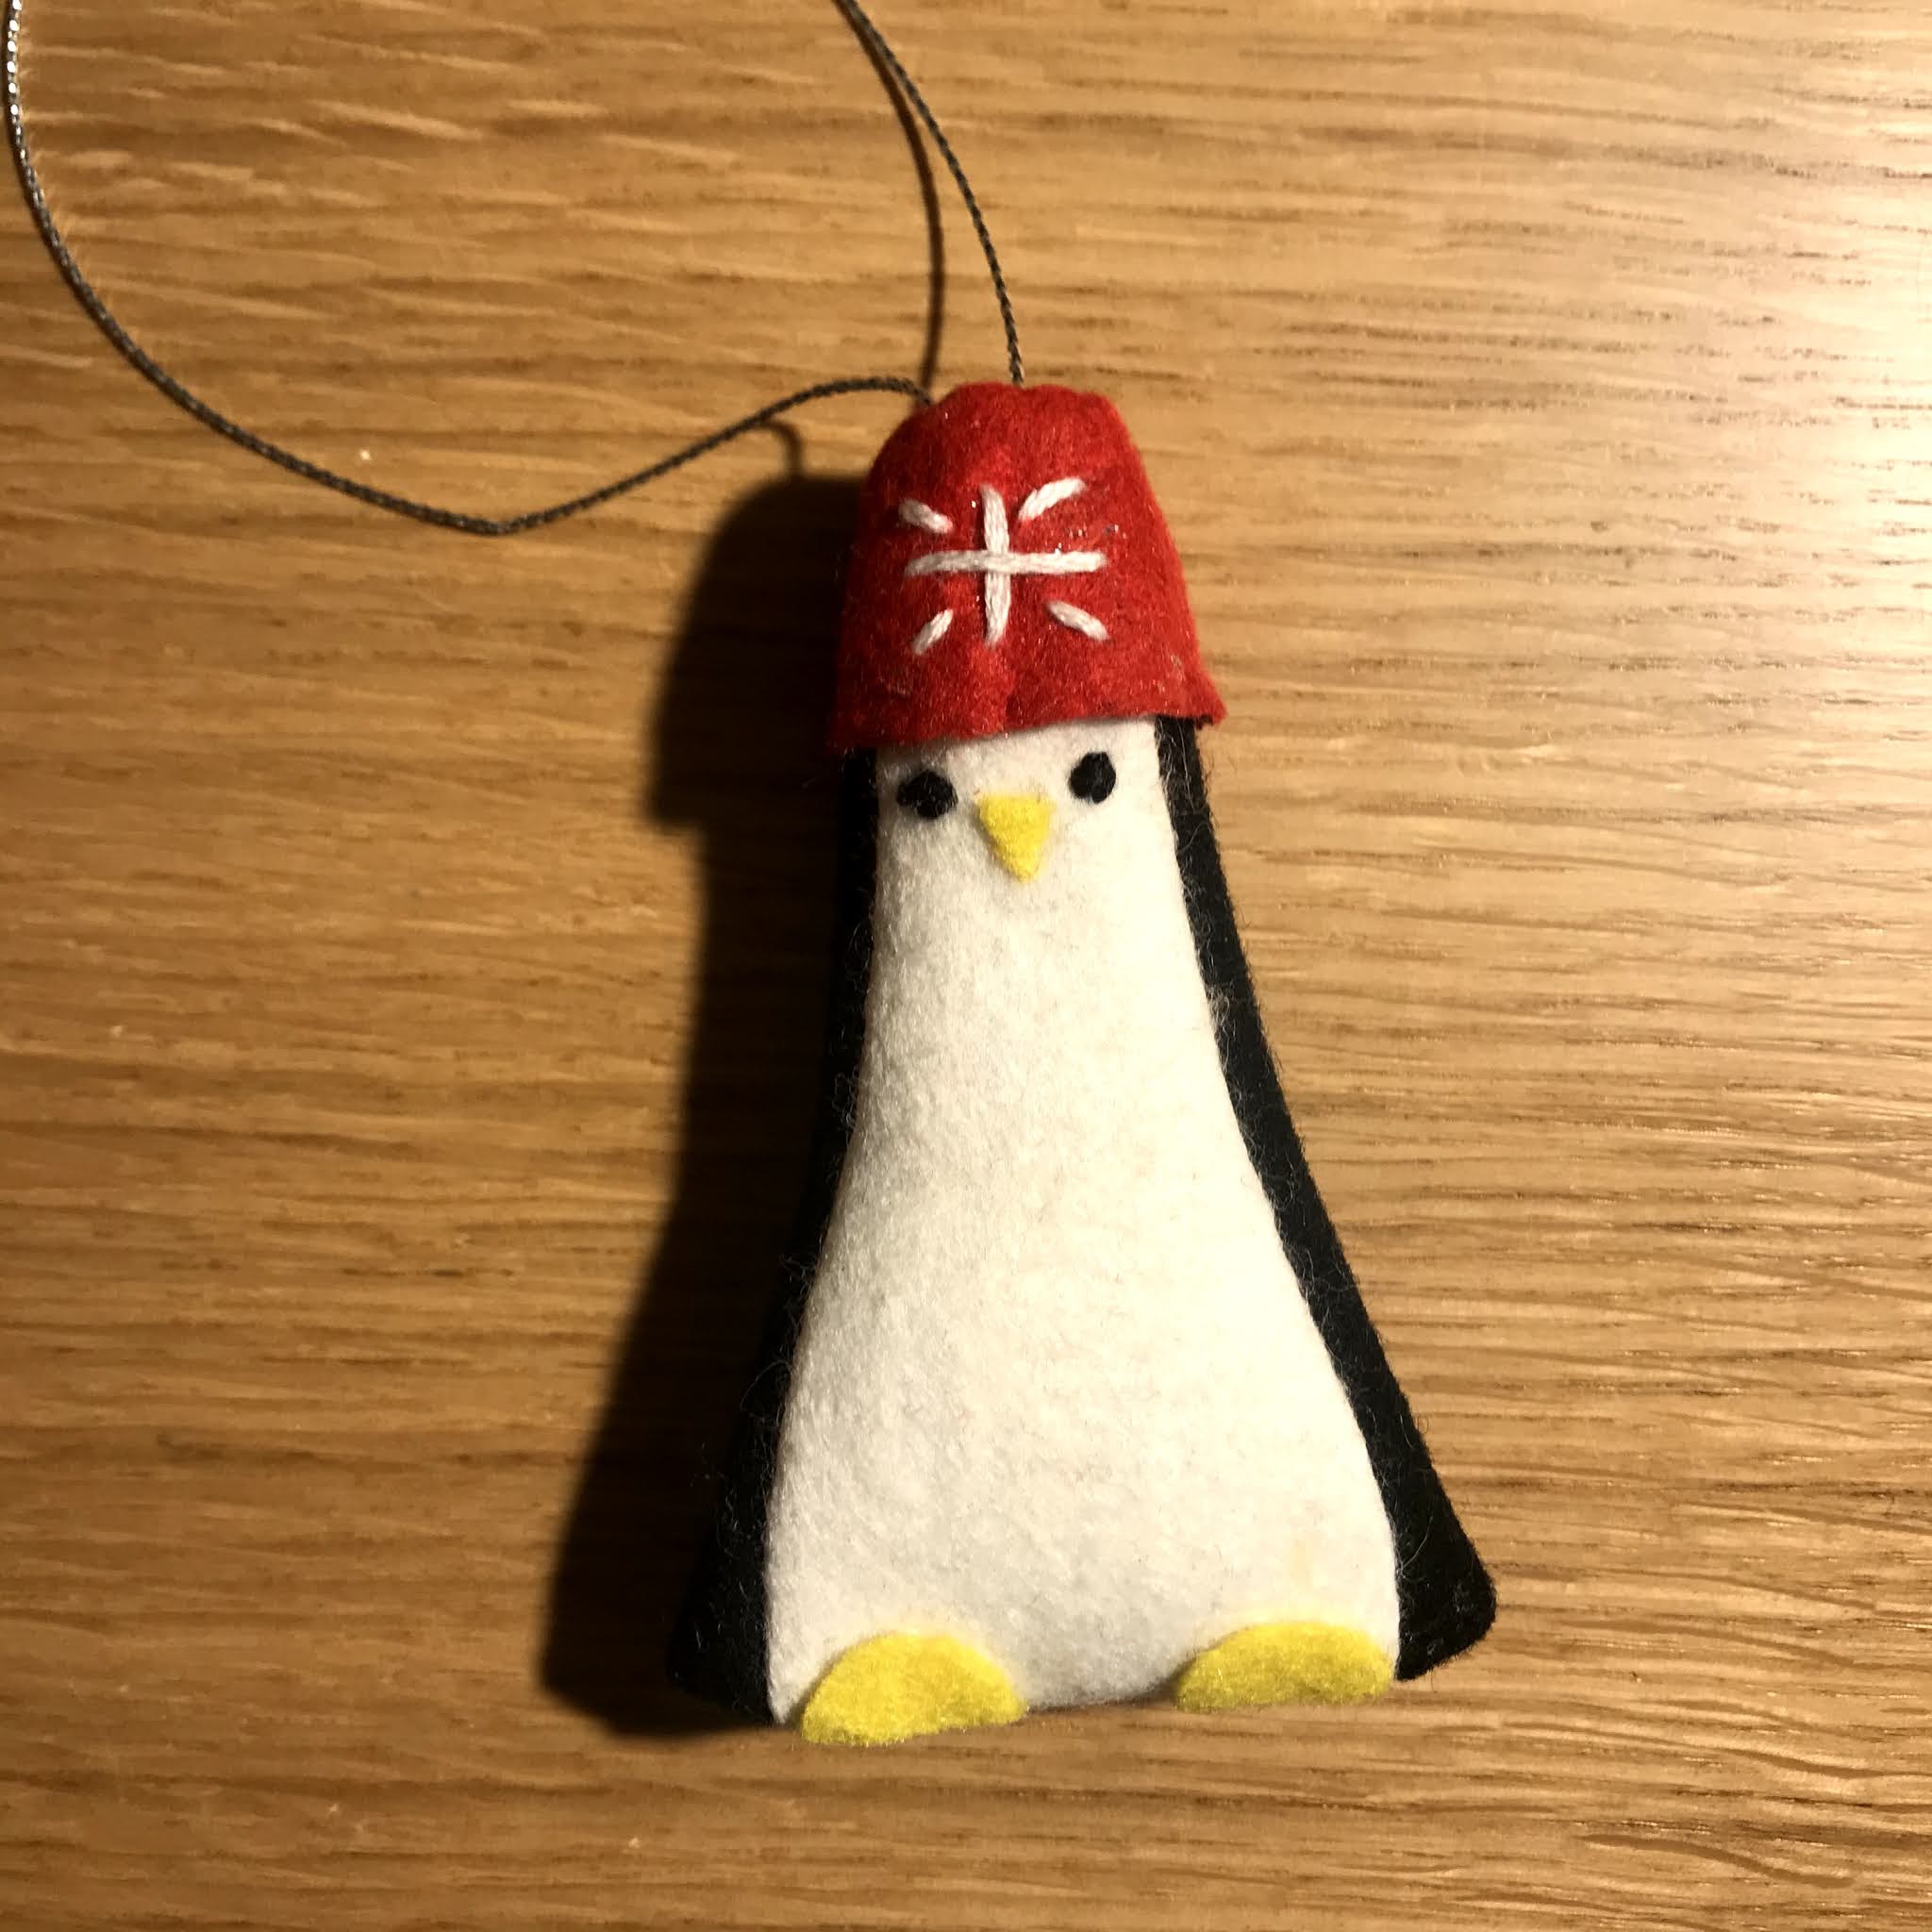
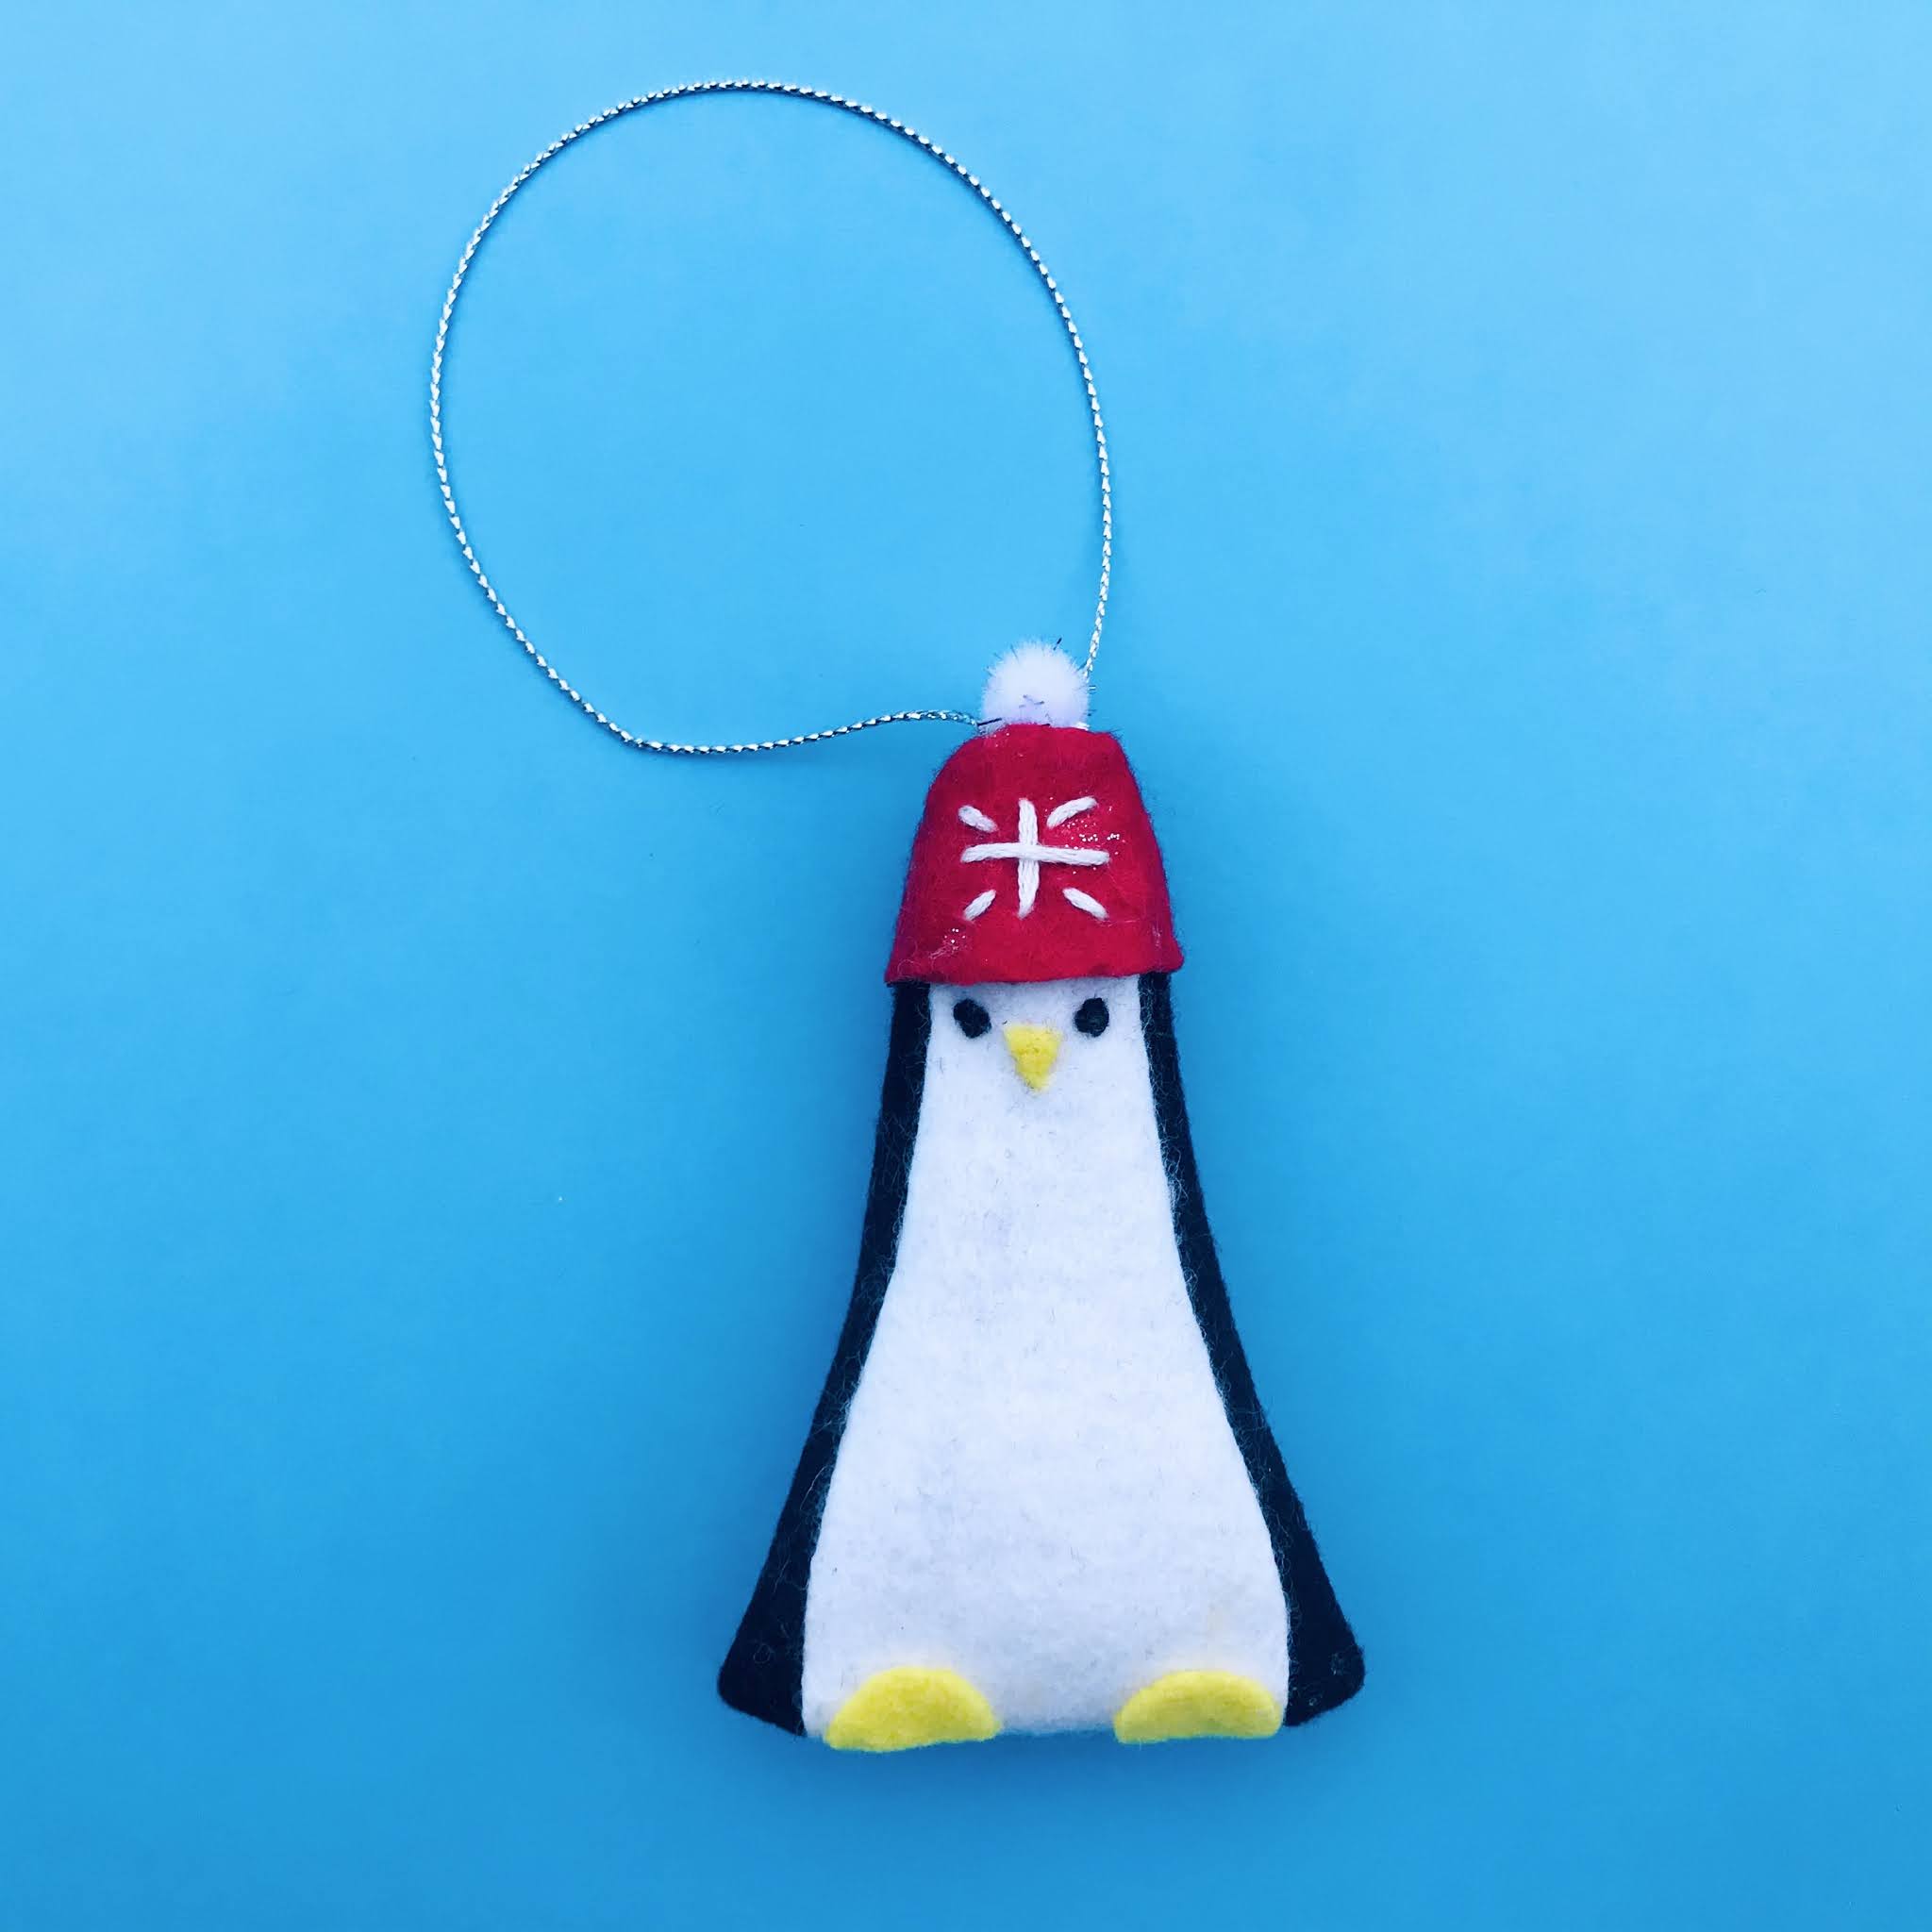
This penguin is quite small, but the sewing is straightforward - help needed with pinning the bottom of the penguin and turning it inside-out.
You will need:
Black felt
White felt
Yellow felt (for feet and beak)
Coloured felt (for hat)
Stuffing
Embroidery thread or thin yarn
Fabric glue
Craft pompoms (optional)
String or yarn
1. First of all, cut out the three pieces from the pattern you'll find HERE. Pin to the felt, and carefully cut around the shapes.
Line up an edge of the white felt with one edge of the black felt. Pin, and on the white felt, draw a pencil line about 1/2-1cm (1/4in.) in from the edge, to help as a guide for sewing. Thread your needle (we used black thread because it was easier to see), and start sewing about 1/2cm (1/4in.) along from the start of the pencil line. You could do running stitch, but back stitch makes a stronger, less visible seam, and the penguin is quite small, so doesn't take too long to do. Finish sewing and fasten off about 1/2cm before the end of the pencil line.

2. Take the pins out and line the other edge of the white felt with the edge of the black felt. Pin again and draw another sewing guideline in pencil. Mirror what you did on the other side with the sewing.
3. Now the slightly more tricky part - you want the white front piece to be right in the middle, so there's a small fold of black either side, roughly the same size. When it looks right, open the seams near the bottom and flatten and pin.
Draw a line across again if you want, about 1/2cm/1cm from the edge, and carefully sew across the bottom of your penguin.
4. Trim the bottom a little before turning inside-out. This can be fiddly, but using the handle of a wooden spoon works well. Press the bottom seam on the end of the handle, and carefully pull and feed the rest of the penguin body down, over the handle end, until it's the right way around. Use your pencil to push out the corners.
5. You only need a very small amount of stuffing, your penguin should be more flat than round - use the pencil to push the stuffing down to the bottom corners.
6. For the hat, fold the felt piece in half and sew up the side seam (use a pencil line as a guide again, if you want). This time, make a starting stitch that loops over the bottom edge, so there's no gap, and fasten off about 1/2cm from the top.
7. With the same thread and needle, do running stitch around the top of the hat, about 1/2cm or so from the top edge. Pull it tight and fasten off.
8. Turn the hat round the right way. We embroidered a simple snowflake shape on the front of the hat, but you could also glue on something sparkly, like a sequin, or just leave it plain.
9. Thread a needle with the string or yarn you're using to hang up your little penguin decoration, and push it through the top of the hat from underneath, and then loop it back down again. Take the needle off, bring the ends of the string together and tie a knot. Pull the knot up, inside the hat.
10. Check the hat fits on the penguin's head - you might need to trim the black and white felt a little. When you're happy, glue on. We found the easiest way was to brush glue inside the top part of the hat - just don't get it too near the bottom edge, you don't any glue bits to be visible on the penguin.
11. Use black embroidery thread or thin black yarn to sew on eyes. Use French knots or make a few small stitches on top of each other.
Cut out a small triangle for a beak from yellow felt and two small semi-circles for feet. Use only a tiny dot of glue on the beak to glue it right under the eyes, and only a thin layer on the feet too.
If you have any among your craft supplies, glue a little pompom on top of the hat.