17.5.13

A giraffe and a zebra roll up to the Zoo

I'm back on the cardboard animal trail - this time my mini maker asked for a zebra and a giraffe to add to the lions we've already made for our zoo. The challenge really was to come with suitable animal legs, that wouldn't drop out or fall off.. and I think I've cracked it...


All you'll need is:
3 toilet paper tubes
cereal box card
newspaper
paint
a black felt tip pen
PVA craft glue
ruler
general purpose scissors
straight-edged nail scissors or similar
(adult help/supervision with cutting)

Cut one of the tubes in half lengthways then use the ruler to measure and cut 4 long strips, each about 3cm/1" wide. Fold them in half lengthways to make the legs.


Shorten the other tubes by a few cms, so they're about 8cm/3" long.

Hold the ruler along the length of one of the tubes and use a pencil to mark two, 2cm/0.75" lines about 1cm/0.5" in from each end of the tube. Repeat this 3cm/1" further on round the tube so the leg slots line up.


With the nail scissors, make a hole on a pencil line (keep them closed, press down and twist from side to side until the tip pierces through), then carefully snip along the slot, making sure it's wide enough for a leg strip. Do the same for the other slots. Wiggle the end of a spoon or fork in and out of opposite slots to make it easier to thread the leg piece through.


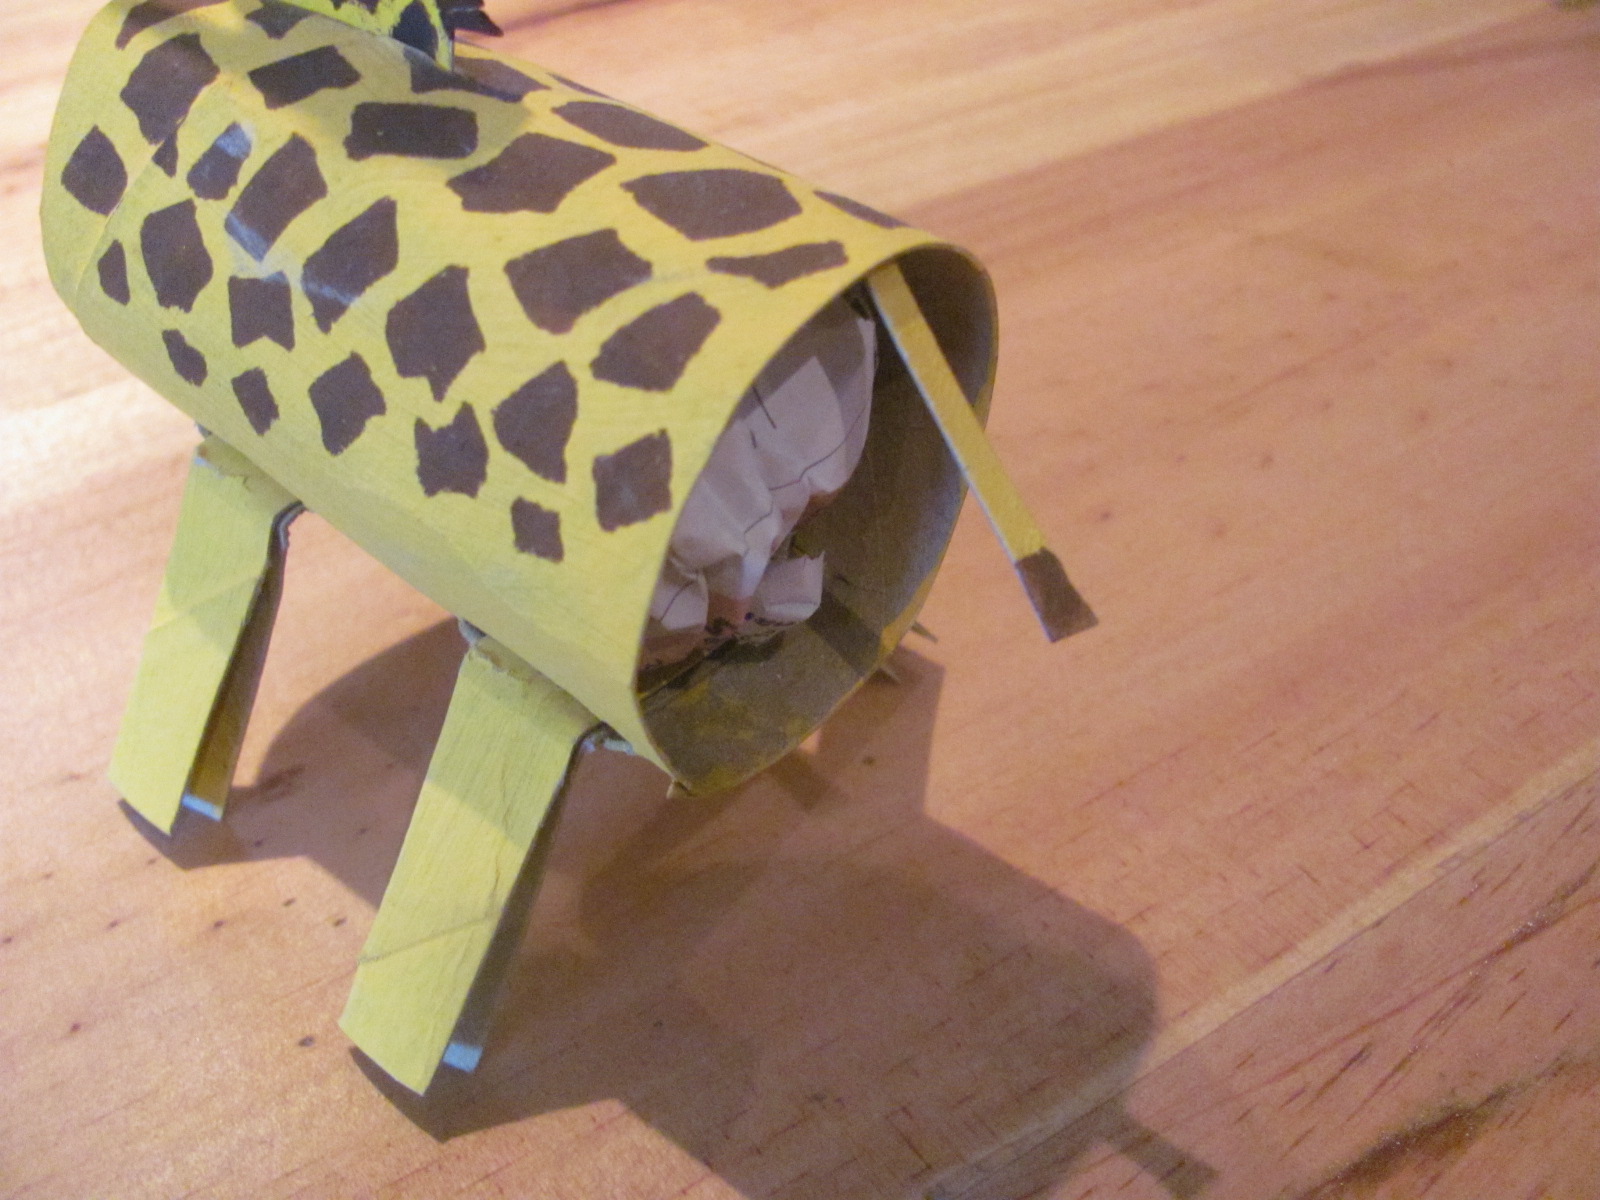
Once the legs are level, fold them inwards and snip until the body stands steady and you're happy with the leg length (keep the giraffe's legs nice and long).


Paint the giraffe body yellow and the other one white. Paint a piece of cereal box card yellow and another piece white too, for the heads and tails.

If you want both sides of your zebra or giraffe's head painted, either rub a piece of sandpaper over the shiny side of the cereal box card to remove the sheen, so the paint goes on better, or us a glue stick to stick a piece of plain paper over the shiny side and leave it under something heavy like a pile of books until it dries, then paint.

TIP: once the paint has soaked in a little on the bodies, leave them to dry upside down or on their sides in an egg box lid - rather than leaving them upright when the legs can end up drying in the splits position! This helps make the animals more sturdy.


When dry, draw a head shape for your zebra/giraffe on the painted cereal box card and remember to include a mane.

Add a tab a few cms long at the bottom of the neck (see picture) - this extra bit will slot into the tube body.


Use a pencil to draw outlines for stripes, manes and spots, then paint or colour in.

Use a black felt tip pen for eyes and nostrils.


Once dry, snip carefully along the mane with small scissors.


About a cm/0.25" in from one end of the body, cut a slot for the head (same technique as for the legs) and wiggle the scissors in and out a bit to make it easier to push the head tab through.


Scrunch up two small pieces of newspaper and push them in, either side of the head tab to hold it steady. Push another scrunched up piece in the other end to help your animal balance.


Cut a thin strip from the painted card for a tail (cut it a little longer than you need). Colour the tip black and stick the extra part just under the top of the tube at the back. Bend into place when dry.


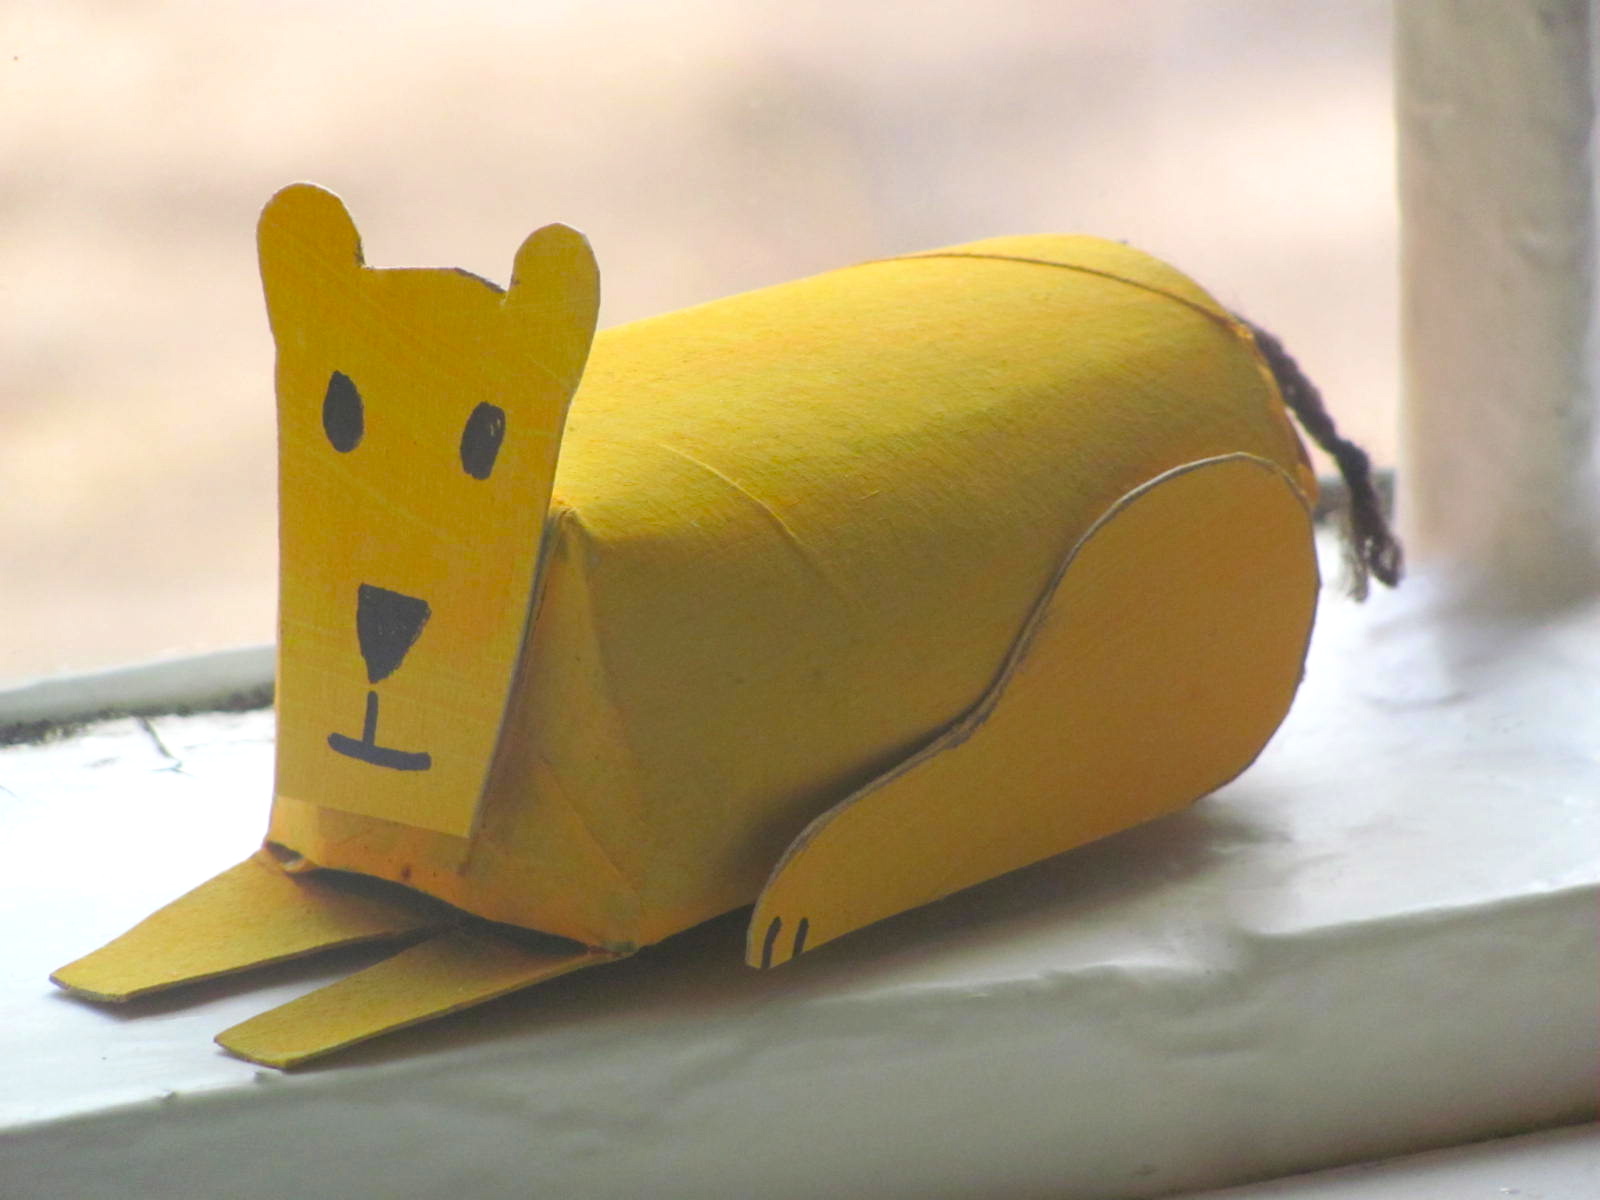
So our zoo so far....and we've added a rare white Bengal tiger, made like the lion, to pull in the crowds..
Next on the list, an elephant.


All these animals and more can be found in my book, 'Make Your Own Zoo'


6.5.13

When a crafty idea gets wheels

My other half smiled and rolled his eyes when I showed him what I'd made last week: he's pretty used to my random knits, so always good to know I can still surprise him!

It is funny sometimes the things that spark a crafty idea; this one came from seeing Wendy's gorgeous campervan bag, which got me thinking about our camper, Betty - and as I've been making quite a lot of woolly cake and the like, I thought I'd knit a Betty...


As with all my make-them-up-as-you-go-along projects, this looks totally different from the picture I had in my head.. For a start, the plan was to make it small enough so I could stuff it with lavender and dangle it from the rear view mirror - a bespoke/personalised van air freshener if you like; but it turned out bigger than expected, and would I think be a driving hazard...so I'm not sure!


Maybe a novelty lavender bag, or it could join the toy camper collection on the windowsill. OR perhaps I should stick with the original idea and put the mini Betty in Betty, just somewhere that doesn't block my view..

I don't think the knitted camper will be going into mass production...a bit on the fiddly side with all the detail, and I found it hard to get the shape right, but my newly acquired flat circle crochet skills came in handy for the wheels. Anyway it was fun to do, and what do you think? A dead ringer??..


Linking up with the ever so lovely Handmade Monday

2.5.13

The Gallery - Self Portrait


This is me, or how I see me: wife, mum... and after that it gets blurry, foggy, uncertain. I mumble the next bit. Feel I should say something else, but don't know what.
I used to be clear, sharp, confident; sure of me: then marriage, army life, kids...and the 'me bit' went fuzzy. Not a bad kind of fuzzy - still happy most of the time; still positive. Most of the time. Still smiling.
And I'm working on the haze. Just taking longer than I thought to find my focus again.


The Gallery theme this week is Self Portrait

1.5.13

Roll up to the Zoo!

If I had to pick a favourite crafty thing to do with the kids it would be making animals out of cardboard tubes. There are herds of them around the house which is probably a bit of a giveaway. Our production line started with cats, bats and owls, inspired by my trusty old 70's craft book - and there's no end of wonderful ideas on the web. It appears you can make just about anything out of a loo roll middle.
I've been squirrelling them away for months...Honestly, I've enough for a zoo...so that's exactly what we thought we'd do. A Zoo! The plan is to make an animal or two every week (hopefully!) using loo roll tubes and the odd cereal/egg box...

First off, lions. RAWR!

You'll need two tubes, part of a cereal packet, craft glue, paint and possibly a little bit of wool.

For the sitting lion, glue the top of the tube together and leave to dry - paperclips help with this bit. For the lying down lioness, draw 4 narrow triangles evenly spaced around one end. They don't need to be perfect..


.. mine were about 3cm long with a 1cm base. Cut out the triangles, then fold two opposite tabs inwards, and fold and glue one of the other tabs over the top of them.
The tab that's left is the front paws and just needs a snip out of the middle to make it look paw-like.
Worth squashing the tube down a little at this stage to flatten the bottom, so it doesn't roll about.
I also cut the corners off the sitting lion, but it's fine to leave them.


Painting time next, and splosh some on part of a cereal box as well as the tubes.


A ball of newspaper in the end of the lying down lioness rounds things off, but miss this bit out if you want.

When it's nice and dry use a cup or something handy to draw a circle, with a smaller circle inside (bottom of a vitamin bottle was perfect for this) You'll also need to draw two front paws, a lioness head and her hind legs, which look a bit like chicken drumsticks.
Paint or colour-in the outer circle of the lion's mane..


Cut everything out, then get mane snipping. Great scissor practice! My daughter loved this bit.


Glue everything in place - you could cut out a paper tail too, but we used a piece of wool - knot near the end and fray the bottom bit.


Just lose the mane, draw or paint on some lines, and you've got a tiger ...or spots for a leopard.

Anyway, it's a start! My mini-maker has asked for a zebra next time...

UPDATE: Our Zoo is expanding! So thought I'd add instructions for a zebra and a giraffe,  an elephant, a hippo and a rhino, penguins, turtles, monkeys...

Linking up with Kids Get Crafty

10.4.13

The Gallery - Happy!


I have more meaningful happy photos: places, occasions, memories; but couldn't resist this one of my daughter taking a big old bite out of Hello Kitty.

You just know she's happy - blissed out on cat shaped chocolate.

Food and happiness - so tightly wrapped together, especially when the food's sweet!

I'd have gone for the ears first too.
Isn't it always the ears?


Linking up with The Gallery 
 the theme this week is Happy

3.4.13

Bumbling along together - The Gallery


I love this picture of my daughter with her little ballet pals all colouring away, like busy bees around a honey pot.
The girls were waiting to dance in their annual performance - and what a performance it was: over a hundred children happily bouncing about in their colourful costumes: I've already posted a photo of the bumble bees about to buzz on stage.

As it was such a big show, there was a fair amount of hanging around, and just a handful of parents to keep the kids entertained. All I can say is thank goodness for a colouring-in book and a pencil case full of felt-tips. It may be classic stereotyping, but it did the trick. For a fleeting moment I remember thinking about my boys, and wondering what we'd have done to keep a gang of 4/5 year old lads quiet for a whole hour.

Seeing her with her friends also reminds me of a chat I had with the 8 year old in the car the other day. He told me he was going to ask his best mate for some money so he could buy a much-longed for computer game - I told him he really couldn't do that.
'Why not?'
'Well, you can't just ask for money, it's not very nice, and that's how you lose friends.'
All of a sudden my daughter piped up from the back,
'I'm never EVER going to lose any friends mummy,
and if I do I've got some spare ones.'

May she always have a case full of colours and plenty of spare friends..


Linking up with The Gallery - the theme is 'Together'
Apologies for the lack of commenting this week - we're away, and no
internet!