1.5.13

Roll up to the Zoo!

If I had to pick a favourite crafty thing to do with the kids it would be making animals out of cardboard tubes. There are herds of them around the house which is probably a bit of a giveaway. Our production line started with cats, bats and owls, inspired by my trusty old 70's craft book - and there's no end of wonderful ideas on the web. It appears you can make just about anything out of a loo roll middle.
I've been squirrelling them away for months...Honestly, I've enough for a zoo...so that's exactly what we thought we'd do. A Zoo! The plan is to make an animal or two every week (hopefully!) using loo roll tubes and the odd cereal/egg box...

First off, lions. RAWR!

You'll need two tubes, part of a cereal packet, craft glue, paint and possibly a little bit of wool.

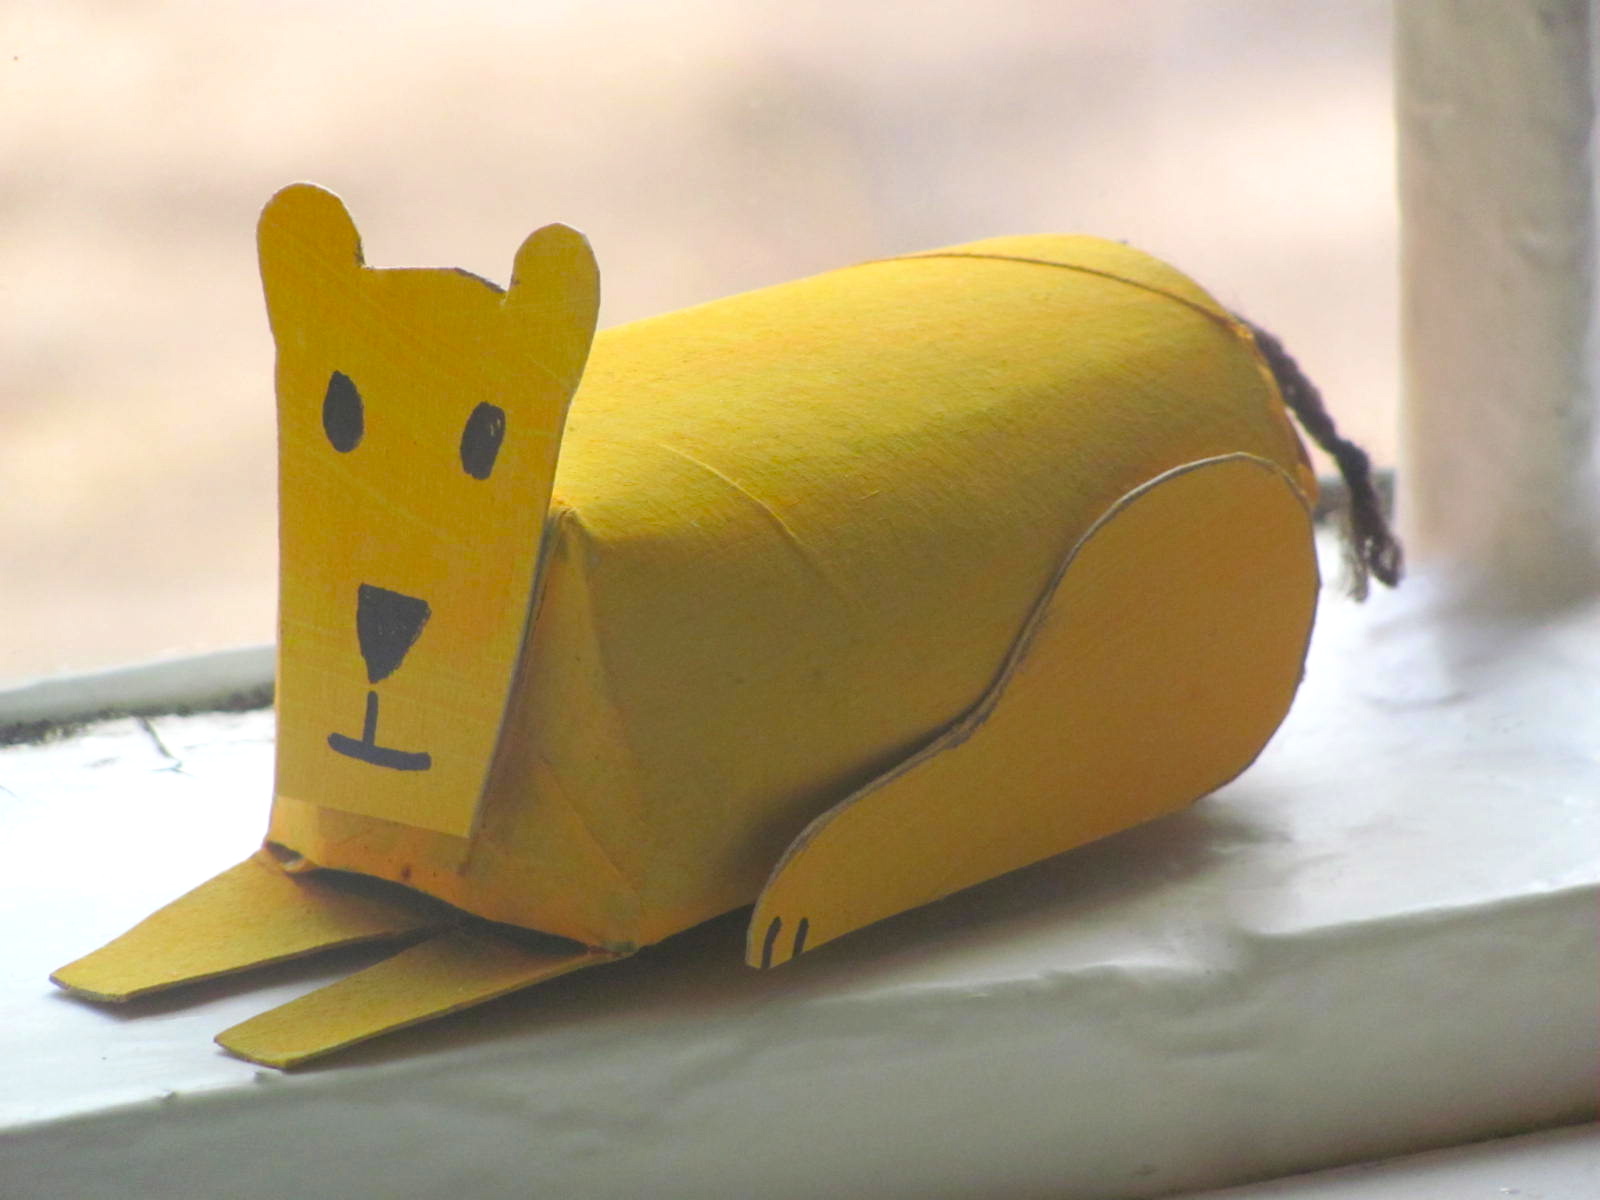
For the sitting lion, glue the top of the tube together and leave to dry - paperclips help with this bit. For the lying down lioness, draw 4 narrow triangles evenly spaced around one end. They don't need to be perfect..


.. mine were about 3cm long with a 1cm base. Cut out the triangles, then fold two opposite tabs inwards, and fold and glue one of the other tabs over the top of them.
The tab that's left is the front paws and just needs a snip out of the middle to make it look paw-like.
Worth squashing the tube down a little at this stage to flatten the bottom, so it doesn't roll about.
I also cut the corners off the sitting lion, but it's fine to leave them.


Painting time next, and splosh some on part of a cereal box as well as the tubes.


A ball of newspaper in the end of the lying down lioness rounds things off, but miss this bit out if you want.

When it's nice and dry use a cup or something handy to draw a circle, with a smaller circle inside (bottom of a vitamin bottle was perfect for this) You'll also need to draw two front paws, a lioness head and her hind legs, which look a bit like chicken drumsticks.
Paint or colour-in the outer circle of the lion's mane..


Cut everything out, then get mane snipping. Great scissor practice! My daughter loved this bit.


Glue everything in place - you could cut out a paper tail too, but we used a piece of wool - knot near the end and fray the bottom bit.


Just lose the mane, draw or paint on some lines, and you've got a tiger ...or spots for a leopard.

Anyway, it's a start! My mini-maker has asked for a zebra next time...

UPDATE: Our Zoo is expanding! So thought I'd add instructions for a zebra and a giraffe,  an elephant, a hippo and a rhino, penguins, turtles, monkeys...

Linking up with Kids Get Crafty

10.4.13

The Gallery - Happy!


I have more meaningful happy photos: places, occasions, memories; but couldn't resist this one of my daughter taking a big old bite out of Hello Kitty.

You just know she's happy - blissed out on cat shaped chocolate.

Food and happiness - so tightly wrapped together, especially when the food's sweet!

I'd have gone for the ears first too.
Isn't it always the ears?


Linking up with The Gallery 
 the theme this week is Happy

3.4.13

Bumbling along together - The Gallery


I love this picture of my daughter with her little ballet pals all colouring away, like busy bees around a honey pot.
The girls were waiting to dance in their annual performance - and what a performance it was: over a hundred children happily bouncing about in their colourful costumes: I've already posted a photo of the bumble bees about to buzz on stage.

As it was such a big show, there was a fair amount of hanging around, and just a handful of parents to keep the kids entertained. All I can say is thank goodness for a colouring-in book and a pencil case full of felt-tips. It may be classic stereotyping, but it did the trick. For a fleeting moment I remember thinking about my boys, and wondering what we'd have done to keep a gang of 4/5 year old lads quiet for a whole hour.

Seeing her with her friends also reminds me of a chat I had with the 8 year old in the car the other day. He told me he was going to ask his best mate for some money so he could buy a much-longed for computer game - I told him he really couldn't do that.
'Why not?'
'Well, you can't just ask for money, it's not very nice, and that's how you lose friends.'
All of a sudden my daughter piped up from the back,
'I'm never EVER going to lose any friends mummy,
and if I do I've got some spare ones.'

May she always have a case full of colours and plenty of spare friends..


Linking up with The Gallery - the theme is 'Together'
Apologies for the lack of commenting this week - we're away, and no
internet!  

29.3.13

Shiny Happy Easter Craft

One of my most popular craft ideas ever, because it involved eating a bag of these..


Obviously there'll be mountains of them being munched over the weekend, so thought I'd post this now in case you fancy a go, and want to salvage some foil before it gets ripped to shreds and ends up in the bin...or sprinkled about the place like tiny shiny bits of confetti that you'll be hoovering up for weeks..


The trickiest bit is getting the foil wrapping off in one piece..or even two. Then you just need to decide what to decorate. We went for a butterfly and a dragonfly. I drew half the shape on a folded piece of cereal packet - cut out and open up.
.

We flattened our bits of foil and cut them into strips and squares. A glue stick worked best - the foil can be fiddly and sticks to fingers with over enthusiastic gluing!
My daughter spread some on the cardboard first before sticking down the pieces she wanted for her foil decoupage.


Very impressed how she mirrored the pattern on the wings.

It really doesn't matter if bits hand over the edge because they can be tucked neatly around the back.


Turns out we needed more coloured foil than I bargained for, so had to break into another Easter egg... shucks hey? I think this is what you call craft with benefits.

Please excuse blatant advertising! We used every decent sized scrap we had..


A pipe cleaner taped to the back makes good butterfly antennae and we added a few more shiny bits.
You could make smaller ones and attach them to plant sticks - they'd look good fluttering above a herb pot.

I think there's a very strong chance we'll be making more next week!

Hope you have a lovely Easter.


Linking up with Red Ted Art's Kids Get Crafty and For the Kids Friday

27.3.13

Life changing walks - The Gallery

I used to be a reluctant walker. Never keen to go out anywhere. I remember when I was about 11 refusing point blank to join a family walk in Tollymore Forest Park, and sitting by the car for what felt like hours until they got back. On my own. Wouldn't happen now would it. Anyway, my lack of enthusiasm for moving any further than I had to, stayed with me well into my 20's. Then in my early 30's things started to unravel: love, work, friendships; and just as I was descending into the depths of despair, an opportunity arose to travel in South America. My family pushed me to go, and I'm so glad they did.
There was a lot of trekking: I walked my little legs off, and I can clearly remember one moment, along the Inca Trail in Peru, when I properly took in the beauty around me and felt truly happy for the first time in ages.
Hey thinny! Highest point on the Inca trail

bleak beauty of the Mournes
The clouds of self-pity started to lift, and by the time I got home I was stronger, more positive and a born again walker.

Things began slotting back into place in my life, and I went walking most weekends; usually in the Mournes and usually on my own.
Then I met a wonderful man who also liked to walk - and one glorious day, after a steady climb up Rocky Mountain, I was getting our picnic ready - goats cheese quiche; never forget food  - and turned round to find him on bended knee, holding a beautiful ring.
A perfect, magical moment; it really felt like we were on the top of the world, in this amazing, wild, empty space - the only people for miles...when out of nowhere we heard a voice,

'Did she say yes?' 

Three young lads appeared on the other side of the peak. Couldn't believe it. We hadn't seen a soul all day. What were the chances?

'Yes, she said YES!'

Makes me smile thinking about it - and there've been a few jokes over the years about his choice of mountain for the proposal..

I walked on air that day.


Linking up with The Gallery - the theme this week is Walks

22.3.13

Easter Surprise! Easy egg box craft

I'm becoming a serious rubbish hoarder. I've a drawer stuffed full of loo roll middles and swiped party napkins, and one of the work surface walls is made of empty cereal and egg boxes with yogurt pot turrets.. But this wall is coming down slowly, because with Easter on its way, egg boxes are the rubbish of choice at the moment! They're so handy for all kinds of craft, and there are some brilliant ideas around. If you haven't already, do take a look at these 10 egg carton crafts on Red Ted Art's blog. We had a go at some of them, then got on a bit of a roll, and came up with our own idea.
An Easter egg shaped box..

little egg shaped box

They're easy to make; a few fiddly bits that need grown up help, but plenty for the kids to do.

You'll need an egg carton, tin foil, craft glue, leftover braid or coloured paper strips, and felt/sequin decorations, or any small, colourful bits.

Cut out the 6 egg holders. I usually do this with small nail scissors, or I cut them out roughly and let my 5 year old do it - but this can mean we end up with teeny tiny cups!

Scrunch up a small piece of tin foil, but not too tight - these are going to form the rounded top of your egg. Glue to the bottom of a cup, and mould until you're happy with the shape.


Then just cut out or rip pieces of tin foil, big enough to cover each part of your egg separately, and wrap tightly, folding the extra foil underneath.


I glued lovely bits of braid around the edge of the top part of our little egg box, while my daughter did some decorating. The braid needs to hang just below the edge, so it fits over the bottom part and covers the join. Well, kind of covers the join!  The sticking takes a little patience - paper clips help so it dries in place, but you could speed things up by using coloured paper strips instead of the braid.


Coloured foil would be great for a bit of variety, but we didn't have any...apart from what was on my stockpile of Easter chocolate..

creme egg eaten in the interests of craft...
There weren't many small yellow pompoms either, so we ended up making exotic chicks! Might need their feathers trimmed so I can fit in a mini egg or two..


exotic Easter chicks

Linking up with Red Ted Art's Kids Get Crafty 
and For the Kids Friday over at Sun Scholars.