4.2.13

Decoupage - comic though not always funny..

My first attempt at decoupage wasn't a great success. I tried to cover a wooden chair in colourful flower themed cutouts gathered from a large stack of old Gardeners' World magazines. It looked brilliant...in my head. And I ploughed on with the project, even when I'd pretty much accepted it was over-ambitious, and possibly not the best way to start my decoupage journey.  The finished piece looked like a badly wrapped comedy parcel - there was definitely a chair in there, somewhere...under the lumps, bumps and wrinkles.
It's long gone now, but inspired by some fantastic crafty blogs, my desire to decoupage seems to have been rekindled. And this time I started with something REALLY simple - so simple I wasn't even sure it counted as decoupage, but having looked up the meaning (decorating a surface with cutouts), it just about qualifies - I did a tiny bit of cutting.
The little table below probably looks familiar? I covered it with vintage domino cards picked up at a french street market. They fitted perfectly and give the top a kind of tile effect. I love the table. No one else is allowed to use it.


So, fired up and feeling a little more confident, I decided to decoupage a bedside table I'd got in a surprise BOGOF win at the auction.  Not the whole thing this time.


I painted it chalk white. Quite honestly it turned out whiter than I'd hoped, but hey, it's for my 8 year old's room and he's really not bothered. There was a little more interest in what went on top, so he did help choose the pages he liked from a pile of old Beanos a friend had given me.

I do have to admit to a few Gardeners' World flashbacks - the paper was so thin and bubbled up as it landed on the layer of PVA glue - but I held my nerve, working quickly and smoothing it down as best I could. It didn't look too bad.


Then I used a water-based clear varnish to seal it and nearly died when it all started bubbling up AGAIN! Deep breath. Deep breath. So I just painted a corner to see what would happen. Thankfully as it dried, the paper contracted and it looked better, but there were some obvious places where the comic had come away from the surface.
An important lesson learnt - I should have spent more time making sure the paper was properly stuck down. Preparation is everything, ain't that the truth? But often in my impatience to see how things turn out, I can be a preparation slacker.
The bedside table is fine, as long as you don't get too close. Perfect for an unobservant 8 year old.


I'm on a roll - the 8 year old loves collecting stuff, and it's usually all over the floor of his room - so my next decoupage job was covering an IKEA drawer box for his birthday. Now I'd advise, if you're in anyway offended by the chopping up of perfectly good books, to look away now...


In my defence I'm not in the habit of doing this, but there were piles and piles of similar encyclopedia-type books being sold off for pennies at a local charity shop. And now bits of them are on permanent show. That's sort of a good thing, right? The paper was also great quality and MUCH easier to stick on the box.


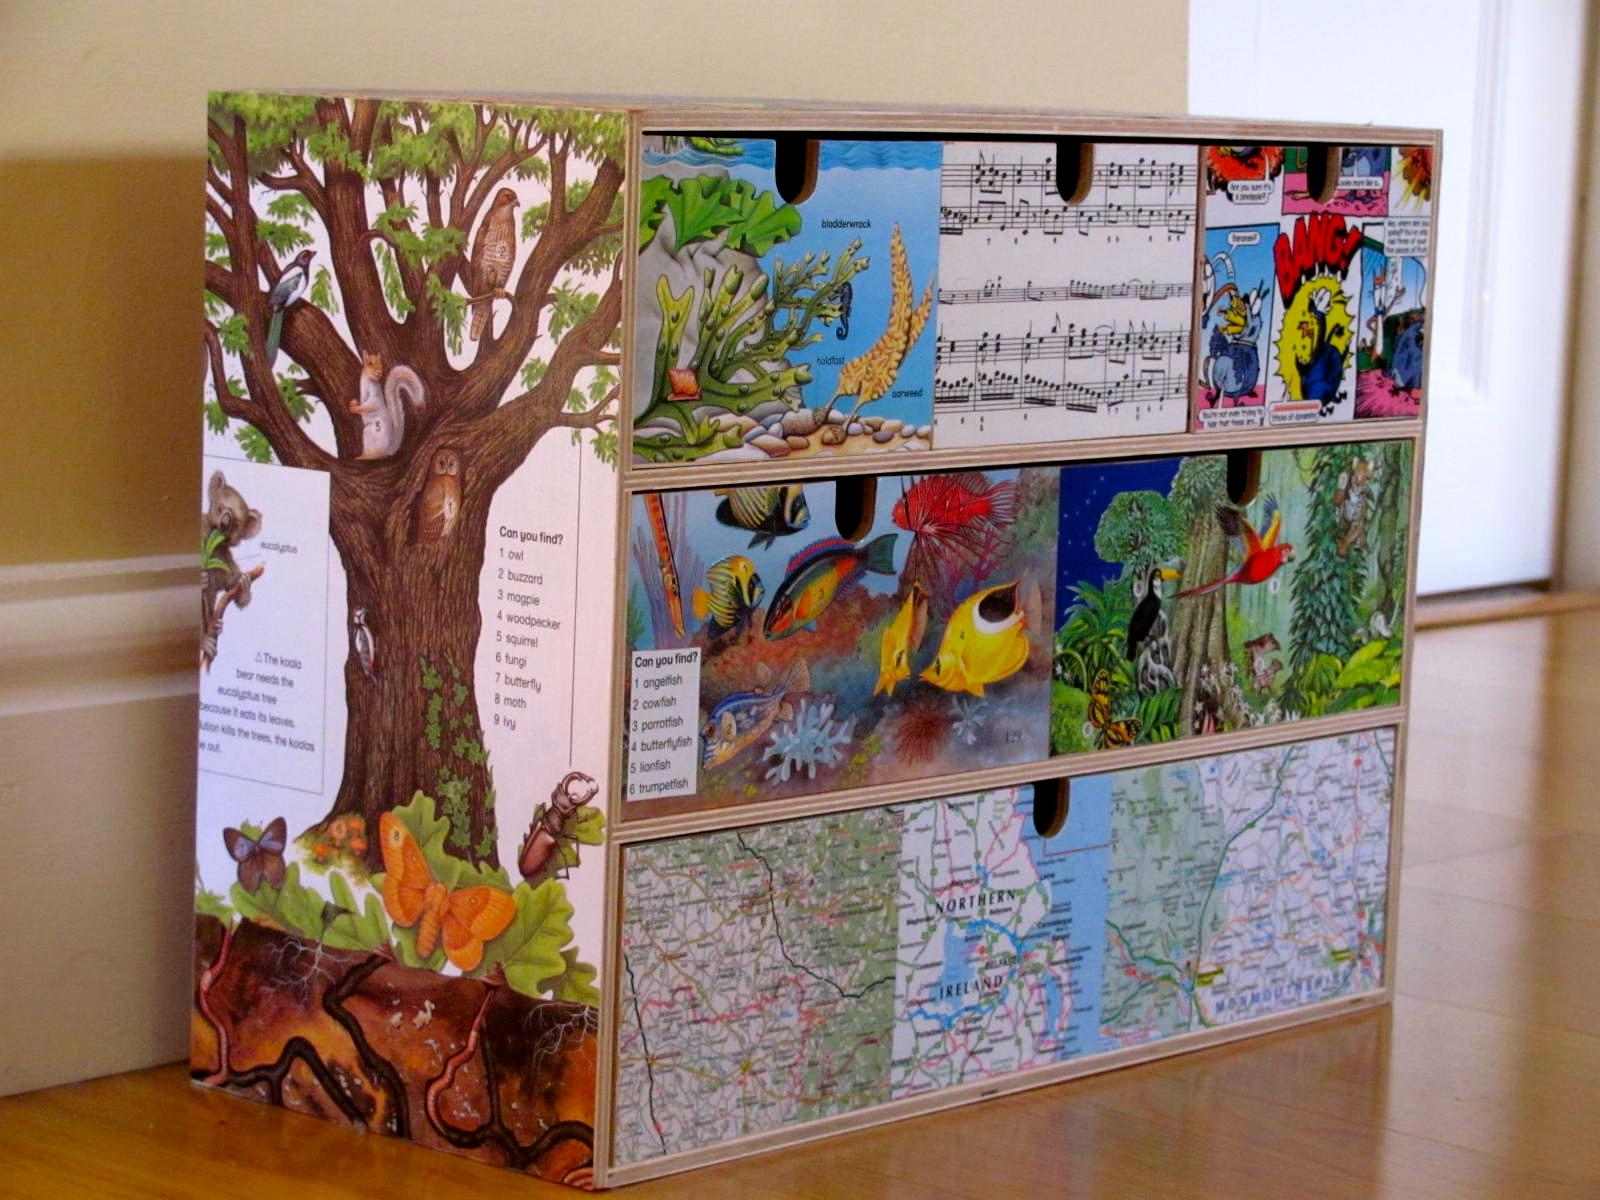
It took a while, but I'm pleased with the result. I made it more personal by using some sheet music, because he's my piano player - as well as maps of home and where he was born. I covered the drawers in loads of layers of varnish, and really hope it's something he'll hang on to.

This is next! My sewing machine trolley. I have a nordic/knittingy idea for it...


Linking up with Ta-dah! Tuesday at Lakota's

30.1.13

Oh Brother!


I took this one without you knowing,
the closeness you're not used to showing.

Much of the time you tease and fight,
shouting and shoving, both always right.

Teasing and playing on each other's fears,
angry words that end in tears.

In truth you're lost without each other,
I know this being your wise old mother.

So I caught this moment to remind you
of the love that always binds you.


18.1.13

sNo fun for birds...a timely DIY bird feeder

The youngest two were standing by the door in full snow kit by 7 this morning. Just shows what's possible when they're keen! And they were so excited; jiggling up and down with anticipation, thinking snow balls, sledging and NO school.
I was thinking snowed in, husband away...and no school. What an old misery.
But I had a plan for my three almost eager little helpers - once they'd had their fill of snow.


I've been meaning to make bird feeders for ages. We used to have a bird table, but it slowly rotted away, and we haven't replaced it because of the cat. There are other ways: higher, hopefully safer ways, and feeders seem to be a better option with a cat prowling about. Nothing's going to be perfect, still it's got to be worth the risk in this kind of weather.

All you'll need is an empty plastic bottle, some string, a few sticks, scissors (I found small, sharp nail scissors were best) and bird food.


Make two small holes opposite each other near the bottom of the bottle, and push a stick through to make a perch. Repeat this, so the second stick goes in slightly above the first.


Next cut a small hole (no more than 3/4cm wide - too big and the seeds will fall out) about 4cm above each perch. I found the best way to do this is to pierce the bottle with the scissors, and then twist a stick around in the hole, until it's the right size.


Poke a hole either side of the bottleneck, and thread some string through (a longish darning needle helped with this bit) and tie the ends together.


Take the cap off and use a funnel to fill the bottle.


I did a little googling to find out where cat owners put their bird feeders. Top tips seem to be washing lines, weak branches and generally making the area under or around them less cat conducive with the odd prickly plant.  So we put one on a line between the apple trees, and the other on a high, spindly branch above a holly bush.


The birds were a little tentative to begin with....


...but it wasn't long before we had our first taker!


16.1.13

The Gallery - New


I love it when the kids get this excited about everything they open. No holding back, just pure spontaneous, fabulous joy.
It might only be a new pencil case; but at that moment, it was the most fantastic thing EVER...until she ripped open the next parcel...
And so begins the noisy unwrapping rollercoaster of excitement - can't bear the thought of it ending one day, but know it will.
The ten year old is already more grown up and sensible about the whole thing - now a quieter, slightly self-conscious present-opener.
Or maybe he's just getting harder to please??


The Gallery theme this week is NEW

14.1.13

Bargain button bracelets

I have a huge collection of buttons. A collection verging on Pearly Queen proportions - and I am especially keen on the shiny, pearly little shell ones that catch the light. I really don't need any more, but a big bag of them for £1.50? Hard to pass up a charity shop button bargain. You could easily pay that for a small card of 6, and they don't take up much room..

So another few hundred to add to the tins (note plural) - a button for every occasion. And quite fun checking through the bag for any beauties.

I'll have to think of something special for the etched ones, and maybe the interesting cross shaped button might work on a choker?


My 5 year old picked out the ones she liked, and rather than put them away, I pinched a wristband idea from a friend that's perfect for showing off your best buttons. It's also good for using up small pieces of braid or lace.


We made some with a felt base and added colourful embroidered trim and our buttons. Lace on felt looks great too, and maybe a few beads or sequins for a little sparkle. I used gold thread to sew the bits onto the bracelets, and to finish off around the button holes.


OK, so I haven't made much of a dent in the pile - but I have been checking out some other use-up-your-massive-hoard-of-buttons ideas online, and there are loads. Do you have any favourites or top button tips? I'd love to hear them.


Found any secondhand lovelies lately?
Plenty of thrifty inspiration over at Liz's Magpie Monday 
and Lakota's Ta-dah! Tuesday