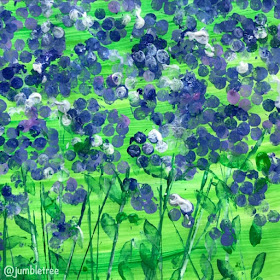
I wanted to do forget-me-nots because they remind me of home. They appear all over our garden, in unexpected places, and always brighten things up.
Forget-me-not, forget-me-not
I'd say that's quite unlikely
since you spread your seeds like common weeds,
at least you're not unsightly..
In fact you bring a zing of spring to any garden nook
which is good news as clouds of blues are everywhere I look!
To make the stamps, cut out a circle of dots (7 dots altogether) and make sure you don't snip or puncture any of them, and glue to the bottom of a cork, or on top of a bottle lid would work too. Use strong glue like UHU or a glue gun if you've got one.
We also made a stamp with four bubble wrap dots, for a bit of variety.
You can of course print on plain paper, but we thought we'd brush on a green wash (using watered down green poster paint and a big brush)
For the flowers we put a good squirt of blue, white and purple paint on a plate.
Mix some of the colours together, but leave some unmixed too. Encourage kids to experiment with all the different colours and shades - dipping into the mixed colour and then dunking into some white or blue. This has a lovely effect, giving the flowers much more life and depth.
Try not to overload the stamps with paint or you'll end up with lots of blobs with no definition at all. To help avoid over-enthusiastic splodges, get kids to try their flower stamp on some newspaper first, which acts like a kind of blotter, before printing on the paper.
You could brush paint on the stamps instead too, but that's not going to be as much fun!
For the stalks, use the side of a coffee stirrer or popsicle stick. We mixed some blue into the green to make it darker, and as before, dipped the side of the stick into the mixed colour, as well as the plain colours, plus a little white too, which helps give the stalks more definition, as if they're catching the light. Get some white on the stick and press it along the side of a printed green line.
This is a simple way of achieving a more advanced effect, and it looks great.
For the leaves, we used half a potato and drew and cut out a simple small leaf shape.
If you want to add yellow centres, dot on some yellow paint using the end of your coffee stirrer, or popsicle stick.


