There are plenty of lovely flower crafts about at this time of year and we've tried quite a few, but I really like this one. Maybe because it's new to us, and new is always good, and maybe because you can get a great result quickly, with very little fuss. Just a toilet paper tube and some coloured tissue and you're on your way to a sweet bouquet!
You'll need:
Toilet paper tube (or part of a kitchen paper tube)
3 Sheets coloured tissue paper (can be same or different colours)
Craft scissors
Glue stick
Green paint (or mix blue and yellow)
1. Paint the outside of the tube green, plus as much of the inside as you can too (you will see the inside part when you cut the leaves).
2. Once the paint's dry, press the sides together near one end to make two creases.
3. Then, line up the creases you've just made in the middle, and press the sides together again to make two more creases. So you end up with four evenly spaced creases (and the top of the tube looks more square).
4. Cut along these creases to about two thirds of the way down the tube. It doesn't matter if they're not exactly the same length.
5. To make the stems, cut down the tube, roughly1cm to the right of each of your original four cuts. Again, they don't need to be perfect, as long as they're roughly the same width, and thinner than the pieces of card between the stems (these are going to be the leaves).
5. Bend the four wider pieces out, and cut them into a long, leafy triangle shapes (cut down from the middle to the bottom corners - see pic)
6. Cut the strip into square shapes, or squarish squares... that's fine!
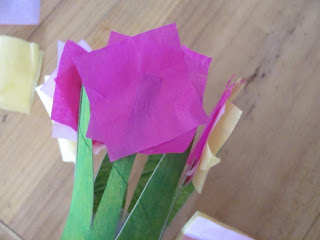
7. Rub some glue stick on the top of a stem and stick the middle of a tissue paper square to it. We wanted to use yellow in the centre, so started with a darker colour, but choose any order you like. We used two squares of each colour per flower, so 6 squares for each one.
Rub more glue in the middle of the first piece of tissue paper and stick the second one on top, but turn it so the angle is different from the one below.
8. Keep adding the squares, turning every time and pressing firmly in the middle to make sure they stick. Do the same for the other three flowers.
9. Once the glue has dried, carefully get hold of the middle two pieces with your fingertips and give them a gentle squeeze (for a nice tight centre), and then give the whole flower a squeeze, all the way around, to shape it. Do the same with the others.
10. Bend the leaves into place, bending the tips down. You could tie a bow around the bottom, to finish off your posy - or, pop it into a yogurt pot 'pot'. Stick pieces of wrapping paper on the pot to cover up any writing.


